


© 2006 Alamo Industrial
Section 8 - 5
Axtreme Boom (Asy Man) 07/06
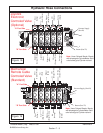
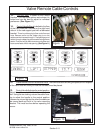
Valve Remote Cable Controls
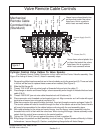
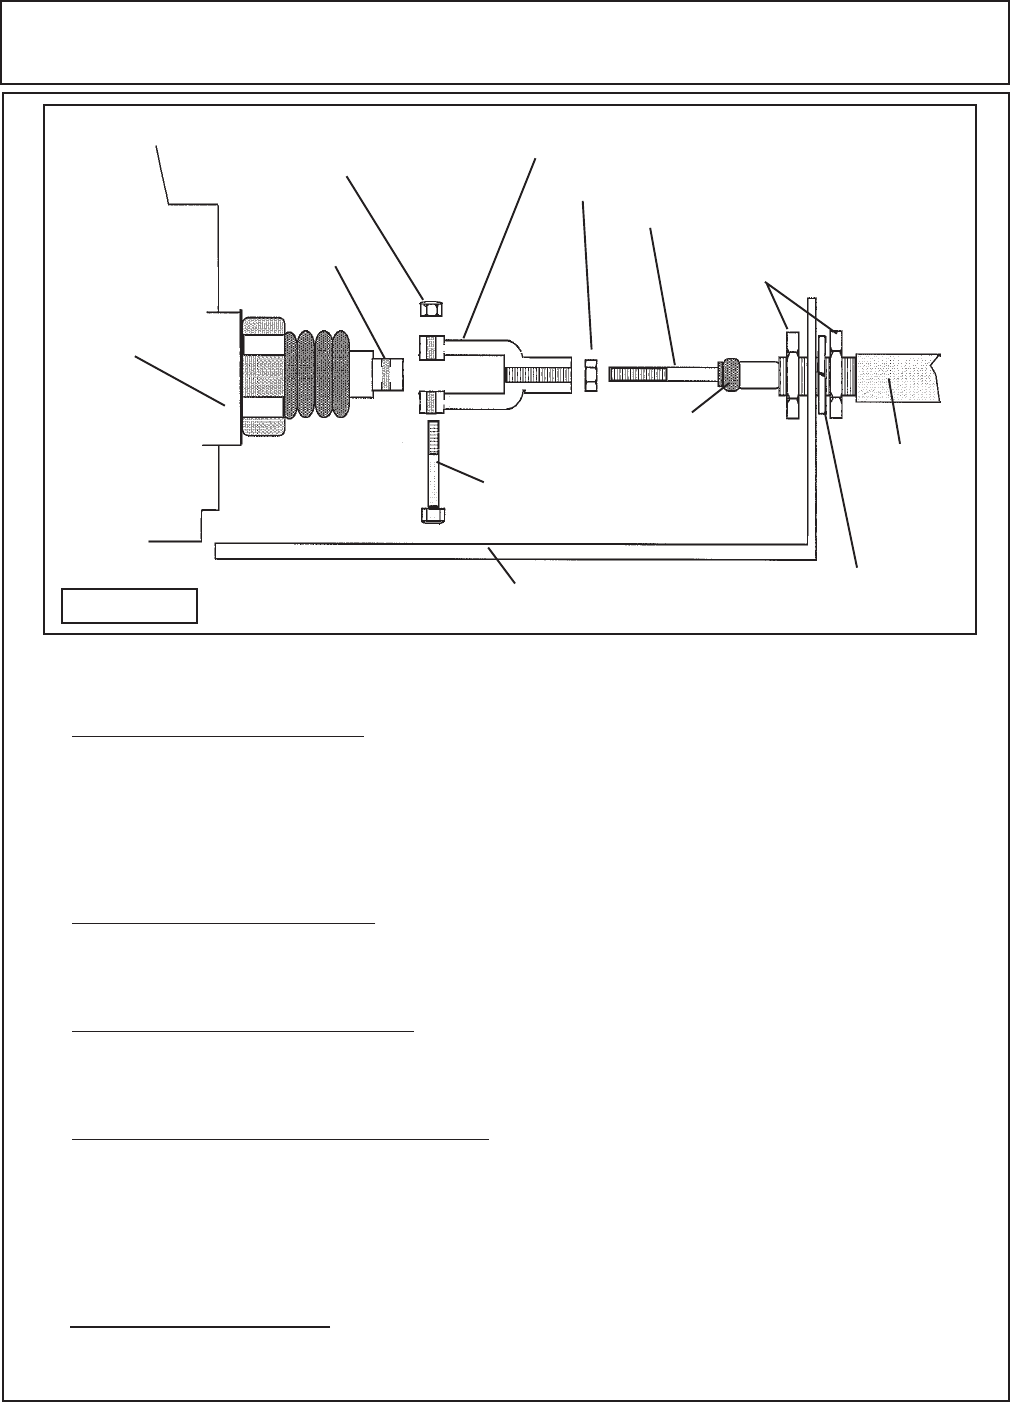
Figure 2
11. Cable Mounting Bracket
8. Clevis Retaining Bolt
7. Screw On Cable Clevis
Valve Asy
9. Clevis Retaining Nut
6. Cable To Clevis Locking Nut
5. Threaded Cable End
3 & 4 Cable Housing
Locking Nuts & Adjusting
Nuts
2. Lockwasher
Cable Housing Seal
1. Cable
Housing
10. Valve Spool
REMOTE CABLE OPERATION AND INSTALLATION:
1. Remote operation of the boom movement control valve can be achieved with the use of cables
and remote actuator handles. The remote operation system is standard equipment on cab tractor and
ROPS tractors as well (See Figure 2). Cable lengths will vary based on the length required to reach
from the valve to the Operator’s location with out binding or kinking. This cable length is determined
by which model tractor the boom is mounted on. See the tractor mounting instruction for the type
tractor being used. The Cable lengths are limited to 48,60,72 and 102 inches.
2. To install the cables to the valve, each valve section will require a cable installation kit (5 kits for
a 5-spool valve). Each individual valve connection kit can be ordered separately. The set of five will
be shipped with a mount kit when using remote cable controls.
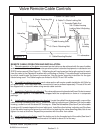
3. Install Valve Cable Mounting Bracket, The valve cable mounting bracket will have 5 holes to mount
5 cables (See Figure 2). The cable will be shipped with the components on them or in a separate
package.
4. Install cable to valve cable mounting bracket. Locate the cable & housing assembly, one end the
cable housing is threaded (See Item 1). Install inner locking / adjusting nut (See Item 3) on to the cable
housing, screw it on until it is about 3/4" the way on. Slide the lockwasher (See Item 2) on to the cable
housing until it is seated against the inner locking nut. Install the other locking / adjusting nut (See Item
4) on the cable housing and screw it on until the nut is touching the valve mounting plate, but do not
tighten the nuts at this time. Repeat this procedure with the other four cables.
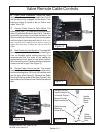
5. Install Locking nut to Cable. Install the locking nut to the threaded end of the cable (See Item 5
& 6). Screw the locking nut onto the threads of the cable to about 3/4 of the way.