


© 2006 Alamo Industrial
Section 8 - 7
Axtreme Boom (Asy Man) 07/06
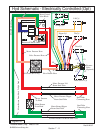
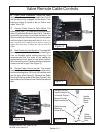
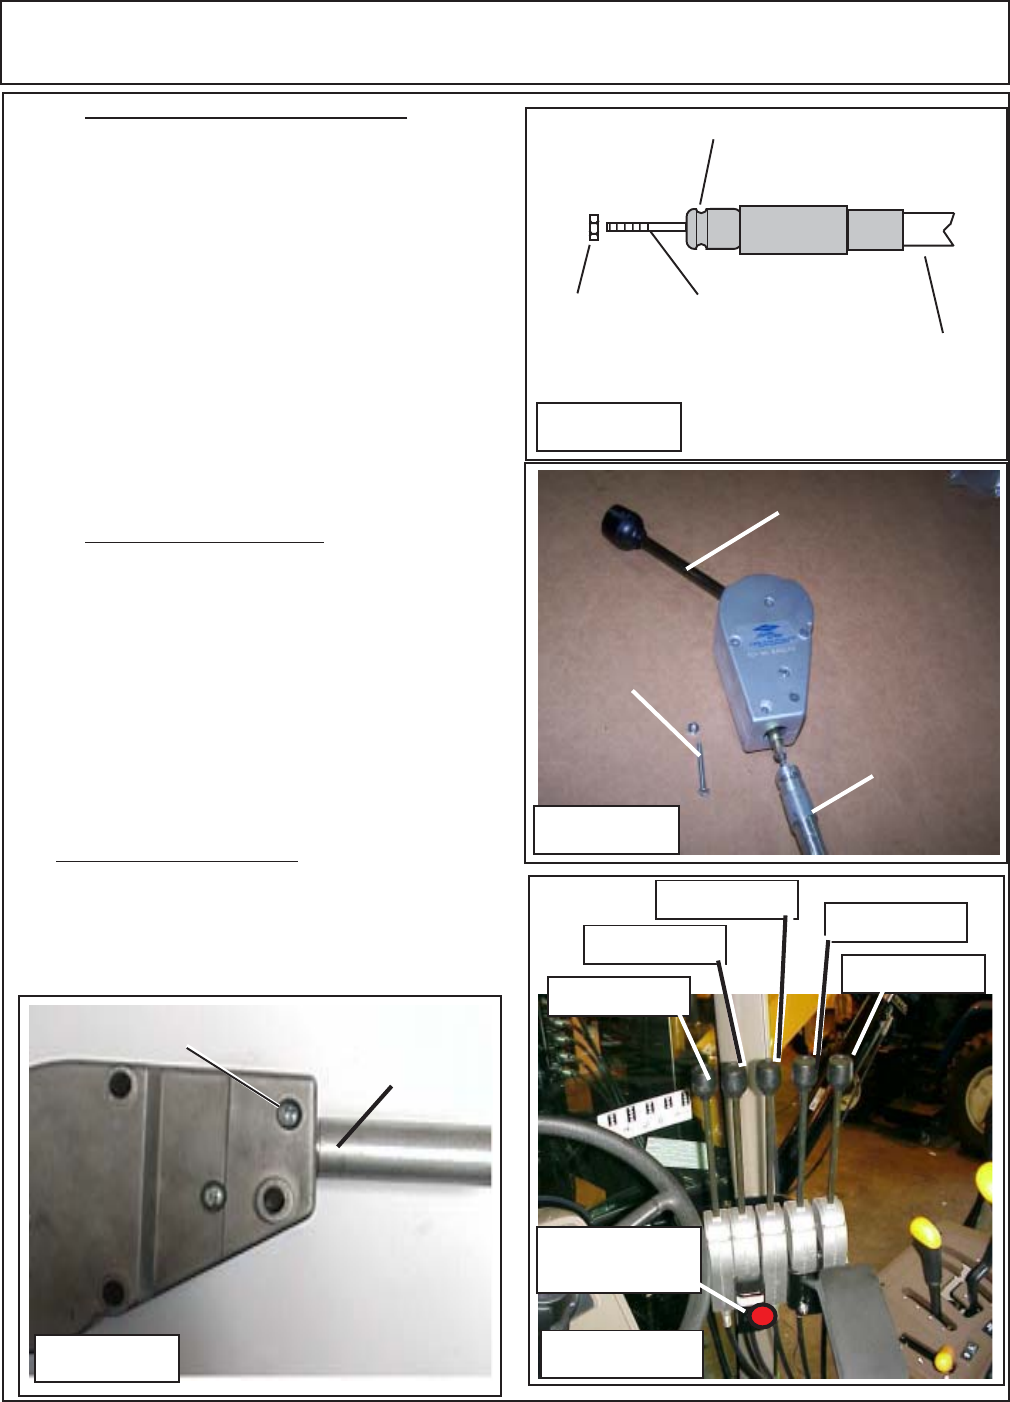
10. Connect Cable to Control Handle. Install the
cable locking nut onto the threaded cable (See Figure
7), screw the nut on leaving enough threads to fully
screw the control handle to the cable. Push the handle
of the control assembly all the way to one side and the
threaded shaft of the handle will be visible at the
bottom (See Figure 8). After the handle is screwed
onto the cable, tighten the cable locking nut against the
handle control. Push the control handle to the straight
position (See Figure 9), while pushing the cable into
the handle asy. When the cable is inserted into the
handle assembly until the groove in the cable housing
is aligned with the retaining screw hole of handle
housing assembly insert the retaining screw and nut
(See Figure 9)
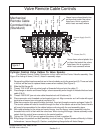
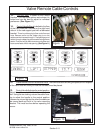
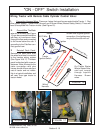
11. Stack Control Handles. Each cable control
handle will attach to the cable in the same way. The
control handles will be stacked together in the proper
order (See Figure 5 & 10). These control handles will
be stacked with the mounting brackets and electrical
switch brackets between them. Where the brackets
are located in the group can vary. Shown in figure 10
is the recommended placement of these brackets.
The bracket that mounts the control handles is slotted
to allow for the adjustment of the angle of the control
handle assemblies.
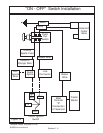
12. The "ON" / "OFF" Switch is bolted to the Control
Handles. This is a good place but can be mounted
somewhere else is desired. If Mounted somewhere
else keep in mind it must be accessible quickly by the
operator in case of emergency needs. (See Figure 10)
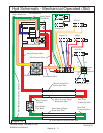
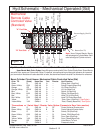
Valve Remote Cable Controls
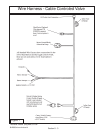
Figure 8
Cable Retaining
Screw Groove
Threaded
Cable End
Cable
locking
Nut
Cable Housing
Figure 7
Cable Retaining
Screw & Nut
Cable Housing
Handle Out of
Neutral Position
Cable Housing
inserted into
hamdle asy
Cable retaining screw
& nut installed
Figure 9
Swing
Lift
Dipper
Tilt
Door / Swivel
"ON" "OFF"
Switch
Figure 10