


Operation
2–2 152607
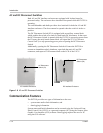
Description of System Operation
Overview
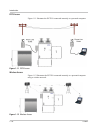
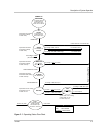
The PV225S is a fully automated grid-interactive photovoltaic inverter. System
startup, system shutdown, PV power tracking, and fault detection scenarios are all
governed and monitored by the CCU2 controller within the PV225S. Manual
interaction or control of the inverter is necessary only in the event of a system
fault. Additionally, the following conditions govern operation of the PV225S.
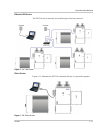
• Stable utility AC voltage and frequency as specified in Table A-3 must be
present for all states of operation.
• PV voltage as specified in Table A-3 must be present.
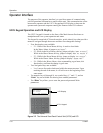
• With the exception of the Matrix Test state, the
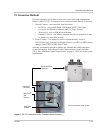
ON/OFF switch, located on the
front door of the PV225S main inverter enclosure, must be switched to the
ON
position for all operating states.
• The door of the main inverter enclosure must be closed with the door
interlock switch in the engaged position.
• Both the AC and DC Disconnect switches must be in the ON or closed
position.
• Fault conditions must not be present.
Faults
Fault states are automatic from any state of operation. In the event of a fault
condition, the PV225S will immediately stop processing power and execute an
immediate orderly shutdown, open both the main AC and DC contactors, and
remain in a faulted state until the fault is remedied and cleared (manually or
automatically).
Most faults are latching, and only those faults associated with grid disturbances
are auto-clearing and thus enable the PV225S to restart after a 5 minute delay
period. All fault conditions arising from within the PV225S are reported to the
UFCU (Universal Frontpanel Control Unit). The 4-line LCD on the UFCU will
display a hexadecimal value (fault code) and a brief text description of the fault.
Once the cause of the fault has been identified and corrected, and it is determined
to be safe to proceed, PV225S faults may be cleared from the UFCU keypad or
via the remote GUI.
See “Clearing Faults Manually” on page 4–3 for instructions on this procedure.