


OPERATION
B-10 B-10
BULLDOG® 140
No one can learn to weld simply by reading about it.
Skill comes only with practice. The following pages will
help the inexperienced welder understand welding and
develop his skill. For more detailed information, order a
copy of the book “New Lessons in Arc Welding.” (See
Book Division section at rear of manual).
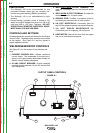
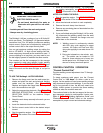
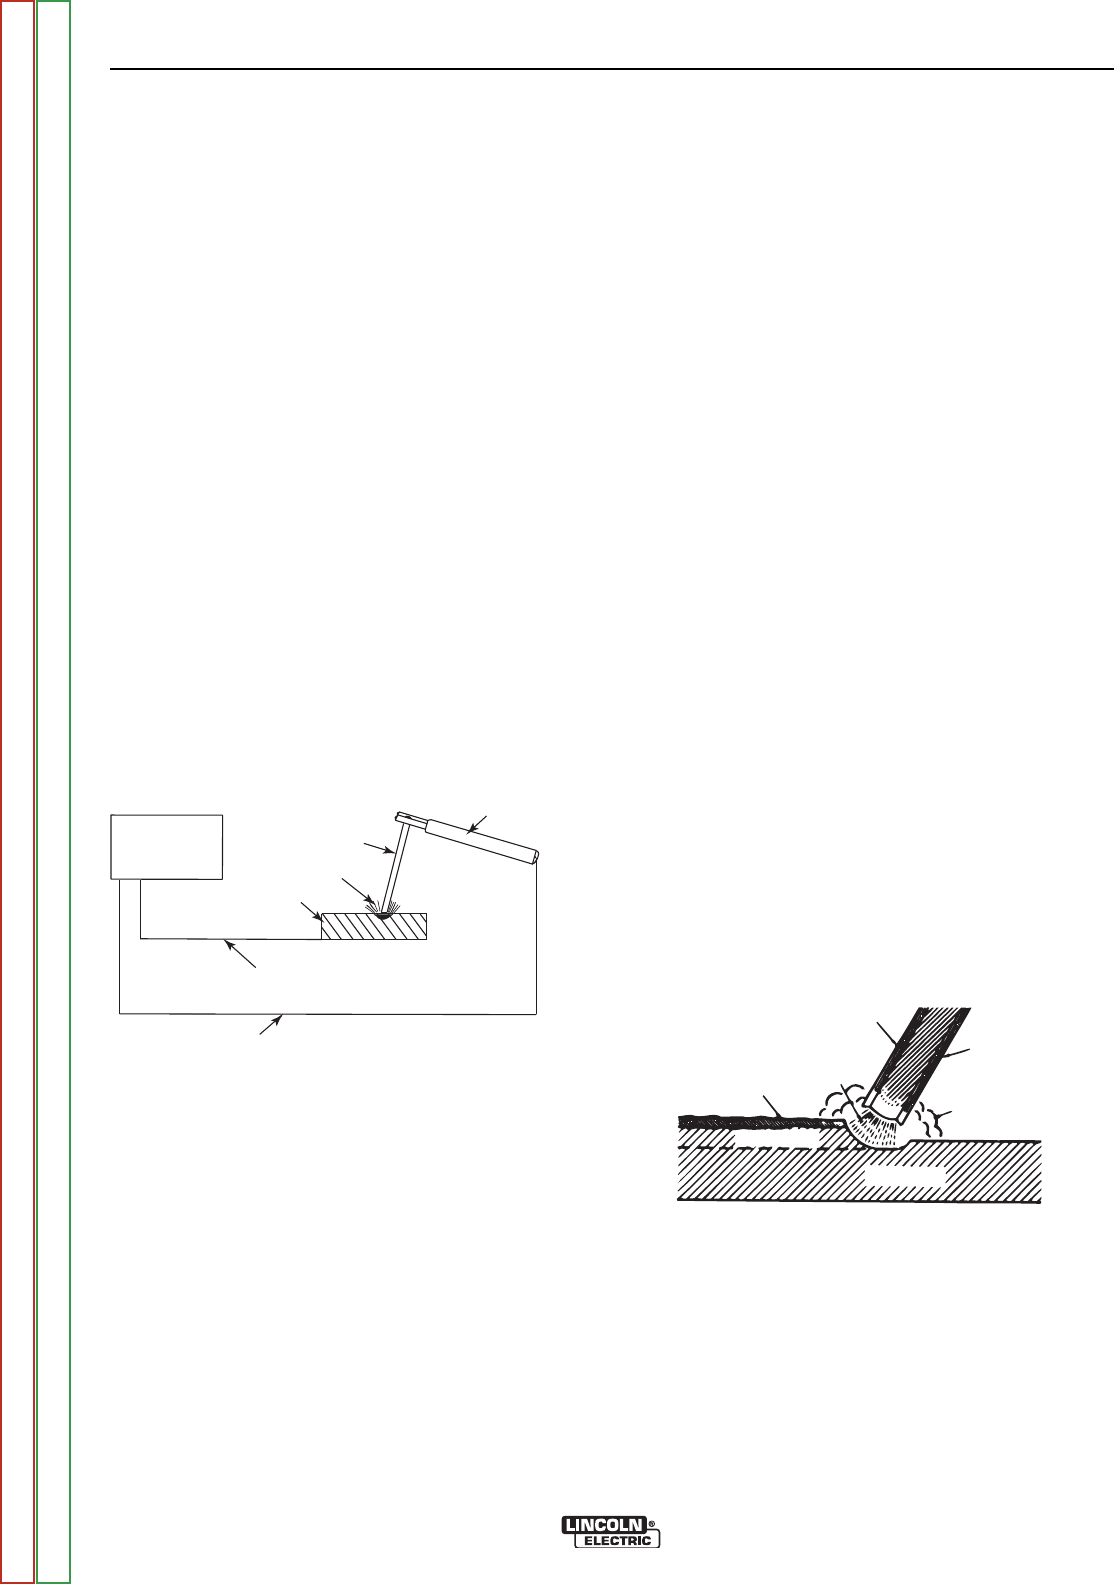
The operator’s knowledge of arc welding must go
beyond the arc itself. He must know how to control the
arc, and this requires a knowledge of the welding cir-
cuit and the equipment that provides the electric cur-
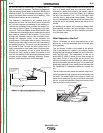
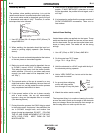
rent used in the arc. Figure 3 is a diagram of the weld-
ing circuit. The circuit begins where the electrode cable
is attached to the welding machine and ends where the
work cable is attached to the machine. Current flows
through the electrode cable to the electrode holder,
through the electrode holder to the electrode and
across the arc. On the work side of the arc, the current
flows through base metal to the work cable and back to
the welding machine. The circuit must be complete for
the current to flow. To weld, the work clamp must be
tightly connected to clean base metal. Remove paint,
rust,etc. as necessary to get a good connection.
Connect the work clamp as close as possible to the
area you are welding. Avoid allowing the welding circuit
to pass through hinges, bearings, electronic compo-
nents or similar devices that can be damaged.
The electric arc is made between the work and the tip
end of a small metal wire, the electrode, which is
clamped in a holder that is held by the welder. A gap is
made in the welding circuit (see Figure 3) by holding
the tip of the electrode 1/16 - 1/8” (1.6-3.2mm) away
from the work or base metal being welded. The elec-
tric arc is established in this gap and is held and moved
along the joint to be welded, melting the metal as it is
moved.
Arc welding is a manual skill requiring a steady hand,
good physical condition, and good eyesight. The oper-
ator controls the welding arc and, therefore, the quali-
ty of the weld made.
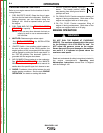
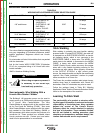
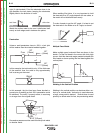
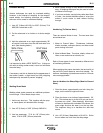
What Happens in the Arc?
Figure 4 illustrates the action that takes place in the
electric arc. It closely resembles what is actually seen
during welding.
The “arc stream” is seen in the middle of the picture.
This is the electric arc created by the electric current
flowing through the space between the end of the elec-
trode and the work. The temperature of this arc is
about 6000°F (3300°C) which is more than enough to
melt metal. The arc is very bright, as well as hot, and
cannot be looked at with the naked eye without risking
painful and possibly permanent injury. A very dark lens,
specifically designed for arc welding must be used with
the handshield or headshield whenever viewing the
arc.
The arc melts the base metal and actually digs into it,
much like water through a garden hose nozzle digs into
the earth. The molten metal forms a pool or crater and
tends to flow away from the arc As it moves away from
the arc, it cools and solidifies. Slag forms on top of the
weld to protect it during cooling.
Covering
Electrode
Shielding Gases
Arc
Solidified Slag
Weld Metal
Base Metal
FIGURE 4 - The welding arc.
ARC
WORK CABLE
WORK
ELECTRODE CABLE
ELECTRODE HOLDER
ELECTRODE
WELDING MACHINE
AC OR DC POWER
SOURCE AND
CONTROLS
FIGURE 3 - The welding circuit for (Stick) shielded metal arc welding.FIGURE 3 - The welding circuit for (Stick) shielded metal arc welding.
Return to Section TOC Return to Section TOC Return to Section TOC Return to Section TOC
Return to Master TOC Return to Master TOC Return to Master TOC Return to Master TOC