TP-5695 12/933-14 Scheduled Maintenance
Flushing and Cleaning
If required, flush coolant from generator set. To properly
flush coolant, obtain Kit #267999 and use the following
procedure:
WARNING
Accidental starting.
Can cause severe injury or death.
Disconnect battery cables before working on
generator set (negative lead first and reconnect it
last).
Accidental starting can cause severe injury or
death. Disconnect battery cables (remove negative
lead first and reconnect it last) to disable generator set
before working on any equipment connected to
generator. The generator set can be started by remote
start/stop switch unless this precaution is followed.
WARNING
Hot coolant and steam.
Can cause severe injury or death.
Before removing pressure cap stop generator,
allow to cool and loosen pressure cap to relieve
pressure.
Hot coolant can cause severe injury or death. Allow
engine to cool and release pressure from cooling
system before opening pressure cap. To release
pressure, cover the pressure cap with a thick cloth then
turn it slowly counterclockwise to the first stop. After
pressure has been completely released and the engine
has cooled, remove cap. If generator set is equipped
with a coolant recovery tank, check coolant level at tank.
1. Disconnect the battery, negative lead first.
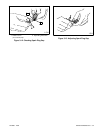
2. With engine cooled, remove the air-bleed screw
and the high water temperature safety shutdown
switch from the thermostat housing.
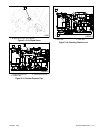
3. Connect kit hose fittings to the engine. Install kit
hoses to fittings (if not already done).
4. Connect a garden hose to the female connector of
large kit hose. Place the free end of the small kit
hose in a 1--2 gal. (min.) bucket.
NOTE
Heat exchanger pressure cap MUST be installed.
5. Turn on water supply to flush coolant from engine
block. Turn off water supply when clean water is
observed coming from hose in bucket.
6. Disconnect garden hose. Place free end of large kit
hose into bucket and connect an air hose to the free
end of the smaller kit hose. Apply air pressure (40
psi [276 kPa] min.) until water stops flowing from kit
hose in bucket. This will remove about 16 fl. oz.
(0.47 L) of water from engine block.
NOTE
Engine coolant capacity is 23 fl. oz. (0.68 L).
NOTE
Some small air compressors may not maintain
pressure under the required flow conditions. In
these cases, it is recommended that the end of the
kit hose in the bucket be closed off momentarily
until pressure is allowed to build up. After pressure
has accumulated, open end to allow water to flow
into bucket. Repeat closing and opening end of kit
hose, as required.
7. Remove kit hoses with hose fittings from engine.
8. Apply pipe sealant to threads of high water
temperature safety shutdown switch and install
switch in thermostat housing. Reconnect wiring
harness lead to switch.
9. Apply pipe sealant to the air-bleed screw and install
screw into engine. Do not final tighten!
10. Remove cap of coolant overflow bottle and pour
contents into a suitable container. Reinstall bottle
on unit.
11. Add fresh coolant to coolant overflow bottle. A
solution of 50% ethylene glycol and 50% clean,
softened water is recommended to inhibit rust/
corrosion and provide freezing protection. Fill to
MIN mark. Install coolant overflow bottle cap.
12. Remove heat exchanger pressure cap and add
about 5 fl. oz. (0.15 L) of clean, softened water.
Then fill remainder of engine with straight coolant
(100%) until level is just below the overflow tube
opening. Final tighten the air-bleed screw when
coolant, free of air bubbles, starts to flow. Install the
heat exchanger pressure cap.


