


TP-5695 12/93 Scheduled Maintenance 3-7
Fuel Pump Screen
WARNING
Explosive fuel vapors.
Can cause severe injury or death.
Use extreme care when handling, storing,
and using fuels.
Explosive fuel vapors can cause severe injury or
death. All fuels are highly explosive in a vapor state.Use
extreme care when handling, storing, and using fuels.
Store fuel in a well-ventilated area away from
spark-producing equipment and out of the reach of
children. Never add fuel to the tank while the engine is
running since spilled fuel may ignite on contact with hot
parts or from ignition spark. Do not smoke or permit
flame or spark to occur near potential sources of spilled
fuel or fuel vapors. Keep fuel lines and connections tight
and in good condition—don’t replace flexible fuel lines
with rigid lines. Flexible sections are used to avoid
breakage due to vibration. Should any fuel leakage, fuel
accumulation, or electrical sparks be noted, DO NOT
OPERATE GENERATOR SET. Have systems repaired
before resuming generator operation.
Gasoline—Store gasoline only in approved red
containers clearly marked GASOLINE. Do not store
gasoline in any occupied building.
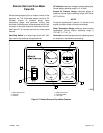
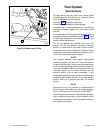
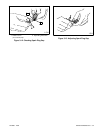
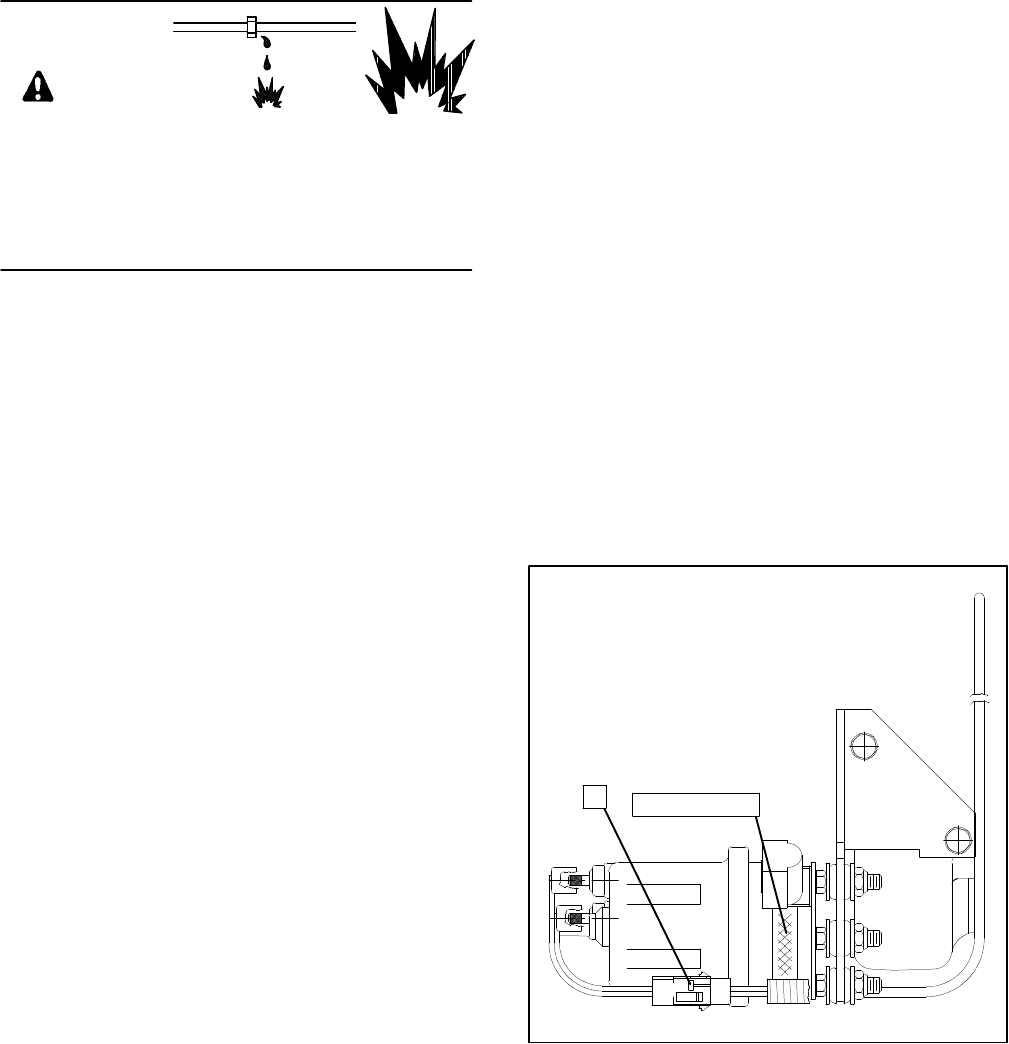
The electric fuel pump includes a screen. (See
Figure 3-7.) At the recommended interval or when
clogging is suspected, inspect and clean the screen as
follows:
1. Shut off fuel flow to electric fuel pump at tank or at
in-line shutoff valve. Disconnect harness plug (see
Figure 3-7 for location).
2. Disconnect fuel lines from electric fuel pump,
draining fuel from the lines and pump into a suitable
container to prevent spillage into the bilge.
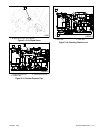
3. Remove the three nuts that secure the electric fuel
pump to the mounting bracket.
4. Remove the three mounting studs from the electric
fuel pump.
5. Remove the cover plate and inspect the screen.
Remove any debris or residue. Be sure the screen
is intact. If the screen is damaged, replace the fuel
pump.
6. Check the O-ring seal. Replace the O-ring if it is
nicked or eroded.
7. Reinstall the cover plate and secure it to the fuel
pump by reinstalling the three mounting studs.
8. Insert the three mounting studs on the fuel pump
through the mating holes in the mounting bracket.
Reinstall the three nuts to secure the fuel pump in
place.
9. Reconnect the fuel lines to the fuel pump.
10. Open fuel line at tank or in-line shutoff valve and
check for leaks from the fuel pump at fuel line
connections and cover plate.
258000-D
2 (enclosed)
1. Harness Plug 2. Fuel Pump Screen
1
Figure 3-7. Fuel Pump Screen