4-5
Maintenance and Troubleshooting
Reassembly
Procedure
1. Inspect all O-rings (1D,3) and replace if necessary. Lightly grease new O-
rings with silicone grease to guarantee an adequate seal.
2. If the O-ring Retainer Plate (1B) has been removed, be sure the correct
side is facing outward. The resistor symbol should be visible on RTD
Transmitters, while a thermocouple symbol should be visible on
Thermocouple or Millivolt transmitters.
3. Inspect threaded connections on the housing and covers to make sure a
minimum of five undamaged threads will be fully engaged. If the threads
are shiny, apply a thin layer of molybdenum disulphide thread coating
(such as Moly-Kote) to prevent galling of the aluminum threads.
4. If the Range Board (7A) requires a Coarse Zero Jumper (7B) check to make
sure it is in the correct location for the desired temperature range. See
Table 3-1, on page 3-3 or Table 3-2, on page 3-6.
5. Orient the Range Board (7A) and Amplifier Board (6) as shown in the
Illustrated Parts List. Taking care not to bend the pins, plug the Amplifier
Board into the Range Board. Press together until all three standoffs on the
Amplifier Board rest against the Range Board.
6. Orient the Output Board (5) so its standoffs line up with the standoffs of
the Amplifier/Range Board combination. Carefully and evenly, plug the
output board into the Amplifier/Range Board. Take care not to bend the
pins. Press together until all three standoffs on the Output Board rest
against the Amplifier Board.
7. The circuit board assembly may be bench-tested, or calibrated outside the
housing through the use of Test Terminal Strips (11 and 12). See the
discussion of Calibration and Troubleshooting in this section.
8. If the circuit board assembly has been calibrated outside the housing, be
very careful to ensure the zero and span adjustment pots are not moved
while inserting the circuit board assembly into the housing.
9. Orient the circuit board assembly so the pot shafts line up with the pot
holes in the housing.
10. Insert the circuit board assembly firmly into the housing.
11. Replace the three Circuit Board Assembly Screws (4).
12. Replace the transmitter covers (2). Tighten the covers hand-tight.
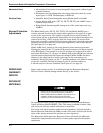
Interchangeability
of Parts
Explosions can cause death or serious injury. Both
transmitter covers must be fully engaged to meet explosion-
proof requirements.
Use only the procedures and new parts specifically
referenced in this manual. Unauthorized procedures or
parts can affect product performance and the output signal
used to control a process, and may render the instrument
dangerous. Direct any questions concerning these
procedures or parts to Rosemount Inc.


