Rosemount Model 444 Alphaline Temperature Transmitters
3-2
CALIBRATING A
RTD TRANSMITTER
Calibration Equipment Required:
Readout Resistor. The transmitter test terminals give a 40–200 mV signal. The
Models 444RL and444RL ___B0912 have a jumper-selectable 4–20 mA test
output option (2-board sets). If this is not suitable for the test equipment
available, a ±0.1% tolerance, 0.5 W precision wirewound resistor is needed.
Suggested values include a 100-ohm resistor to give a 0.4 to 2 volt output; or 500
ohms for 2 to 10 volts.
Voltmeter (such as a 5-digit DVM). Voltage rating is dependent upon the test
signal. Accuracy is ±0.01%; resolution is 1 mV.
dc Power Supply. Power capability is 24 V dc at 35 mA.
Resistance Decade Box. Precision type, 5-dial, with largest dial providing 100-
ohm steps. Accuracy is ±0.02 ohm. The decade box should be periodically
calibrated against a 5-dial Wheatstone bridge.
Lead Simulation Resistors. If the transmitter is to be mounted remote from the
RTD, and the lead resistance between the transmitter and the RTD is greater
than 2 ohms per lead (equivalent to 200 ft of 20 AWG wire), the transmitter
should be trimmed with simulated lead resistances for best accuracy. This
requires wirewound resistors with resistance values equal to the nominal lead
resistance of the RTD.
Calibration Procedure To calibrate a model 444RL or 444RL___B0912, perform the following procedure:
1. The Models 444RL and 444RL ___B0912 have a jumper-selectable 4–20
mA test output option. If a 4–20 mA test output is required, reposition the
test terminal output jumper on the range board (the default setting is 40–
200 mV). Refer to steps 2 through 4 of the disassembly procedure, on page
4-4, for information on removing the circuit board assembly.
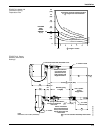
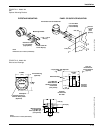
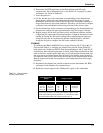
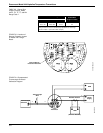
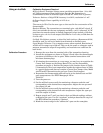
Place the jumper in the position labelled “A” for a 4–20 mA test output. See
Figure 3-1. Refer to steps 5 through 12 of the reassembly procedure, on
page 4-5, for information on reinstalling the circuit board assembly.
2. Remove the cover from the terminal side of the transmitter housing.
3. If an RTD is already connected, remove all RTD lead connections.
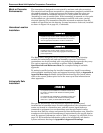
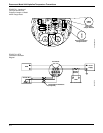
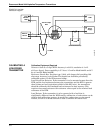
4. Attach the calibration test equipment as shown in Figure 3-2. Use
miniature banana plugs to make terminal connections. Use simulated lead
resistors only if necessitated by long lead wire lengths, as discussed above.
NOTE
If using RTD configurations other than the 3-wire design shown in Figure 3-2,
refer to Figure 2-6 on page 2-6 for the correct wiring.
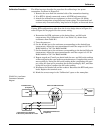
5. If trimming the transmitter to a new range, you may have to reposition the
Coarse Zero Jumper on the Range Board. If so, see the disassembly
procedure on page 4-4. Position the jumper in the location shown in Table
3-1. (A transmitter with a Base Temperature outside the regions shown in
Table 3-1 is a special design, and does not contain a Coarse Zero Jumper.)
Reassemble the circuit boards.


