3-5
Calibration
CALIBRATING A
THERMOCOUPLE
TRANSMITTER
Using a
Compensated
Thermocouple
Simulator
Calibration Equipment Required
Compensated Thermocouple Simulator. Precision voltage source providing
conformity to NIST Monograph 125 thermocouple curves. Reflect accuracy of
simulator to desired calibration span. A simulator accuracy four times better
than the transmitter is recommended (0.05% of calibrated span or 0.005mV
whichever is greater). Simulator inaccuracies greater than this will degrade
system accuracy and factory calibration is recommended.
Voltmeter. Such as a 5-digit DVM. Accuracy is ±0.01%; resolution is 1 mV.
dc Power Supply. Power capability is 24 Vdc at 35 mA.
Thermocouple Wire.Use the same type as that used in the construction of the
thermocouple.
Readout Resistor. The transmitter test terminals give a 40–200 mV signal. If
this is not suitable for the test equipment available, a ±0.1% tolerance, 0.5 W
precision wirewound resistor is needed. Suggested values include a 100-ohm
resistor to give a 0.4 to 2 volt output; 250 ohms for 1 to 5 volts; or 500 ohms for
2 to 10 volts.
Calibration Procedure 1. Remove the cover from the terminal side of the transmitter housing.
2. If a thermocouple is already connected, remove all thermocouple lead
connections.
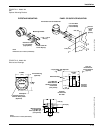
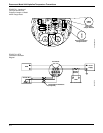
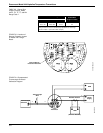
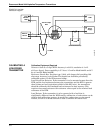
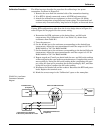
3. Connect the equipment as shown in Figure 3-4. Be sure to maintain
polarity from the transmitter to the thermocouple simulator. Make
terminal connections using miniature banana plugs.
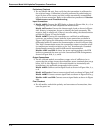
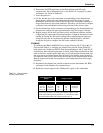
4. If trimming the transmitter to a new range, you may have to reposition the
Coarse Zero Jumper on the Range Board. If so, see the Disassembly
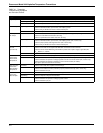
Procedure on page 4-4. Position the jumper in the location shown in Table .
(A transmitter with a base temperature outside the regions shown in Table
is a special design and does not contain a Coarse Zero Jumper. Also, Model
444 TR and TS transmitters do not have Coarse Zero Jumpers.)
Reassemble the circuit boards.
5. Determine the base and full scale temperatures.
6. Turn the power on.
7. Refer to the thermocouple simulator instructions for setting the
thermocouple type and engineering units. Set the simulator to the base
(zero) temperature and adjust the zero pot until the output is 4 mA (or 40
mV at the test terminals).
8. Set the simulator to the full scale temperature and adjust the span pot
until the output is 20 mA (or 200 mV at the test terminals).
9. Repeat steps 7 and 8 until you obtain the 4 and 20 mA readings without
readjusting the pots. Use the “overshoot” technique described in step 9 of
the RTD calibration procedure, if desired.
10. Disconnect the simulator leads. Reconnect the thermocouple and power
leads, if required. Replace the terminal side housing cover.
11. Mark the new range in the “Calibration” space on the nameplate.


