


29
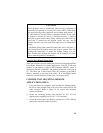
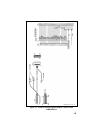
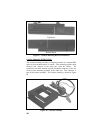
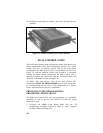
Remote Mount Installation
The bracket shown in Figure 27 is used for Remote Mounting (USA
Only). In some applications the bracket shown in Figure 26 can also be
used for Remote Mounting. The following instructions are for a Remote
Mount installation using the bracket shown in Figure 27.
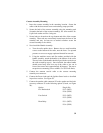
1. Using the bracket as a template, mark and drill the mounting holes
using a No. 27 drill. Be sure to leave enough room at the rear of
the radio unit for the cable connections.
2. Secure the Mounting bracket using four 1/4"-14 x 3/4" sheet metal
screws (use 1/4"-14 x 1" if needed.) The bracket can be used
mounted so that it is either above or below the radio for the user's
convenience.
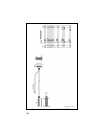
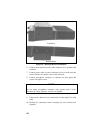
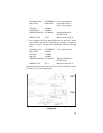
3. Slide the radio unit into the bracket by aligning bracket guides with
grooves on each side of radio (rear of radio should be inserted first).
Slide radio back until screw holes in front of bracket align with
screw holes in side of radio. See Figure 27.
4. Secure radio to the bracket with two M4 x 10 mm socket head
screws provided.
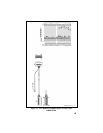
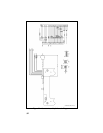
5. Connect antenna coaxial cable to antenna connector (TNC).
6. Connect remote control cable connector P1 to the ORCC connector
on the radio unit and secure with the two captive screws.
7. Connect other end of remote control cable to the remote control
cable connector (RCCC) on the remote control unit.
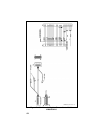
8. Connect remote mount accessory cable connector P1 to the option
connector (OPT) on control unit. Then connect the speaker to
connector P2 and accessory connector P3 to any options
(hookswitch, etc.). If connector P3 is not used, insulate and tie back
to main cable.
9. Recheck all connections and cables. Insert fuse into transmit fuse
assembly.