


OUTLET MANAGED PDU
16
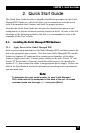
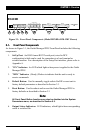
2.1.2. Connect your PC to the Outlet Managed PDU
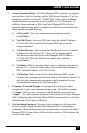
The Outlet Managed PDU can either be controlled by a local PC, that communicates
with the unit via the SetUp port, controlled via external modem, or controlled via
TCP/IP network. In order to switch plugs or select parameters, commands are issued
to the Outlet Managed PDU via either the Network Port or SetUp Port. Note that it
is not necessary to connect to both the Network and SetUp Ports, and that the SetUp
Port can be connected to either a local PC or External Modem.
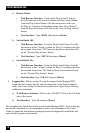
• Network Port: Connect your 10Base-T or 100Base-T network interface to
the Outlet Managed PDU Network port.
• Setup Port: Use the DX9F-DTE-RJ Adapter supplied with the unit to
connect your PC COM port to the Outlet Managed PDU’s SetUp Port.
• External Modem: Use the optional DX9M-RJ-KIT (not included) to
connect your external modem to the Outlet Managed PDU’s Setup
(RS232) Port.
2.2. Communicating with the Outlet Managed PDU
In order to ensure security, both Telnet and Web Browser Access are disabled when
the Outlet Managed PDU is shipped from the factory. To enable Telnet and/or
Web Browser access, please refer to Section 5.9.2. When properly installed and
congured, the Outlet Managed PDU will allow command mode access via Telnet,
Web Browser, SSH client, modem, or local PC.
Notes:
• Default Outlet Managed PDU serial port parameters are set as
follows: 9600 bps, RTS/CTS Handshaking, 8 Data Bits, One
Stop Bit, No Parity. Although these parameters can be easily
redefined, for this Quick Start procedure, it is recommended to
configure your communications program to accept the default
parameters.
• The Outlet Managed PDU features a default IP Address
(192.168.168.168) and a default Subnet Mask (255.255.255.0.)
This allows network access to command mode, providing that you
are contacting the Outlet Managed PDU from a node on the same
subnet. When attempting to access the Outlet Managed PDU
from a node that is not on the same subnet, please refer to the
User’s Guide for further configuration instructions.