


English Français
32
6. Set up 6. Assemblage
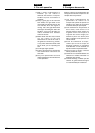
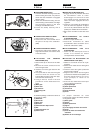
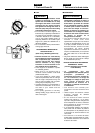
■ MOUNTING ENGINE (SE1)
1. Push the driveshaft housing toward the
clutch housing and rotate it by hand to
check that the driveshaft is engaged
with the gears.
2. Insert the driveshaft housing into the
clutch housing until it bottoms, and align
the positioning holes on the both
housings and install the screw.
3. Fasten the clamp securely with 2
screws.
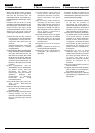
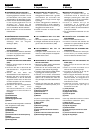
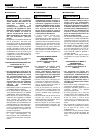
■ CONNECTING THROTTLE WIRE
1. Remove the air cleaner cover.
2. Connect the end of the throttle wire to
the joint on the top of the carburetor.
(SE2)
■ CONNECTING SWITCH WIRES
• Connect the switch wires between the
engine and the main unit. Pair the wires
of the same color.
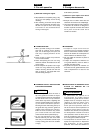
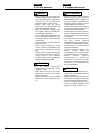
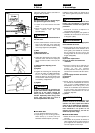
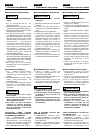
■ ATTACHING THE PRUNING
MECHANISM (SE3)
1. Remove the cap on the end of the main
pipe.
2. Remove the screw screwed into the
end of the gear case.
3. Insert the end of the gear case into the
main pipe.
4. Line up the hole on the end of the gear
case into which the screw is to be
inserted with the hole on the main pipe,
and screw the screw firmly in.
5. Using a wrench, screw in the bolt
provided to fix the mechanism into
place.
(1)Main pipe
(2)Gear case
(3)Screw hole
(4)Fastening bolt
(5)Bolt
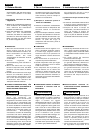
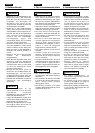
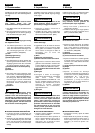
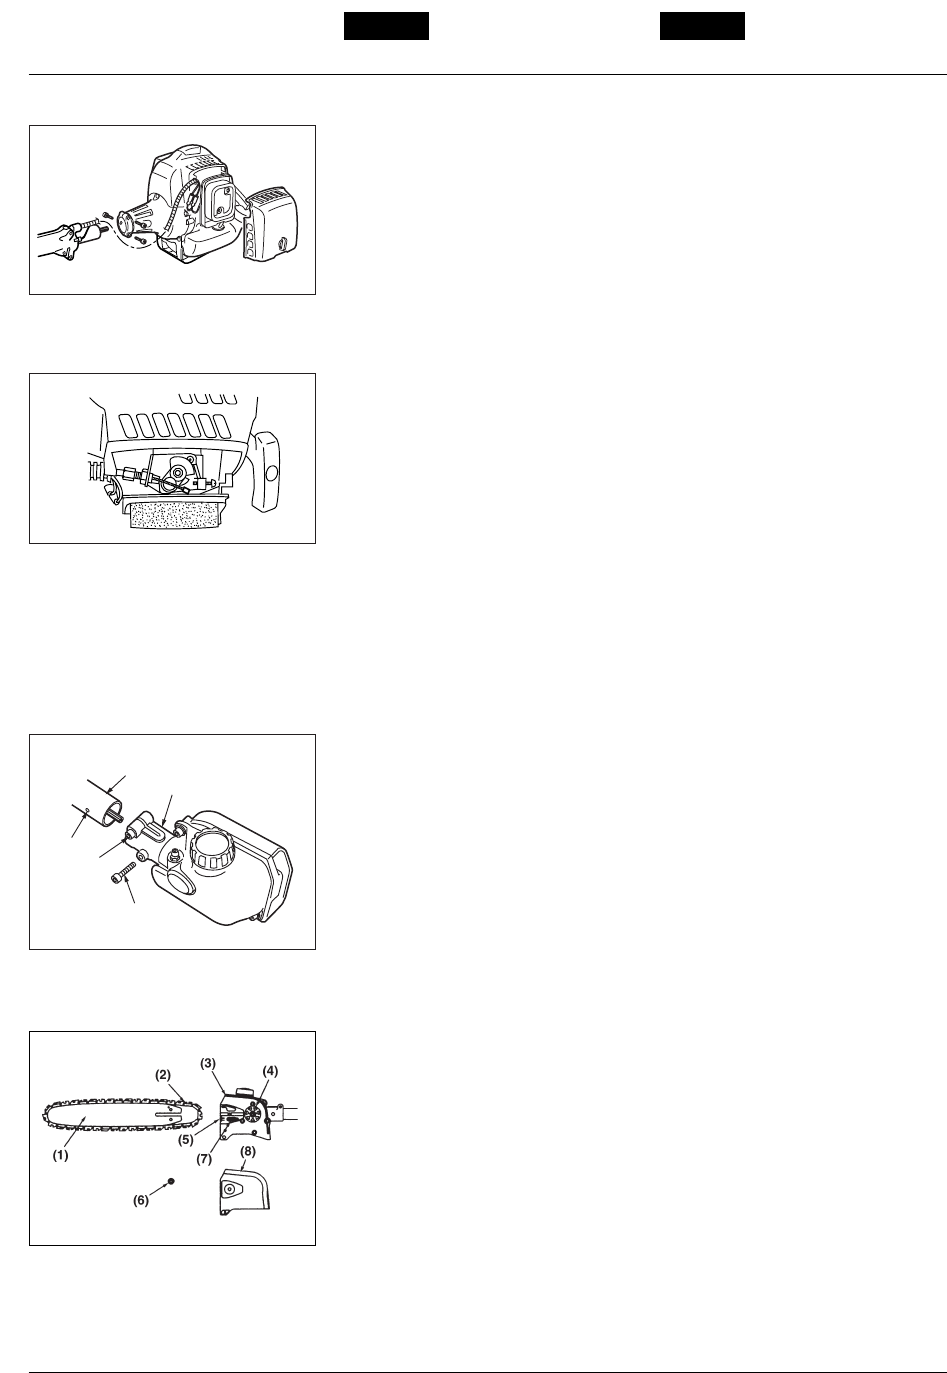
A standard package contains the items as
shown below. (SE4)
(1)Guide bar
(2)Saw chain
(3)Gear case
(4)Sprocket
(5)Chain tension adjust screw
(6)Nut
(7)Chain tensioner nut
(8)Chain cover
■ MONTAGE DU MOTEUR (SE1)
1. Engager le tube de protection de l’arbre
de transmission dans le carter
d’embrayage et le tourner à la main
pour vérifier que les cannelures de
l’arbre sont bien engagées dans leur
logement.
2. Insérer à fond l'arbre de transmission
dans le boîtier de l'appareil et aligner
les trous de positionnement des deux
parties pour installer les vis de fixation.
3. Bien serrer la bride à l’aide des deux
vis.
■ RACCORDEMENT DU CABLE
D’ACCELERATEUR
1. Enlever le capot du filtre à air.
2. Raccorder l’extrémité du câble
d’accélérateur dans sa fixation sur le
dessus du carburateur. (SE2)
■ RACCORDEMENT DES FILS
ELECTRIQUES
• Relier les fils électriques entre le
moteur et la machine en faisant
correspondre les couleurs de fils.
■ FIXATION DU MECANISME DE
DEBROUISSAILLAGE (SE3)
1. Retirez le couvercle du bout du tuyau
principal.
2. Retirez la vis vissée au bout de la gaine
protectrice.
3. Insérez le bout de la gaine protectrice
dans le tuyau principal.
4. Alignez le trou avec le bout le la gaine
protectrice à l’intérieur de laquelle la vis
doit être insérée avec le trou sur le
tuyau principal, et vissez la vis
fermement.
5. Avec une clef, vissez l’écrou fourni pour
fixer en place le mécanisme.
(1)Tuyau principal
(2)Gaine protectrice
(3)Trou de vis
(4)Ecrou d’attache
(5)Ecrou
Un paquet standard de cette
tronçonneuse contient les articles illustrés
sur la guache. (SE4)
(1)Barre guide
(2)Chaîne
(3)Gaine protectrice
(4)Pignon
(5)
Vis de réglage de tension de la chaîne
(6)Ecrou
(7)Ecrou de mise sous tension de
chaînette
(8)Boîtier du renvoi d’angle
SE1
SE2
(1)
(2)
(3)
(4)
(5)
SE3
SE4