


24 www.seektech.com Ridge Tool Company Elyria, Ohio U.S.A
SeekTech SR-60
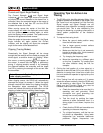
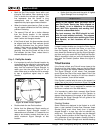
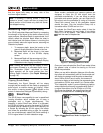
• Mark the first Pole location found with a red
triangular Pole marker. After centering on the
Pole, a double-line indicator will appear. This
line represents how the Sonde is lying
underground, and in most cases also
represents the pipe’s approximate direction.
• When the locator gets close to a Pole, a zoom
ring will appear centered on the Pole, allowing
precision centering.
• The second Pole will be a similar distance
from the Sonde location in the opposite
direction. Locate it in the same manner and
mark it with a red triangular marker.
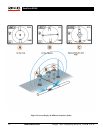
• If the Sonde is level, the three markers should
be aligned and the red Pole markers should
be similar distances from the yellow Sonde
marker. If they are not, a tilted Sonde may be
indicated. (See “Tilted Sondes”, below.) It is
generally true that the Sonde will be on the
line between the two Poles, unless there is
extreme distortion present.
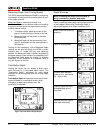
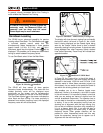
Step 3: Verify the locate
• It is important to verify the Sonde’s location by
crosschecking the receiver’s information and
maximizing Signal Strength. Move the SR-60
away from the maximum Signal Strength, to
make sure that the signal drops off on all
sides. Make sure to move the unit far enough
to see a significant signal drop in each
direction.
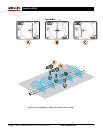
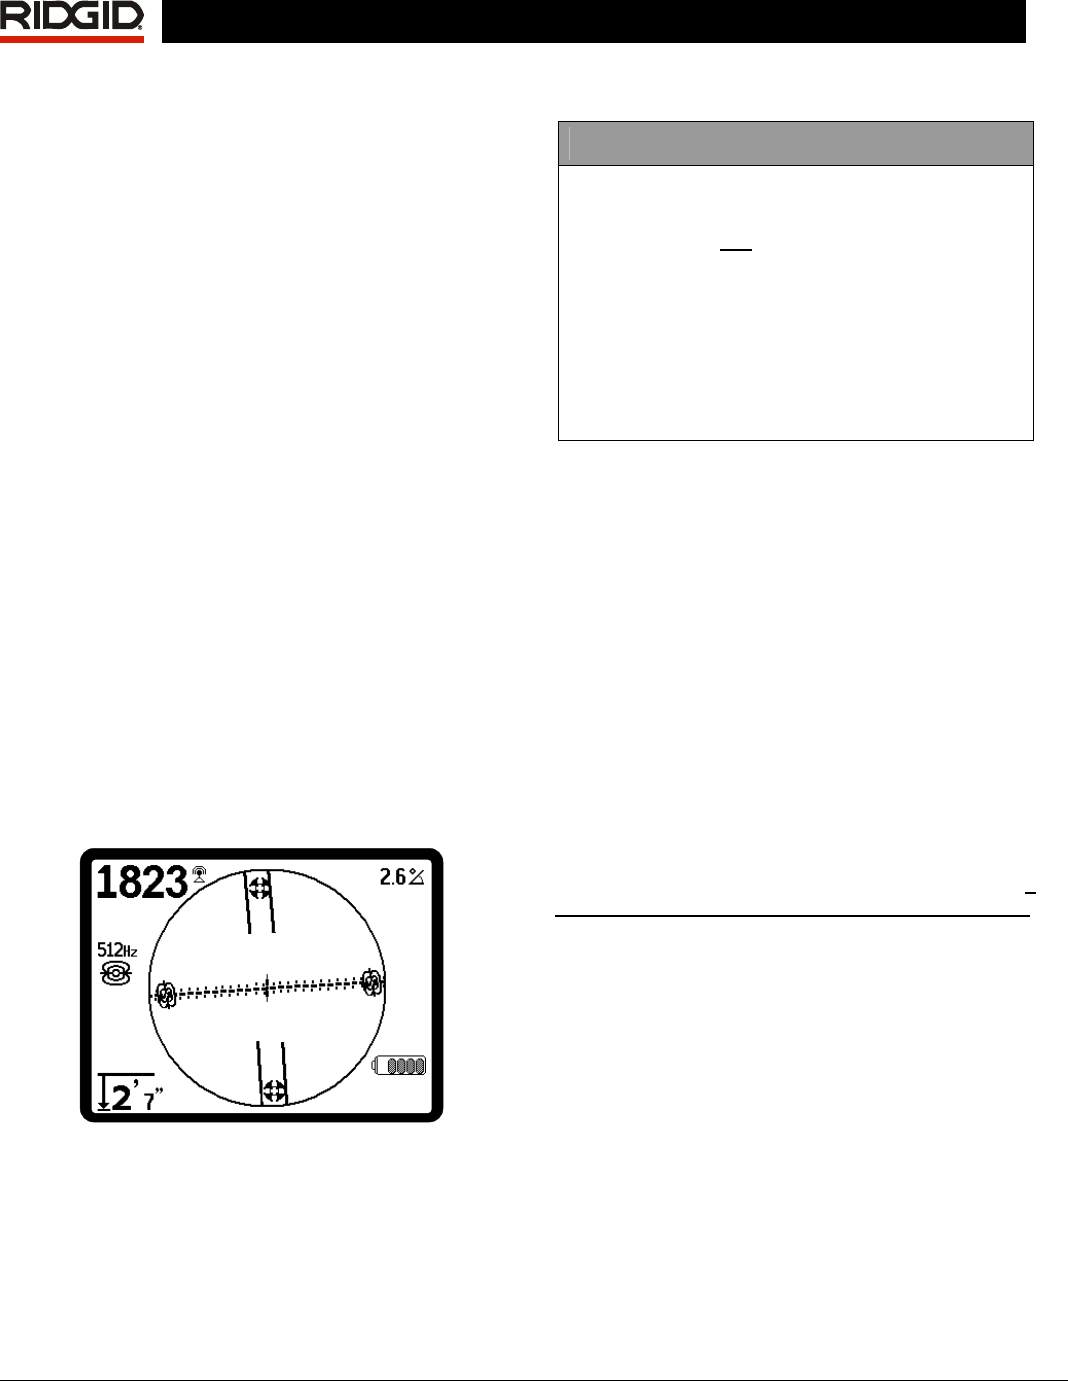
Figure 36: Sonde Locate: Equator
• Double-check the two Pole locations.
• Notice that the Measured Depth reading at
the maximum Signal Strength location is
reasonable and consistent. If it seems far too
deep or too shallow, recheck that there is an
actual maximum Signal Strength at that
location.
• Notice that the poles and the point of highest
Signal Strength lie on a straight line.
Important!
Being on the Equator does not mean one is
over the Sonde. Seeing two Poles aligned on
the display is not a substitute for centering
over each Pole separately and marking their
locations as described above.
For best accuracy, the SR-60 should be held
with the mast oriented vertically. The antenna
mast must be vertical when marking the Poles
and Equator, or their locations will be less
accurate.
It doesn’t matter whether you locate the Poles first, or
the Equator first, and then the Poles, or one Pole,
then the Equator, and then the other Pole. You can
even locate the Sonde using just the Signal Strength,
and then verify your result with the Poles and Equator.
What is important is that you verify all the data points,
and mark the Sonde’s position where the signal is
highest
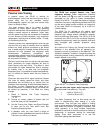
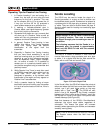
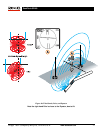
Tilted Sondes
If the Sonde is tilted, one Pole will move closer to the
Sonde and the other farther away so that the Sonde
location no longer lies midway between the two Poles.
The Signal Strength of the nearer Pole becomes
much higher than that of the more distant Pole if the
Sonde is vertical (as it could be if it fell into a break in
the line); however, it can still be located.
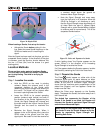
If the Sonde is vertical what is seen on the screen is a
single Pole at the point of maximum Signal Strength.
(The Ridgid Floating Sonde is designed to have a
single Pole “visible” and is weighted to maintain the
Sonde on a vertical axis. See Note below.)
It is important to realize that a severely tilted Sonde
can cause the Pole locations and the Equator to
appear offset because of the angle of the Sonde; but
maximizing the Signal Strength will still guide to the
best location for the Sonde.
Floating Sondes
Some Sondes are designed to be flushed or to drift
down a pipe pushed by water flow. Because these
Sondes swing much more freely than a torpedo-
shaped Sonde in a pipe, they can be oriented any
which way. This means the Equator may be distorted
by tilting, and the location of the Poles may vary. The
only guarantee of having located a floating Sonde is
maximizing the Signal Strength and double-checking