Section 4. ET106 Sensor Arm Installation
4-2
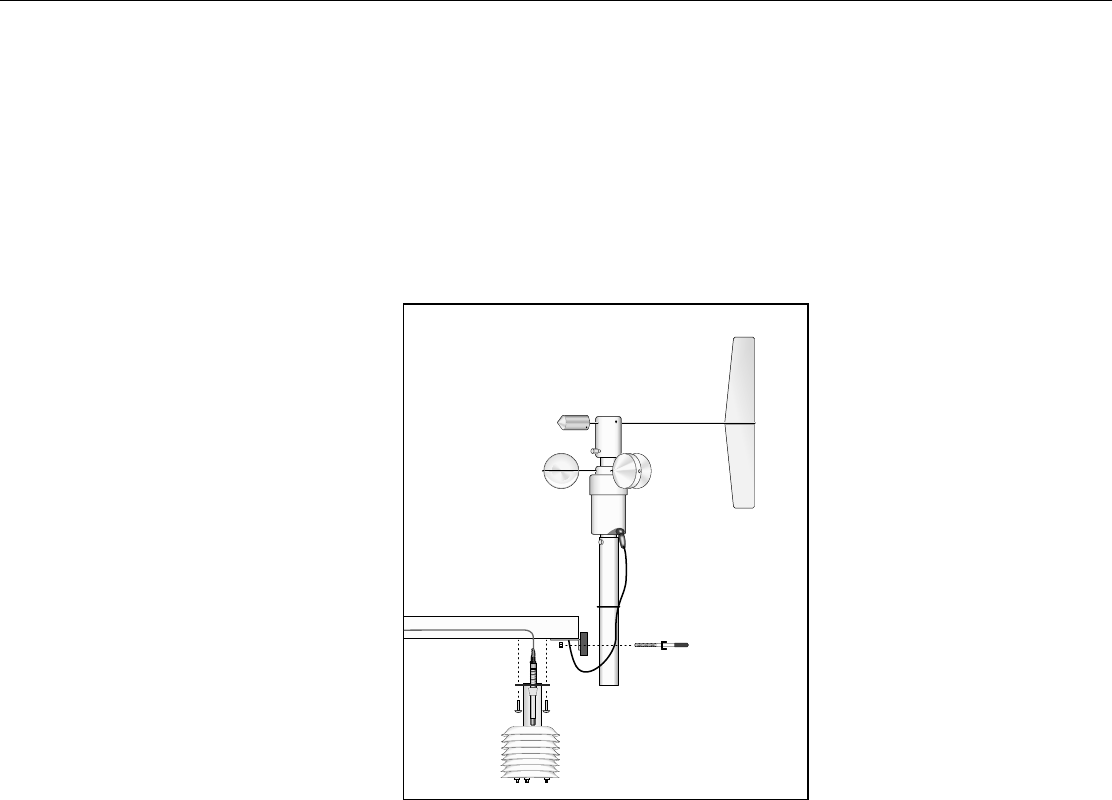
4.4 034A Wind Sensor Installation
Install the 034A Wind Sensor as shown in Figure 4.4-1 after the sensor arm is
securely installed. The wind vane is oriented after the datalogger has been
programmed (Section 5), and the location of True North has been determined
(Section 1.2). Orientation is most easily done with two people, one to aim and
adjust the sensor, while the other observes the wind direction displayed by
CR10KD Keyboard Display or a laptop PC.
FIGURE 4.4-1. Wind and RH/Temperature Sensor Installation
1) Place the 034A in the 034A Mounting Shaft pointing the vane due south.
Tighten the alignment screw.
2) Attach the 034A and mounting shaft to the sensor arm. Insert the mounting
shaft into the U-bolt clamp. Adjust sensor height to 2 or 3 meters by
moving the mounting shaft up or down in the clamp. Lightly tighten clamp
nuts.
3) Attach the 034A connector to the 034A.
4) Establish a reference point on the horizon for True North.
5) Sighting down the instrument center line, aim the counter weight at True
North. Display input location #8 (Section 4.6) for wind direction using the
*6 Mode of the datalogger, or the Monitor Mode of PC208.
6) While holding the wind vane position, slowly rotate the sensor base until
the datalogger indicates 0 degrees. Securely tighten the clamp nuts.


