


Interstater (NH TS-100A , 115A , 125A & 135A Asy. Manual) 06/04
© 2004 Alamo Group Inc.
Section 3 - 4
Pump - Driveshaft - Hyd tank
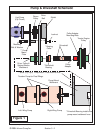
Figure 4
Use
Flatwasher
here
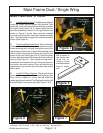
Figure 5
Slotted
Adjusting
Hole
3/8"
square
hole
3/8"
Ratchet
Install Driveshaft, Pump & Tank:
(continued)
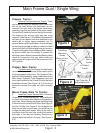
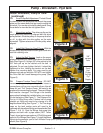
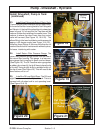
10. Small Pump Belt Adjustment. The belt Guard
is retained with the same bolts that mount the pump
plate and the same bolts that are used to adjust the
drive belt. For now do not install the belt guard. Snug
these bolts for now but do not tighten them
11. Align driven pulley. The driven pulley on the
small pump will need to be aligned with the drive
pulley below it. Slide the pulley on the pump shaft on
or off to align with the drive pulley on the main
driveshaft. Tighten setscrews in Driven pulley when
aligned.
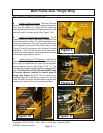
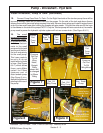
12. Install Belt Guard on Small Pump. With the
driven pulley aligned install the belt guard and rein-
stall the retaining nuts.
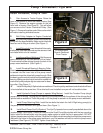
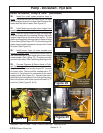
13. Adjust the Belt Tension. Look on the mount
plate you will see a 3/8" square hole above the slotted
hole (See Figure 5). Using a 3/8" drive ratchet in the
3/8" hole pull up on the ratchet until the belt is
adjusted. Do not over tighten the belt, it should be
tightened to firm. Holding the tension on the belt
tighten the mounting bolts. You may need to get
someone to help you with this. DO NOT over tighten
the Drive Belt as it could damage the pump. (See
Figure 6)
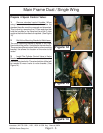
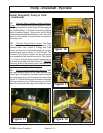
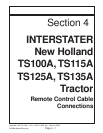
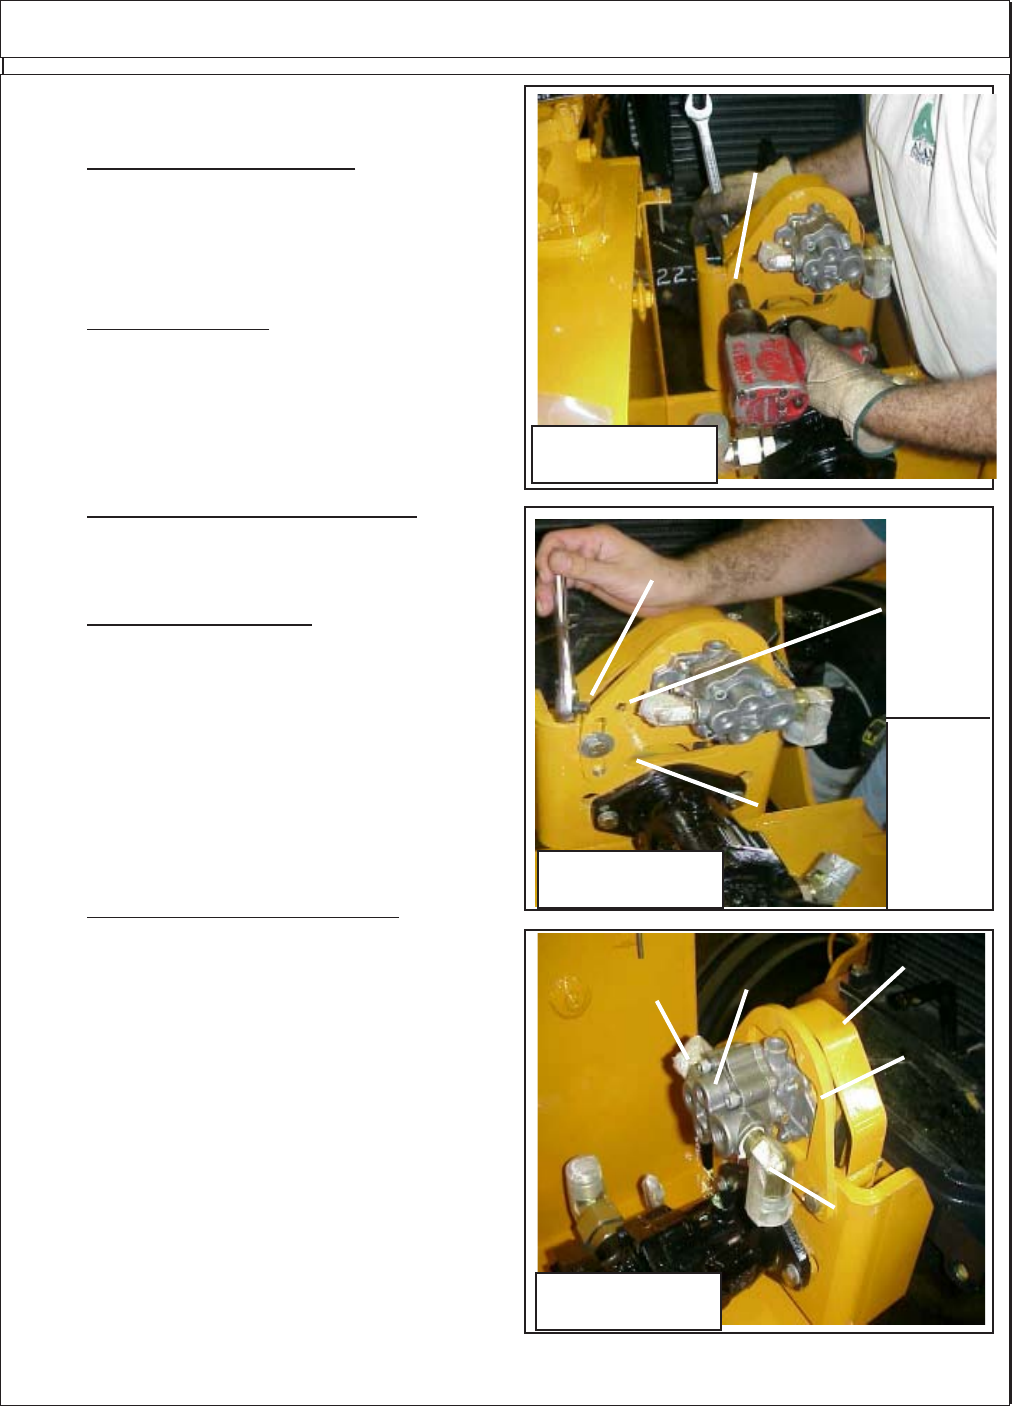
14. Prepare Tandem Pump Fittings DO NOT
remove any caps or plugs on hydraulic hoses or
connections until you are connecting them, this will
keep dirt out. The Tandem Pump will need to be
prepared for connecting the hoses. There are fittings
that must be changed. The Fittings in the tandem
pump should already be installed when you receive
it from the factory (See Figure 7). The Pressure Out
Port to LH Wing from outer Tandem half of pump
straight out fitting will need to be change to a 90
degree elbow fitting (See Figure 7 ). The Two large
caps on the tank suction ports will need to be
replaced with two elbow fittings and hose barbs (See
Figure 7, 8 & 9). Coat the fittings that screw into
pumps and tank with a pipe sealer (NOT Teflon
Tape), do not put excess sealer on OD of fittings and
none on ID of fittings (See Figure 7). Install the elbow
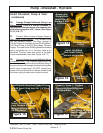
Small
Hyd
Pump
for Hyd
Cyl
Supply
Belt
Guard
Pump
Mount
Plate
Small
Pump
In
Suction
Side
Out
Pressure
Side
Figure 6
fitting into the pressure port of the LH Motor Pump (outer pump on tandem pump) with the supplied
elbow (See Figure 9)