


19
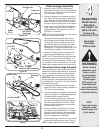
Belt
Routing
Various Models
8
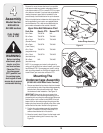
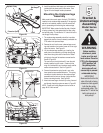
Before installing
attachment, place
tractor on a firm and
level surface. Place
the PTO in the disen-
gaged (OFF) position,
set the parking brake,
shut engine off and
remove key to prevent
unintended starting.
WARNING
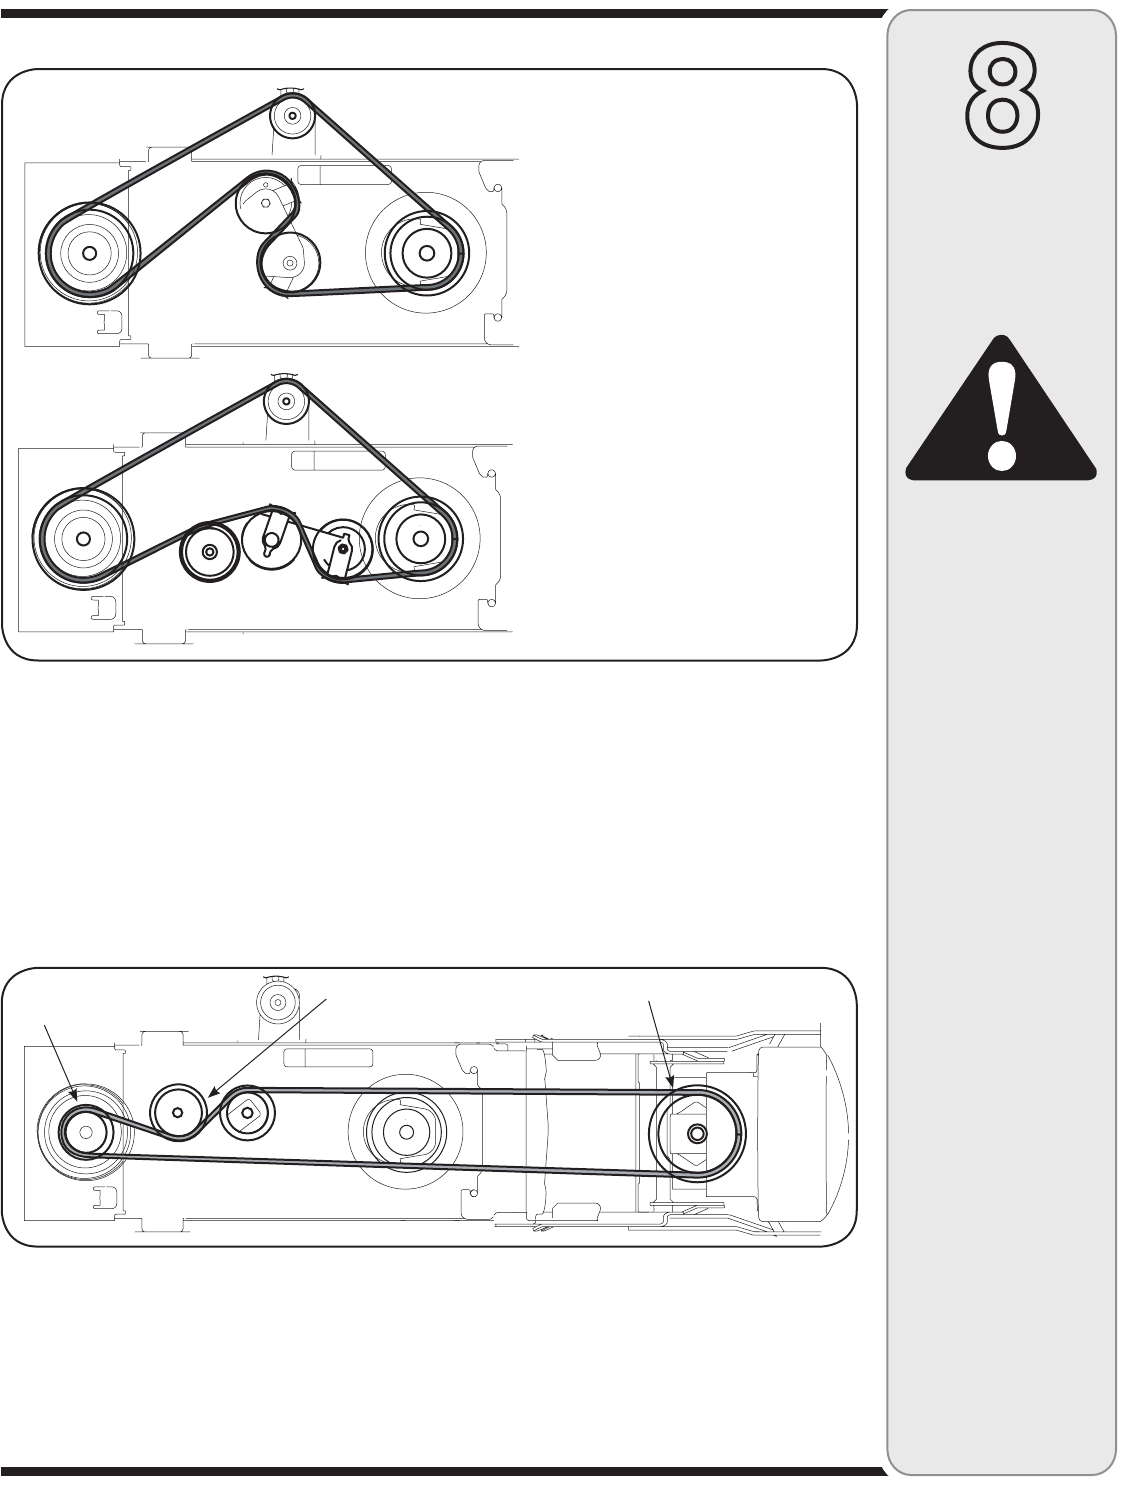
46 inch Manual
Older Style Setup
42 in. Electric and
Manual Older Style
Setup
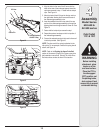
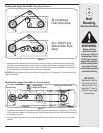
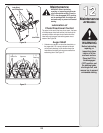
Routing the Upper Drive Belt (Older Style Tractors )
1. Attach and route the proper upper drive belt (refer to the table on page 12) around the spindle pulley and idler
pulley found on the undercarriage, the lower portion of the engine pulley and the two pulleys found on the PTO
double-idler bracket as illustrated in Figure 31. Make sure that the belt is routed to the INSIDE of all belt keepers
on the idler pulleys and the keeper pins found around the spindle pulley
IMPORTANT: Make certain that the flat side of the belt is facing outward. This allows the “V” side of the belt to ride
snugly in both pulleys.
Figure 31
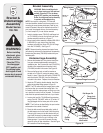
Figure 32
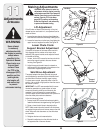
1. Attach and route the lower drive belt around the lower pulley on the spindle assembly, both pulleys on the double-
idler bracket found beneath the undercarriage, and the drive pulley found on the rear of the snow thrower housing
as illustrated in Figure 32.
2. Attach the tension spring (found on the undercarriage double-idler bracket) to the hex screw if it is not already
attached.
Routing the Lower Drive Belt (All Tractors Models)
Spindle Pulley
Snow Thrower Drive Pulley
Undercarriage
Double-Idler Bracket
IMPORTANT:
Make certain that the
flat side of the belt is
facing outward. This
allows the “V” side of
the belt to ride snugly
in both pulleys.
Right Side
Left Side