


Assembly 39
MAN0943 (07/12/2011)
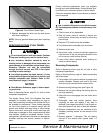
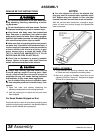
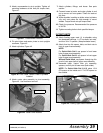
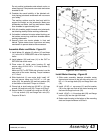
3. Attach crossmember to strut uprights. Tighten all
mounting hardware at this time per torque chart,
Figure 41.
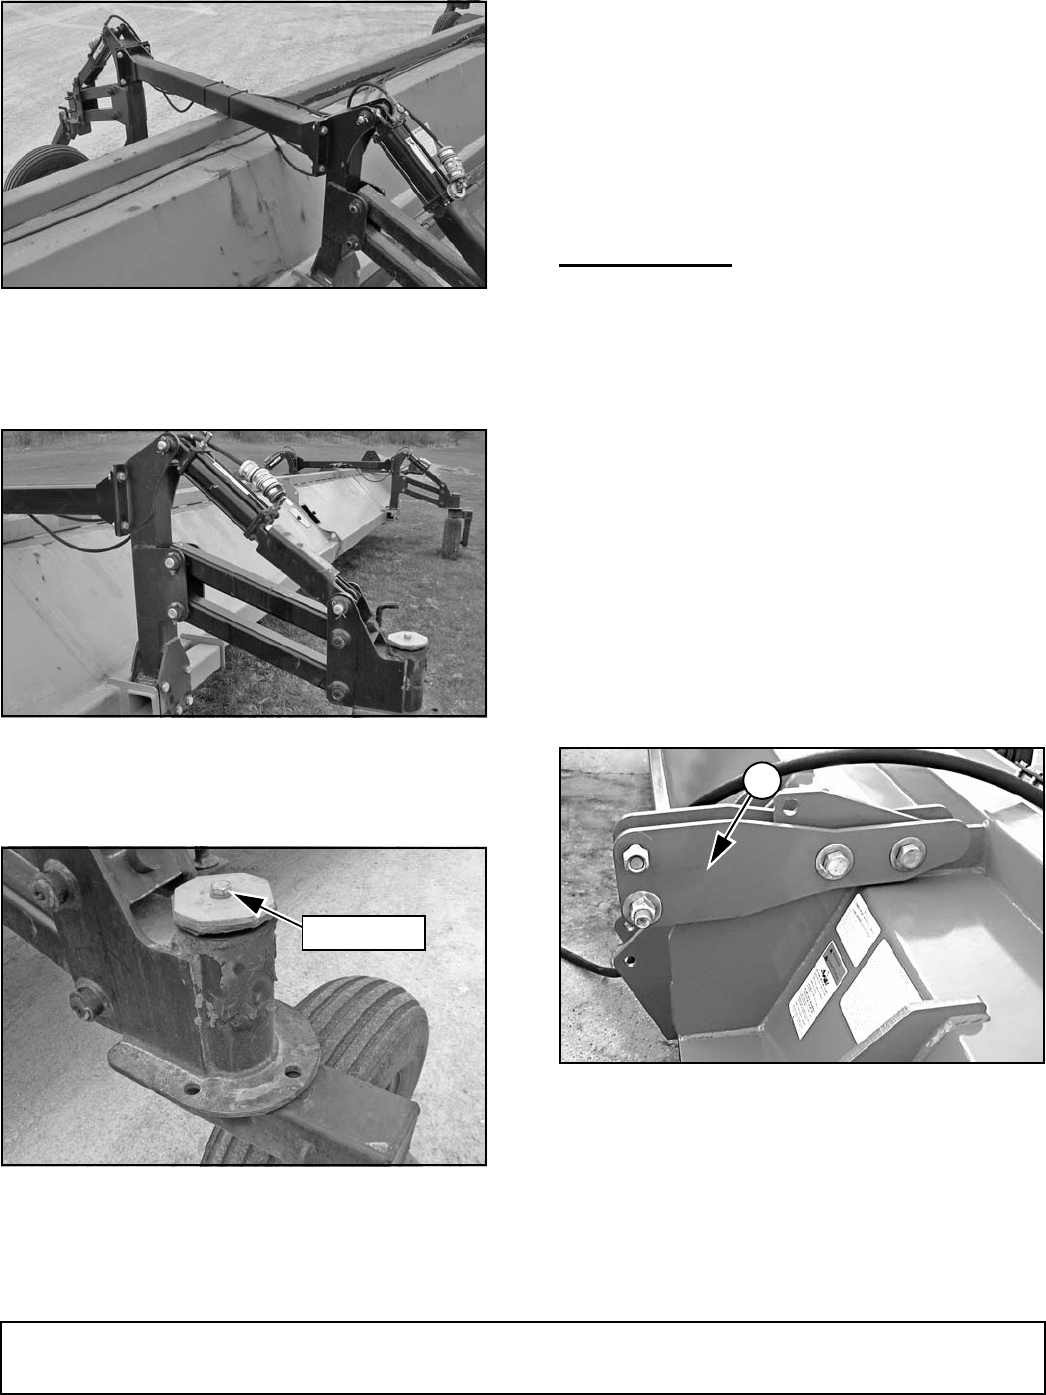
Figure 41. Crossmember Installed
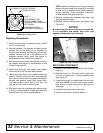
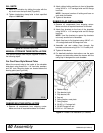
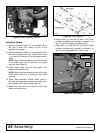
4. Pin pivot tubes and caster pivots to strut uprights
as shown, Figure 42.
5. Attach cylinders, Figure 42.
Figure 42. Pivot Tubes, Caster Pivots & Cylinders
Installed
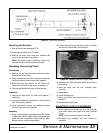
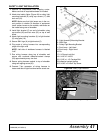
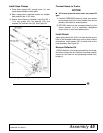
6. Attach caster yoke assembly to pivot assembly,
Figure 43. Use Loctite on hex bolt.
Figure 43. Caster Yoke Installed
7. Attach cylinders, fittings, and hoses. See parts
section.
8. Connect hoses to tractor and cycle cylinder in and
out to remove air from system. Check for leaks at
this time.
9. While shredder is setting on skids, retract cylinders
fully until cast yokes are high enough to mount
wheels. Torque wheel nuts per torque chart.
10. Check tire pressure. Recommended tire pressure
is 30 PSI.
11. Tighten mounting bolts to their specified torque.
3-POINT UNITS
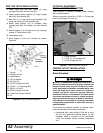
12. Attach floating upper mast (1) to shredder using
two hardened bushings, 1 x 5" hex bolts, lock nuts,
and four 3/4 x 3" spacers. (Keep hardware loose.)
13. Attach front top link spacer, bolts, and lock nuts to
front of upper mast assembly.
NOTE:
For Quick Hitch Cat II, use spacer in front lower
hole of upper mast assembly.
For Quick Hitch Cat III, use spacer in front upper
hole of upper mast assembly.
Without Quick Hitch, use spacer through top link
pivot in front upper hole of upper mast assembly.
14. Assemble lower 3-point hitch pin assembly,
spacers, and klik pin to lower mast (both sides).
NOTE: For Quick Hitch Cat II & III, place 1-3/4
OD spacer on the inside and 1-7/16 OD spacer on
the outside.
Figure 44. Floating Upper Mast Installed
DP121
DP122
1
Use Loctite
DP123
DP11
1