


11
Section 2: Equipment Hook-up & Unhook
3/18/15
SBL2566, SBL2574, & SBL2584 with S/N 891531+ Snow Blowers 370-478M
Table of Contents
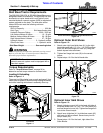
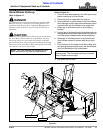
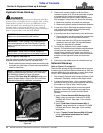
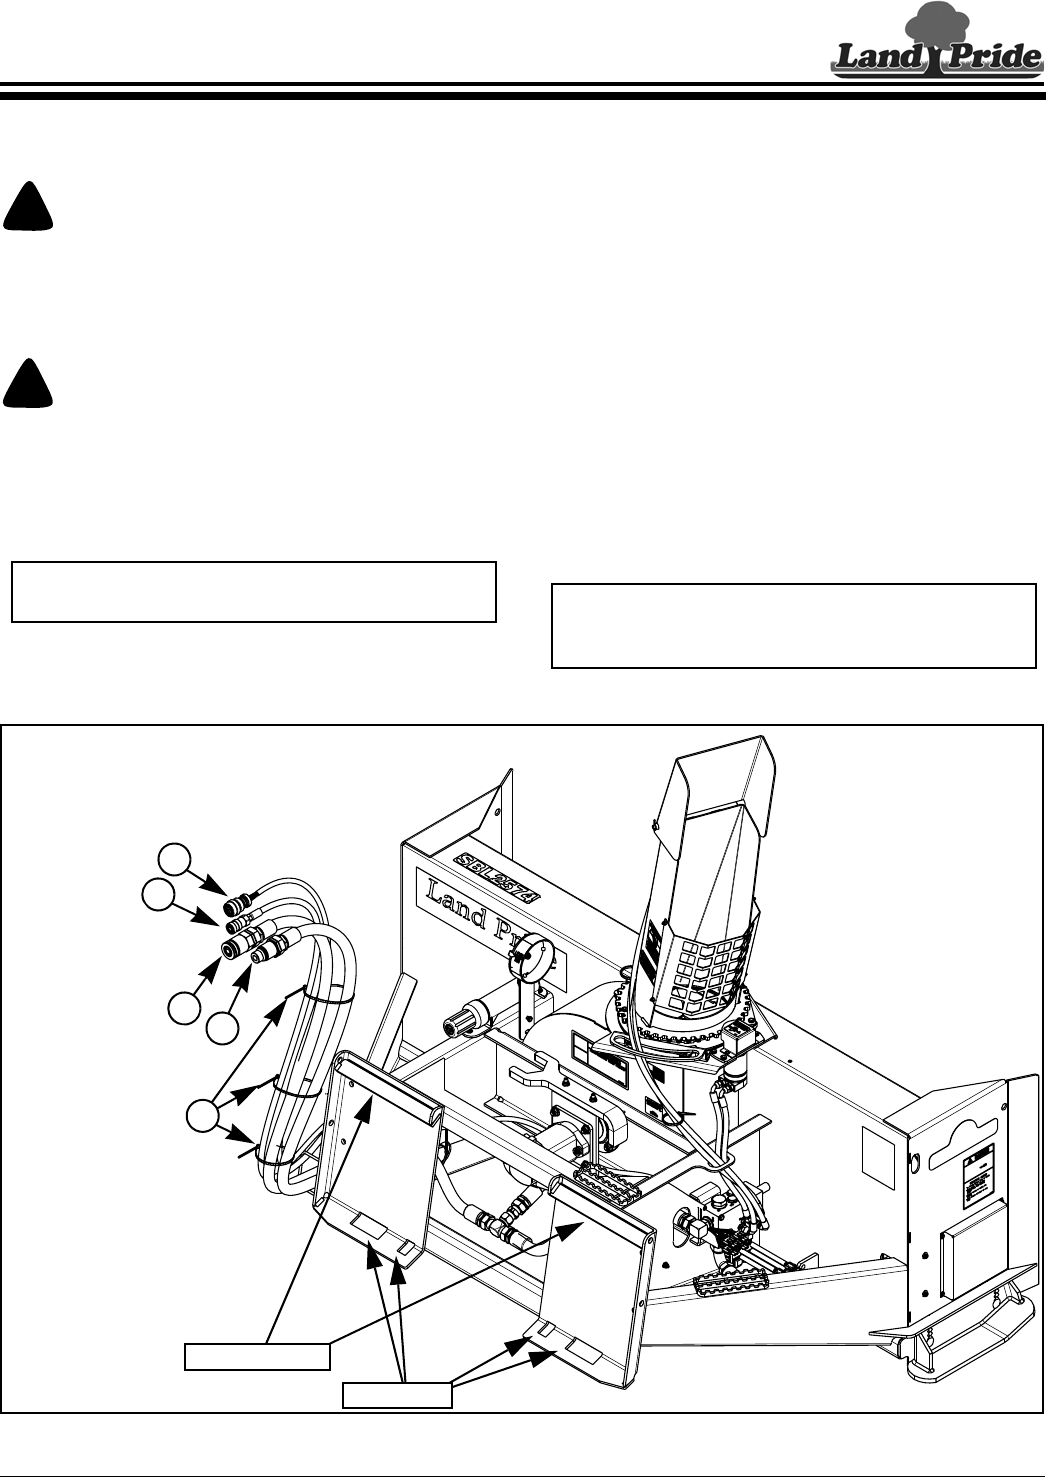
Snow Blower Hook-up
Refer to Figure 2-1:
!
DANGER
A Crushing Hazard exists when hooking-up equipment. Do
not allow anyone to stand between skid steer/tractor and
implement while hooking-up to implement. Do not operate
hydraulics while someone is near the skid steer/tractor or
implement.
!
CAUTION
Make sure your skid steer/tractor hitch is properly attached to
the Snow Blower hitch. It must be secured under the Snow
Blower top angle bars and loader hitch plate lock handles
must be locked down with locking pins extending fully through
bottom slots in the Snow Blower hitch. An improperly attached
Snow Blower can come loose and fall.
NOTE: The Snow Blowers are designed for skid
steers and tractors with front mounted loaders.
Section 2: Equipment Hook-up & Unhook
Hook-up to Snow Blower
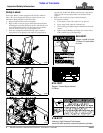
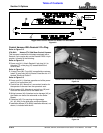
Figure 2-1
35599
Bottom slots
Top Angle Bars
1
2
3
5
4
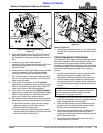
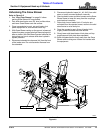
Refer to Figure 2-1:
1. Check for and remove debris in the hitch point areas
before hooking-up to Snow Blower.
2. Raise lock pins on loader hitch for hook-up.
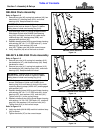
3. Drive skid steer or tractor slowly to the Snow Blower
hitch making sure hitch plate on the skid steer/tractor
is parallel with the Snow Blower’s top angle bars.
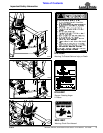
4. Rotate top of skid steer/tractor tilt arms slightly
forward.
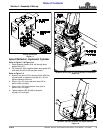
5. Position top of skid steer/tractor hitch plate under the
top angled bars and slowly raise loader hitch plate up
until hitch plate is seated under the top angle bars.
6. Rotate top of skid steer/tractor tilt arms back until
Snow Blower makes full contact with face of hitch
plate.
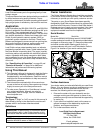
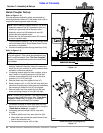
7. Push lock pins on the loader hitch down. Make sure
lock pins go through bottom slots in the Snow Blower
hitch and handles are fully locked down.
8. Set loader arms to float.
IMPORTANT: Set loader arms to float before
blowing snow. The skid shoes can have increased
wear if loader arms are rigid.