


OPERATION
OM 0400-A
21
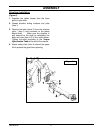
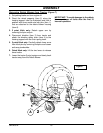
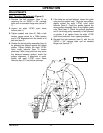
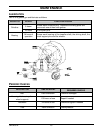
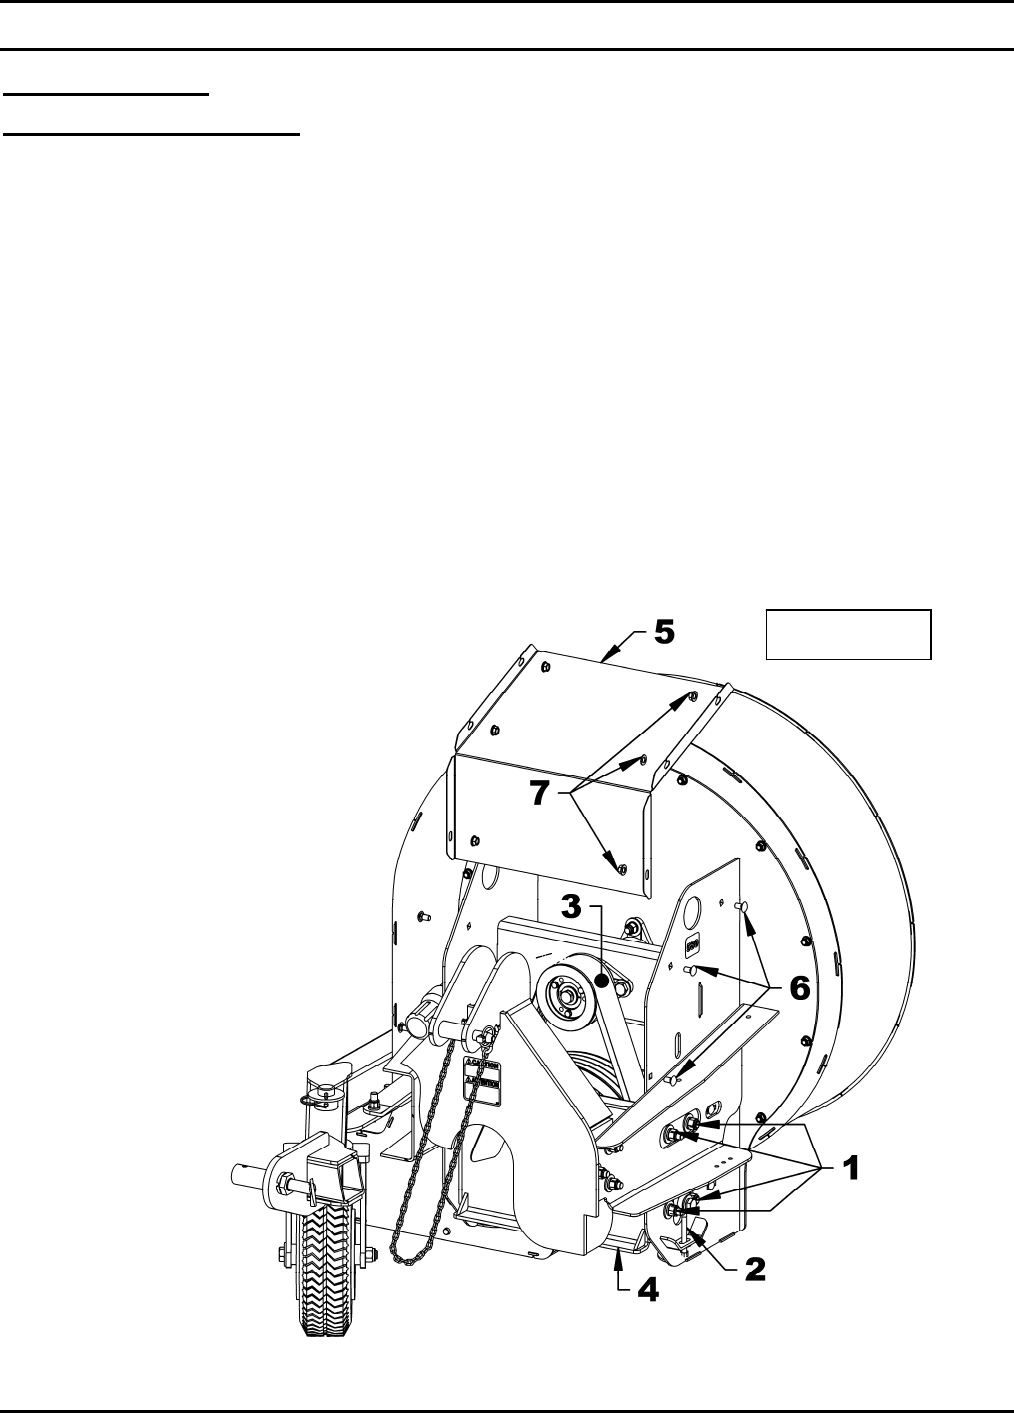
Figure 9
ADJUSTMENTS
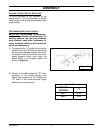
Belt Tension Adjustment (Figure 9)
1. Remove the belt protector (item 5) by
removing the six 3/8"NC x 3/4" carriage
bolts and six serrated flange nuts (items 6-
7).
2. Loosen the eight 1/2"NC nylon insert
locknut (item 1).
3. Tighten eyebolt nuts (item 2). With a belt
tension gauge check for a 35lbs tension
and a 3/16" displacement in the center in all
belt axis (item 3).
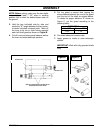
4. Realign the driving pulley assembly (item 4)
by pressing the support against the bolted
guides. Tighten loosely the eight 1/2"NC
nylon insert locknuts (item 2) loosen
previously. With a long ruler that may cover
the distance between pulleys, check the
pulleys alignment, If alignment is good,
tighten the eight 1/2"NC nylon insert
locknuts (item 2). If not, follow next step.
5. If the belts are not well aligned, loosen the guide
nuts and the eyebolt nuts. Align the two pulleys,
slightly tighten the eight 1/2"NC nylon insert
locknuts (item 2). Press the guides against the
driving pulley assembly (item 4) and tighten guide
nuts. Redo step 2. Check the pulleys alignment
and if the driving pulley assembly is well pressed
on guides. If so, tighten firmly the eight 1/2"NC
nylon insert locknuts. If not, repeat procedure.
6. Reinstall the belt protector (item 5) with the six
3/8"NC x 3/4" carriage bolts and six serrated
flange nuts (items 6-7).