


ASSEMBLY
OM 0400-A
12
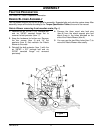
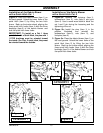
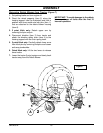
Debris Blower Installation on a Three Point Hitch (Figures 2-3)
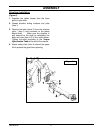
NOTE: To install on a Cat. 1 three point hitch,
the hitch pins (item 3) must be oriented toward
the inside. On a Cat. 2, they must be oriented
toward the outside.
NOTE
: To install on a
quick hitch, remove the
1 1/4" OD bushing from the
3/4" upper pin. If you install
the debris blower on a
Cat.2 tractor, you must
remove the two 1 1/2"OD
bushings attached to the
hitch pins with spring pins
(items 1-2-3).
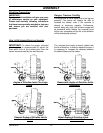
1. Attach the upper and lower arms to the
tractor:
CATEGORY 1
(Figure 2)
A- Attach the tractor lower arms (item 1) to
debris blower pins (item 2) from the inside
and secure with linchpins (item 3).
B- Secure the tractor upper arm (item 4)
between the upper hitch plates (item 6)
with a pin (item 5) and a linchpin (item 3).
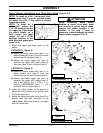
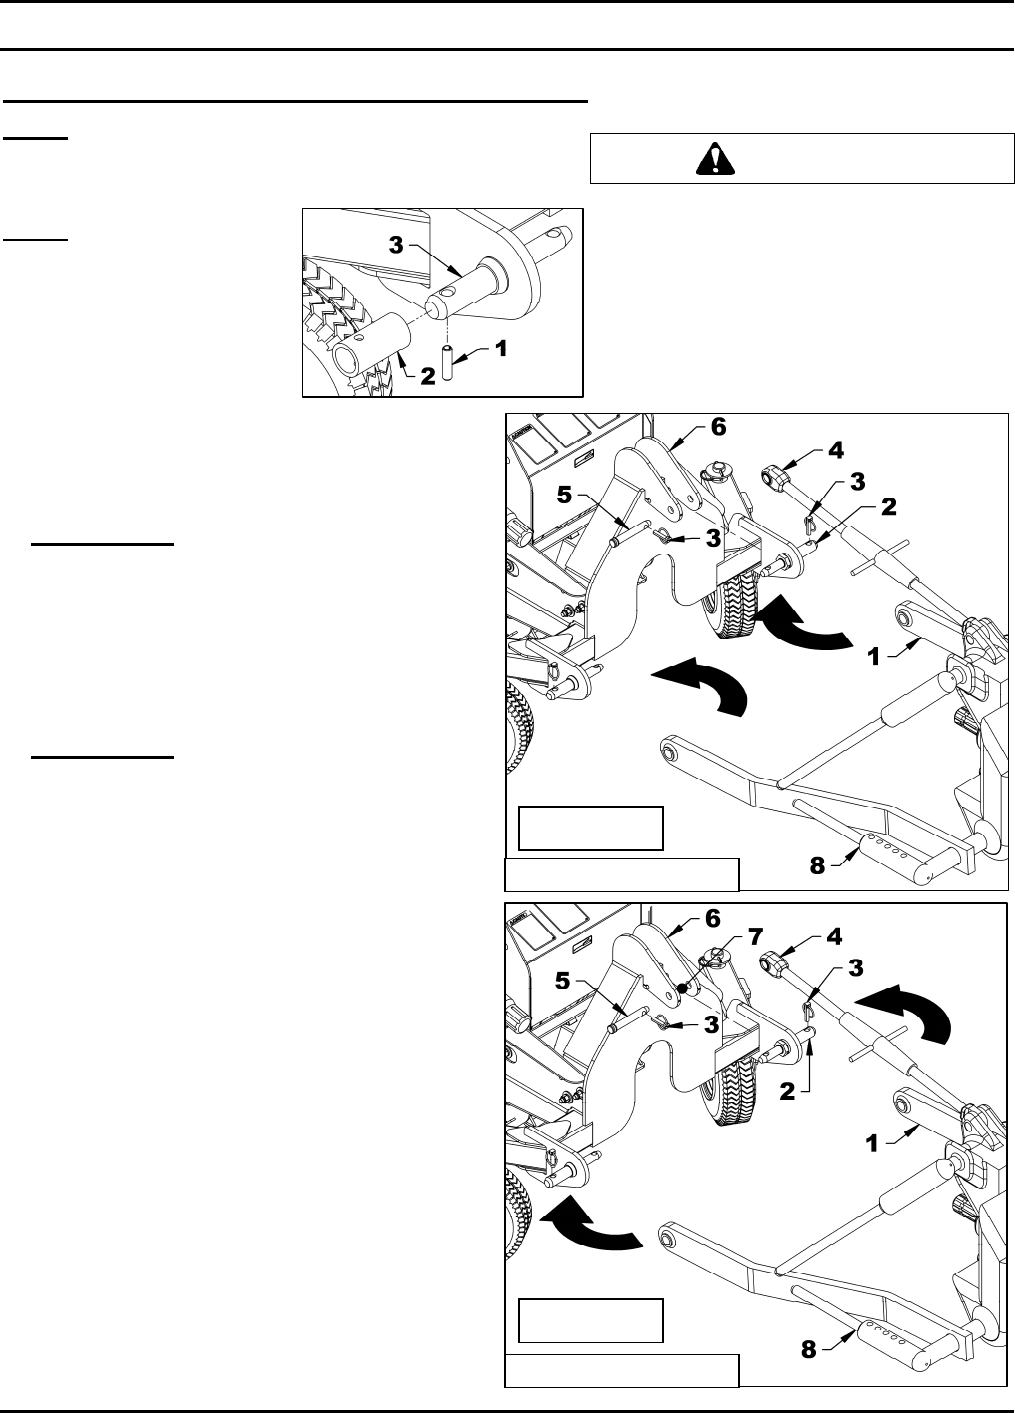
CATEGORY 2
(Figure 3)
A- Attach the tractor lower arms (item 1) to
debris blower pins (item 2) from the
outside and secure with linchpins (item 3).
B- Secure the tractor upper arm (item 4)
between the upper hitch plates (item 6)
with a pin (item 5) and a 1"OD x 2" lg
bushing (5RD4600056) (item 7 – not
included) and a linchpin (item 3).
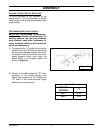
2. Lower the debris blower to the ground to
adjust the level, parallel to the ground, with
the tractor upper arm.
3. Adjust the tractor anti-sway arms (item 8) to
prevent back and forth movement of the
debris blower. Make sure there is no contact
with the tractor tires.
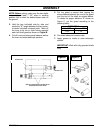
ATTENTION
Before connecting debris blower
driveline to tractor drive shaft, make
sure driveline is not too long in raised,
lowered and middle position. If the
driveline is too long it must be
shortened, to avoid damaged to tractor.
See procedure on pages 14 to 16.
CATEGORY 2
Figure 2
Figure 3
CATEGORY 1