20
1 2
0
4 3
CHANGING FREQUENCY SETTING
NOTE: All fans leave the factory set to
“111111”
You will only have to change the dip switch settings in the remote if you
are using more than one fan in the same area and want to control them
separately.
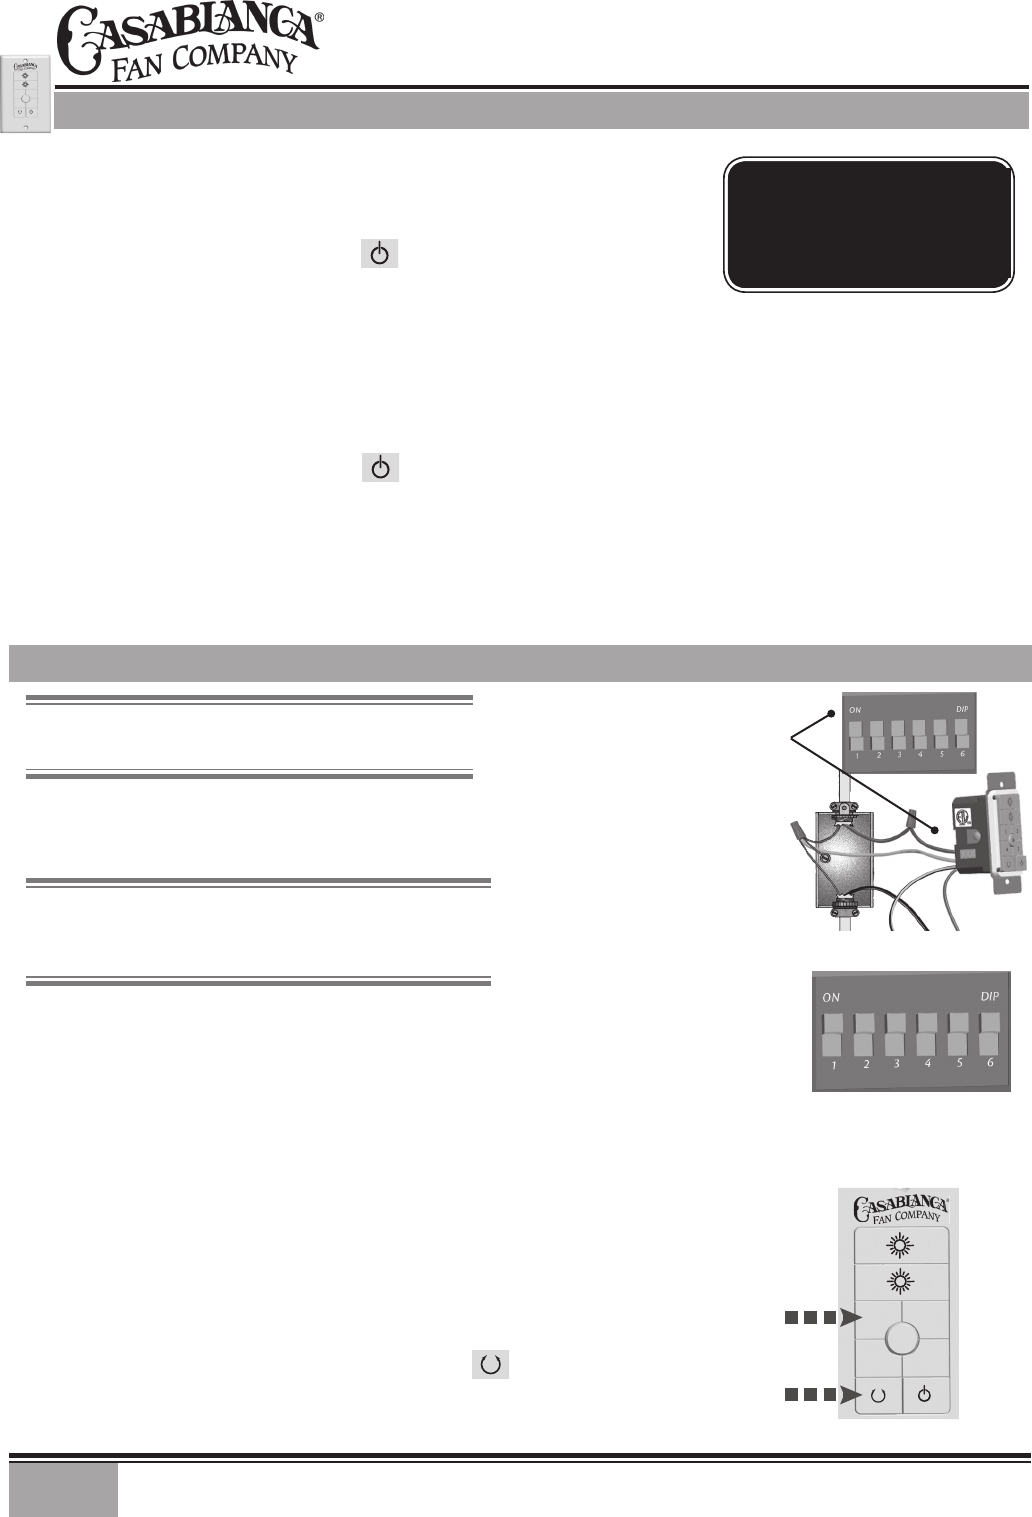
DIP SWITCHES
SET TO ‘111111’
(Factory Setting)
NOTE: DO NOT set dip switch setting in the
remote to ‘0000’, this may cause frequency
interference from other Casablanca Products.
1.
Turn power OFF at the circuit breaker or fuse box and at the toggle
switch, for the fan you want to change.
2. Remove the screws and switch plate from the existing switch box.
3. Remove the screws holding the switch in the switch box.
4. Pull the existing W-74 switch from the switch box to expose the dip
switches located on the side of the control as shown in Figure #1.
5. Change the dip switch settings, assuring that they are different from
the previously installed Direct-Touch fan.
6. Mount the W-74 Wall Control unit back into the wall electrical box.
7. At the circuit breaker or fuse box and at the toggle switch, turn the
power off for the fan whose frequency you are changing.
8. Within 20 seconds of restoring power to the ceiling fan and the W-74
Wall Control press and hold both the “1” and
reverse buttons
as shown in Figure #2. For 3 seconds, you will hear one tone from
the Piezo Buzzer indicating the command has been accepted. The Fan
and Lights will be off.
DIP
SWITCHES
(Figure 1)
OPERATION CFL MODE
Your fan has the ability to disable the dimming feature to allow the use of
CFL bulbs.
To activate CFL mode:
1. Turn the fan off by pressing the
power button.
2. Allow the fan to remain off for at least 5 seconds.
3. Press the power button again to restore power to the fan.
4. Immediately press and hold the "1" and "3" buttons for at least 5 seconds. The fans lights will go to
100% brightness and the dimming function will be disabled.
To cancel CFL mode:
5. Turn the fan off by pressing the
power button.
6. Allow the fan to remain off for at least 5 seconds.
7. Press the power button again to restore power to the fan.
8. Immediately press and hold the "2" and "4" buttons for at least 5 seconds. The fans lights will dim to
50% brightness and the dimming function will be enabled. Press and hold the light buttons until the
desired dimmer setting is reached.
Caution: CFL bulbs will not
function properly when
dimmed, which may result
in ickering or reduced bulb
life.
(Figure 2)
1 2
0
4 3
DIP SWITCHES
SET TO ‘000000’
