11
20. Reassemble the impellor and shaft bearing to the impellor (fan) cover and secure (hand tighten only) with
the two (2) nuts removed in step 10. Install the housing cover and bearing assembly onto the shaft and
housing secure with four (4) nuts removed in step 9. Secure the two (2) set screws on the impellor (fan)
and shaft bearing be sure that these set screws are securely in place.
20. Reassemble the impellor and shaft bearing to the impellor (fan) cover and secure (hand tighten only) with
the two (2) nuts removed in step 10. Install the housing cover and bearing assembly onto the shaft and
housing secure with the four (4) nuts removed in step 9. Secure the two (2) set screws on the impellor (fan)
and shaft bearing be sure that these set screws are securely in place.
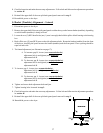
21. The impellor (fan) must now be adjusted or centered in the blower housing align the center of the motor
shaft (at impellor [fan] or shaft bearing) so that the center of the motor shaft is exactly eight (8) inches from
the left side panel.
A. Once the impellor (fan) is properly centered tighten the two (2) nuts of the impellor and shaft
bearing that were hand tightened in step 20.
IMPORTANT: Failure to have the impellor (fan) properly aligned can resulted in the impellor (fan) being
damaged.
22. Reinstall the lower half of the rear split back guard panel removed in step 8.
23. Replace the two (2) bolts, lock washers, and washers removed in step 7. Tighten bolts.
24. Assemble the two (2) 9/16" (O.D.) nuts onto idler tension spade bolt removed in step 4. Do not tighten
these two (2) 9/16" nuts at this time.
25. Reconnect drive belt and motor pulley with fan belt and then make necessary belt tension adjustments.
Follow belt and idler tension adjustment procedure in section K.
26. Make necessary impellor belt adjustments by tightening or loosening the 5/16" HEX head machine bolt on
the side of the impellor bearing mount. Before making this adjustment the two (2) bolts in step 23 must be
loose. Retighten these bolts after proper alignment and tension adjustment is made for the belt impellor.
27. Reverse steps 1 through 3.


