Assembly Section 2-22
ASSEMBLY
BOOM MOUNTING BRACKET
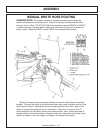
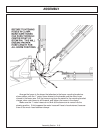
Using a floor jack and / or a hoist, raise the boom mounting bracket up to level
and slide the bracket into position onto main frame as shown in parts section.
Install pin through main frame and bracket. Secure with cap-screw, lock-washer
and hex nut through boss on main frame as shown.
Secure mounting bracket to main frame with the cap-screws, lock-washers, flat-
washers, cut flat-washers and hex nuts provided. Secure using the two slotted
holes on the bracket and main frame.
SWIVEL BRACKET MOUNTING
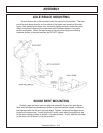
Install the boom swivel bracket onto the boom mounting bracket with the swivel
pin. Secure the pin in place using the capscrews, etc. through the hole in the boss
and pin. NOTE: The head of the capscrew must be toward the front of the tractor.
Install all new swivels and fittings on the swing cylinder with swivel openings
facing each other. Fittings will vary in type and direction depending on your
application, refer to your parts section for more details.
Install bearings in the main frame anchor for the swing cylinder. This may
already be done for you.
Install the swing cylinder between the boom mounting bracket cylinder anchor and
the boom swivel with the pins. Insert roll pins through the top and the bottom hole in
the pins.
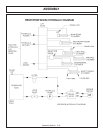
Now the hoses can be attached from the control valve to the swing cylinder.
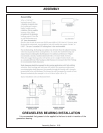
PREFORMED TUBE INSTALLATION
Lay booms on floor so the side with the nuts welded on is up. If mounting a
ditcher head, only the main boom tube installation is required. Locate all tube
clamps and install them loosely in the welded nuts on the left side of the booms.
Arrange the tubes and hoses as outlined in the parts section diagram. Install the
smaller tube closest to the boom arm, being careful not to pinch the tubes. Place
the large tubes outside of the small tubes. Snug all clamp bolts, but do not tighten.
Check all tubes for correct alignment and that none are pinched or bent. The clamp
bolts can now be tightened.


