


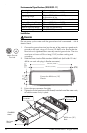
22 © 2007 Schneider Electric. All rights reserved.
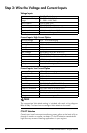
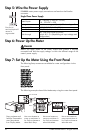
Step 5: Wire the Power Supply
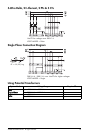
ION8800 meter power supply connections are found on the Essailec
connector.
Single Phase Power Supply
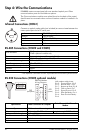
Step 6: Power Up the Meter
DANGER
Before you apply power to the meter, ensure that ground is securely
connected and that the supply voltage is within the allowed range of the
meter’s power supply.
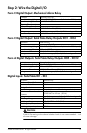
Step 7: Set Up the Meter Using the Front Panel
The following Setup screens are available for meter configuration via the
front panel:
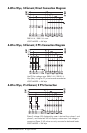
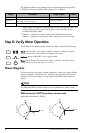
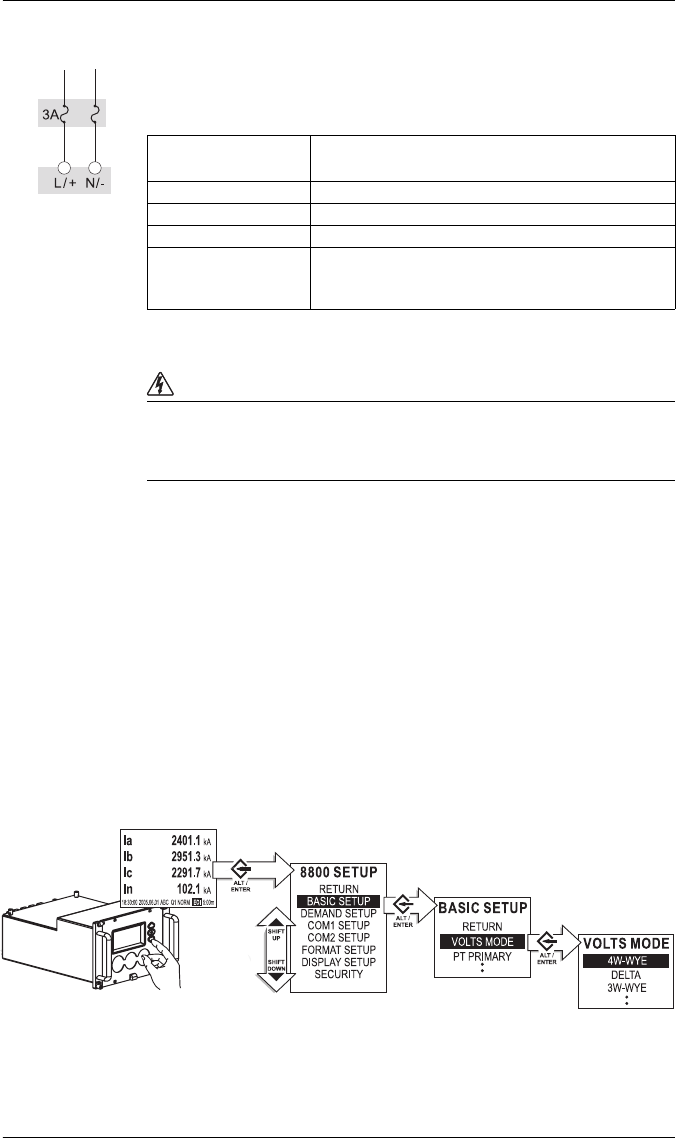
The following example shows Volts Mode setup using the meter front panel.
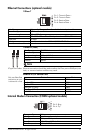
Fuse for N/-
terminal required if
neutral is
ungrounded.
Rated Inputs
85 - 240 VAC ±10%
(47 - 63 Hz)
110 - 270 VDC ±10%
Rating Installation category II (local), Pollution degree 2
Dielectric Withstand 2,000 VAC RMS for 60s (50Hz)
Max. Burden 9 W (20 VA) for base unit without comm module
Ride-through
Min: 120 ms (6 cycles @ 50 Hz)
Typical: 0.5 - 5 s (depending on input voltage and
configuration)
BASIC SETUP
DEMAND SETUP
COM1 SETUP
COM2 SETUP
COM3 SETUP
COM4 SETUP
NETWORK SETUP
FORMAT SETUP
DISPLAY SETUP
SECURITY SETUP
Press ALT/ENTER and
hold for 3 seconds
to
enter Setup Mode
from Display Mode.
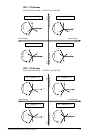
Use arrow buttons to
move up and down in
list. Press ALT/ENTER to
select Basic Setup.
Use arrow buttons to
move up and down in
list. Press ALT/ENTER to
select Volts Mode.
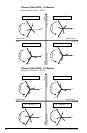
Use arrow buttons to
move up and down in
list. Press ALT/ENTER to
select 4W-WYE.
Press and hold
Press
Press
Press
Press