


Configuration 14
Selecting an Ethernet management port
The Ethernet management port is only available on ProLiant ML150 G2 and ML110 G3 servers.
To select either the LO100 or side-band connection:
1. Power on the server by pressing the Power On/Off button on the front panel.
2. When POST displays the message, ROM-Based Setup, press the F10 key. If the server has an
administrator password configured, the system prompts you to enter the password. If the server does
not have a password configured, the main screen of the BIOS Setup Utility appears.
3. Press the right arrow (→) key to navigate to the Advanced menu.
4. Press the down arrow (↓) key to scroll to NIC Option. Press the Enter key to select between the
dedicated or side-band connection.
5. Press the Esc key to return to the previous screen, or press the F10 key to save the changes and exit
Setup.
The dedicated TCP/IP over Ethernet management port, whether dedicated or shared, is a standard
Ethernet 10/100Mb interface that is connected to the network using a standard Ethernet cable. Before
using the dedicated management port, you must determine the DHCP IP address, set a static IP address,
or use the default static IP address.
Obtaining a DHCP IP address from the BIOS Setup Utility
By default, LO100 has DHCP enabled and automatically negotiates an IP address. To view the DHCP IP
address, run the BIOS Setup Utility or retrieve the DHCP IP address using CLP through the serial port
connection.
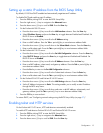
To view the DHCP IP address using the BIOS Setup Utility:
1. Power on the server by pressing the Power On/Off button on the front panel.
2. When POST displays the message, ROM-Based Setup, press the F10 key. If the server has an
administrator password configured, the system prompts you to enter the password. If the server does
not have a password configured, the main screen of the BIOS Setup Utility appears.
3. Press the right arrow (→) key to navigate to the Advanced menu.
4. Press the down arrow (↓) key to scroll to IPMI. Press the Enter key.
5. On HP ProLiant ML110 G3 and ML150 G2 servers:
a. Press the down arrow (↓) key to scroll to the LAN Configuration (ML110 G3) submenu or LAN
Interface (ML150 G2). Press the Enter key.
b. Note the DHCP assigned IP address for future reference.
6. On HP ProLiant DL140 G2 and ProLiant DL145 G2 servers:
a. Press the down arrow (↓) key to scroll to the LAN Interface submenu. Press the Enter key.
b. Note the DHCP assigned IP address for future reference.
7. Press the Esc key to return to the previous screen, or press the F10 key to save the changes and exit
Setup.
To configure or change your network settings, see "Network settings (on page 36)" for more information.