40
Section 5: Maintenance & Lubrication
ZT60i & ZT72i (S/N 748110+) Accu-Z
®
Zero Turn Mowers 357-552M
Table of Contents
2/06/14
Transaxle Oil & Filter Change
The mower has two independent hydrostatic transaxle
systems. Each system will require separate oil and oil
filter changes. It is best to change oil soon after using the
mower while dirt particles are still suspended in the oil.
See page 51 for transaxle oil specifications.
Initially, change oil and oil filters after the first 25 to 50
hours of operation. Thereafter, change oil and filters
every 200 hours or every year whichever comes first. Two
filters are required with each oil change. They may be
purchased from your nearest Land Pride dealer. See
page 51 for filter part numbers.
1. Park unit on a flat level surface. Stop engine and
remove ignition key. Make sure blade engagement
switch is (OFF). Spread control levers fully apart.
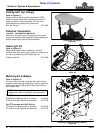
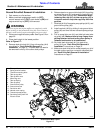
Refer to Figure 5-8 on page 39:
2. Begin on the left side by placing an oil pan (12" or
more in diameter with approximately 8 qt. or more
capacity) beneath the transaxle oil filter cover (#1).
3. Clean transaxle exterior and expansion tank of any
debris. A degreaser may be needed.
4. Unscrew oil filter cover (#1) and allow oil to drain.
5. Remove oil ring (#2) from oil filter cover (#1) and
dispose of oil ring properly.
6. Remove expansion tank cap (#8) to facilitate
drainage.
7. Allow oil to drain until it has slowed to a slow drip. Be
sure to properly dispose the oil.
8. After oil has completely drained from transaxle
housing, remove used oil filter (#3) from transaxle
housing and dispose or properly.
9. Install new oil filter per instructions below:
a. Insert new oil filter into transaxle housing.
b. With a clean rag, clean the inside surface of the oil
filter cover that the oil ring seats against.
c. Apply a thin coat of oil on new rubber oil ring (#2)
and install new O-ring onto filter cover (#1).
d. Screw oil filter cover on until it makes contact with
the surface it seats against.
IMPORTANT: The transaxles must be purged after
every oil change. See “Transaxle Purging
Procedures” on this page.
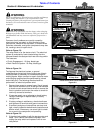
IMPORTANT: Refer to Figure 5-8 on page 39. Clean
debris from around oil filter cap (#1), oil fill vent port
plug (#4), and expansion tank cap (#8) before
removing any caps and draining hydraulic oil.
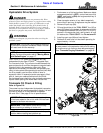
NOTE: Drain old oil filters of all free flowing oil prior
to disposal. Place used oil and oil filter in
appropriate containers and deliver to an approved
collection facility.
e. Tighten oil filter cover to specified torque. See
“Additional Torque Values” on page 58 for
specified torque value.
Refer to Figure 5-8:
10. Remove top port vent plug (#4). This will allow the
transaxles to vent during oil fill.
11. Remove expansion tank cap (#8) and fill transaxle by
adding specified oil to expansion tank (#7) until oil
appears at the top port vent plug opening (#4). See
“Hydrostatic Transaxle Specifications &
Capacities” on page 51 for oil type and quantity.
12. Install top port vent plug (#4) and tighten.
13. Continue to add oil to the expansion tank until oil
reaches the full cold line (approximately 3/8" up from
the bottom of expansion tank).
14. Reinstall expansion tank cap (#8) by hand. Be
careful to not overtighten.
15. Wipe off all excess oil. A degreaser may be needed
to remove excess oil.
16. Repeat steps 1 thru 15 for the right side.
Transaxle Purging Procedures
It is critical that air is purged from the hydrostatic drive
system to keep it efficient. This is because compression
and expansion rate of air is higher than that of oil.
This purge procedure should be implemented any time
the hydrostatic system has been opened to facilitate
maintenance or after oil has been changed.
Symptoms of a hydrostatic system that has not been
purged may be:
1. Noisy operation.
2. Lack of power after short term operation.
3. High operation temperature and excessive
expansion of oil.
Refer to Figure 5-8 on page 39:
Before purging system, make sure fill tubes (#5) are full
of oil and expansion tanks (#7) are filled to the cold full
line (#6). Squeeze all air from fill tubes and add oil if
expansion tanks are low. See “Hydrostatic Transaxle
Specifications & Capacities” on page 51 for oil
specifications. The following procedures are best
performed with mower drive wheels off the ground and
then repeated under normal operating conditions. If this
is not possible, the procedure should be performed in an
open area free of any objects or bystanders.
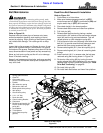
1. Open both transaxle bypass valves (#9) by rotating
the valves counterclockwise to “BYPASS”.
NOTE: Fill tube (#5) should be hand squeezed
several times to burp out air and to drain oil from the
expansion tank into the tube. Be careful not to
damage the tube while squeezing it. Use a
protective cloth wrapped around the tube if using a
tool to squeeze such as a pair of pliers.


