


12
Section 1: Assembly & Set-up
ZT60i & ZT72i (S/N 748110+) Accu-Z
®
Zero Turn Mowers 357-552M
Table of Contents
2/06/14
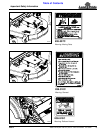
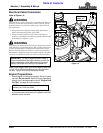
Folding ROPS Installation
In most instances your ROPS (Roll Over Protection
System) will come factory installed with ROPS folded
down at the hinge. Refer to “Unfolding The ROPS”
instructions below if mower is shipped with ROPS
attached. If mower is shipped with ROPS unattached,
see “Folding ROPS Assembly” below.
!
DANGER
Low structures can make contact with the ROPS and flip the
mower over backwards. Fold ROPS down when driving under
low structures such as tree limbs and doorways.
!
CAUTION
Keep hands and other body extremities away from hinged
pinch points while folding and unfolding ROPS.
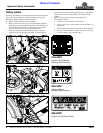
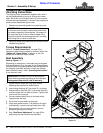
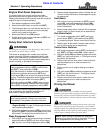
Unfolding The ROPS
Refer to Figure 1-4:
ROPS locking knobs (#1) are included in an attached
parts bag.
1. Remove hitch pins (#2).
2. Rotate upper ROPS frame up to position shown.
3. Reinsert hitch pins (#2) and secure with attached
hairpins.
4. Install locking knobs (#1) and hand tighten.
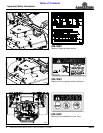
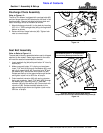
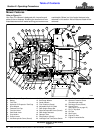
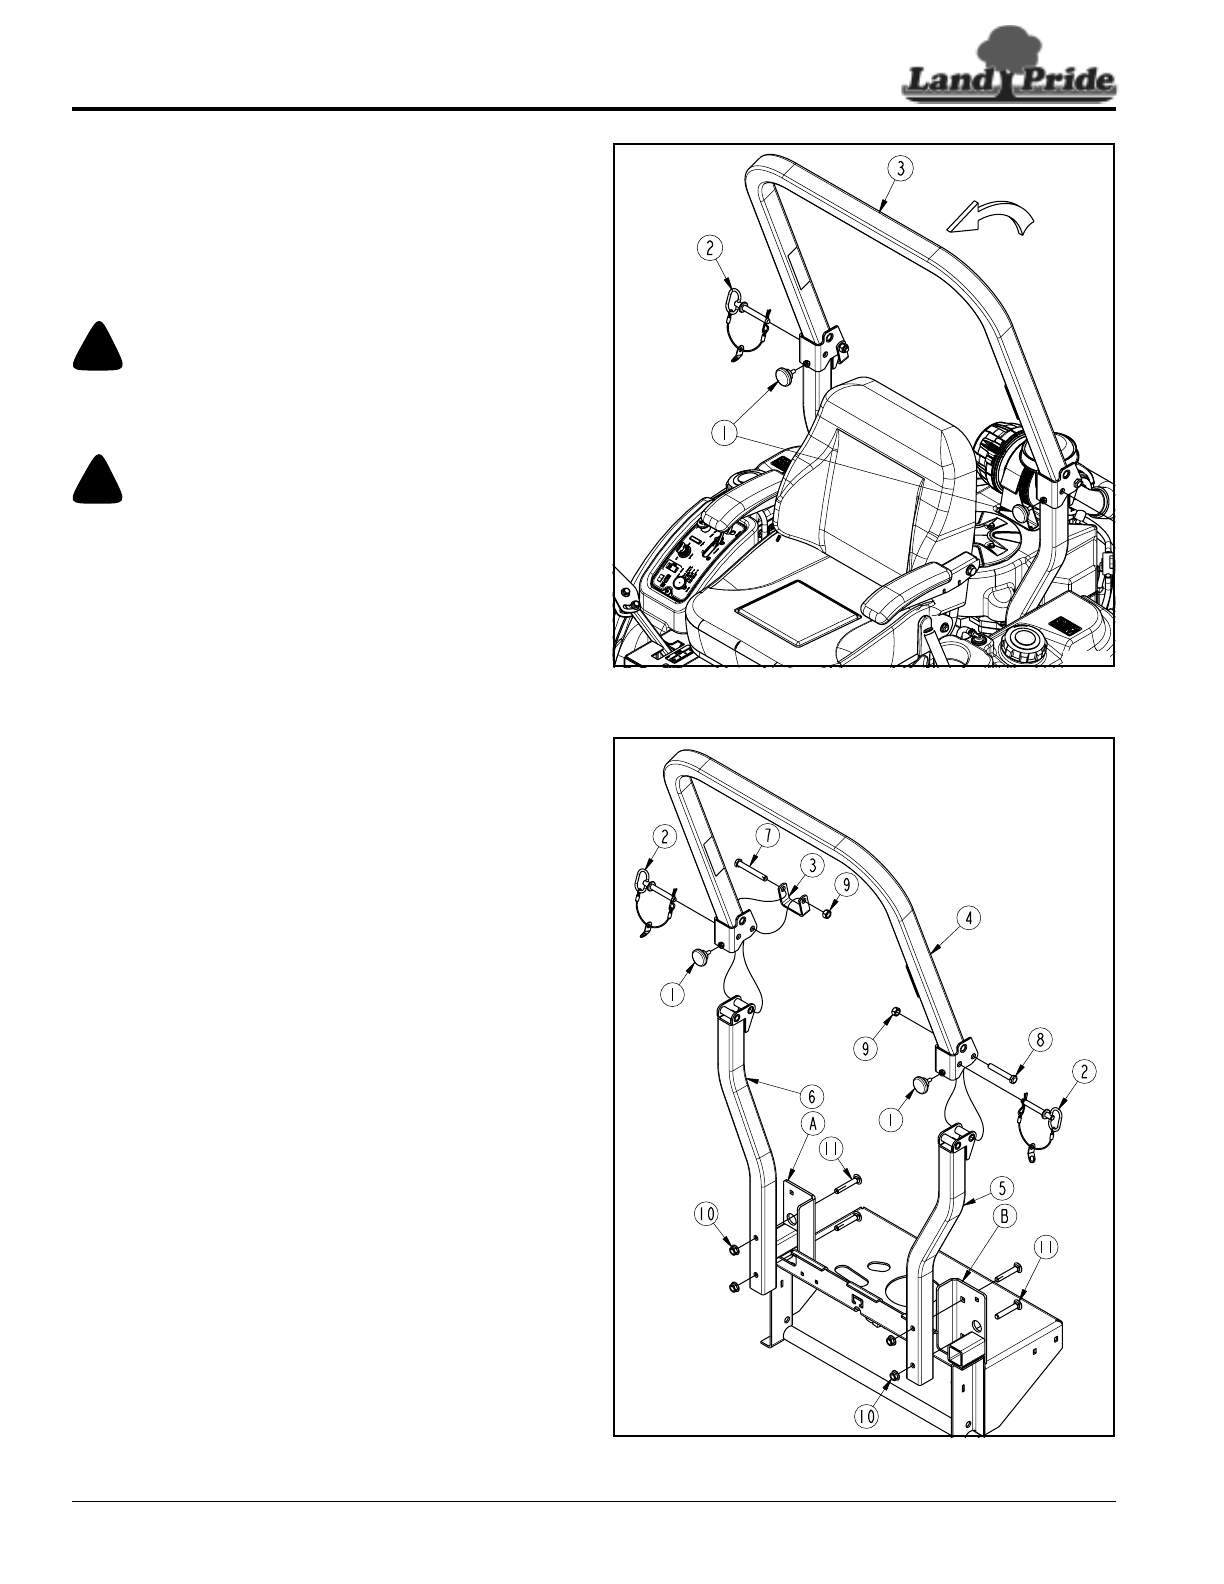
Folding ROPS Assembly
Refer to Figure 1-5:
1. Attach lower right-hand ROPS tube (#6) to mounting
bracket “A”. Make sure hinge at the top faces back.
2. Insert two 1/2"-13 x 3" GR5 carriage bolts (#11)
through mounting bracket “A” and ROPS tube (#6).
Secure with 1/2" hex flange lock nuts (#10). Draw
lock nuts up snug, do not tighten.
3. Attach lower left-hand ROPS tube (#5) to mounting
bracket “B”. Make sure hinge at the top faces back.
4. Insert two 1/2"-13 x 3" GR5 carriage bolts (#11)
through mounting bracket “B” and ROPS tube (#5).
Secure with 1/2" hex flange lock nuts (#10). Draw
lock nuts up snug, do not tighten.
5. Attach upper ROPS tube (#4) to lower left ROPS
tube (#5) with 1/2"-13 x 3 1/4" GR5 cap screw (#8)
and hex lock nut (#9). Do not tighten.
6. Attach upper ROPS tube (#4) and ROPS stop (#3) to
lower right ROPS tube (#6) with 1/2" x 3 3/4" GR5
cap screws (#7) and hex lock nut (#9). Do not tighten.
7. Tighten hex flange lock nuts (#10) to 76 ft-lbs. Draw
hex lock nuts (#9) up snug. Do not tighten.
8. Rotate ROPS loop end (#4) up and insert locking
pins (#2). Secure locking pins with hair pin clips
attached to locking pins.
9. Install locking knobs (#1) and hand tighten.
Folding ROPS Bar Assembly
Figure 1-4
Folding ROPS Bar Assembly
Figure 1-5
33824
30137