


31
Section 3: Adjustments
ZT60i & ZT72i (S/N 748110+) Accu-Z
®
Zero Turn Mowers 357-552M
Table of Contents
2/06/14
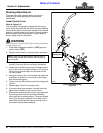
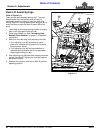
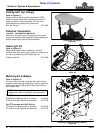
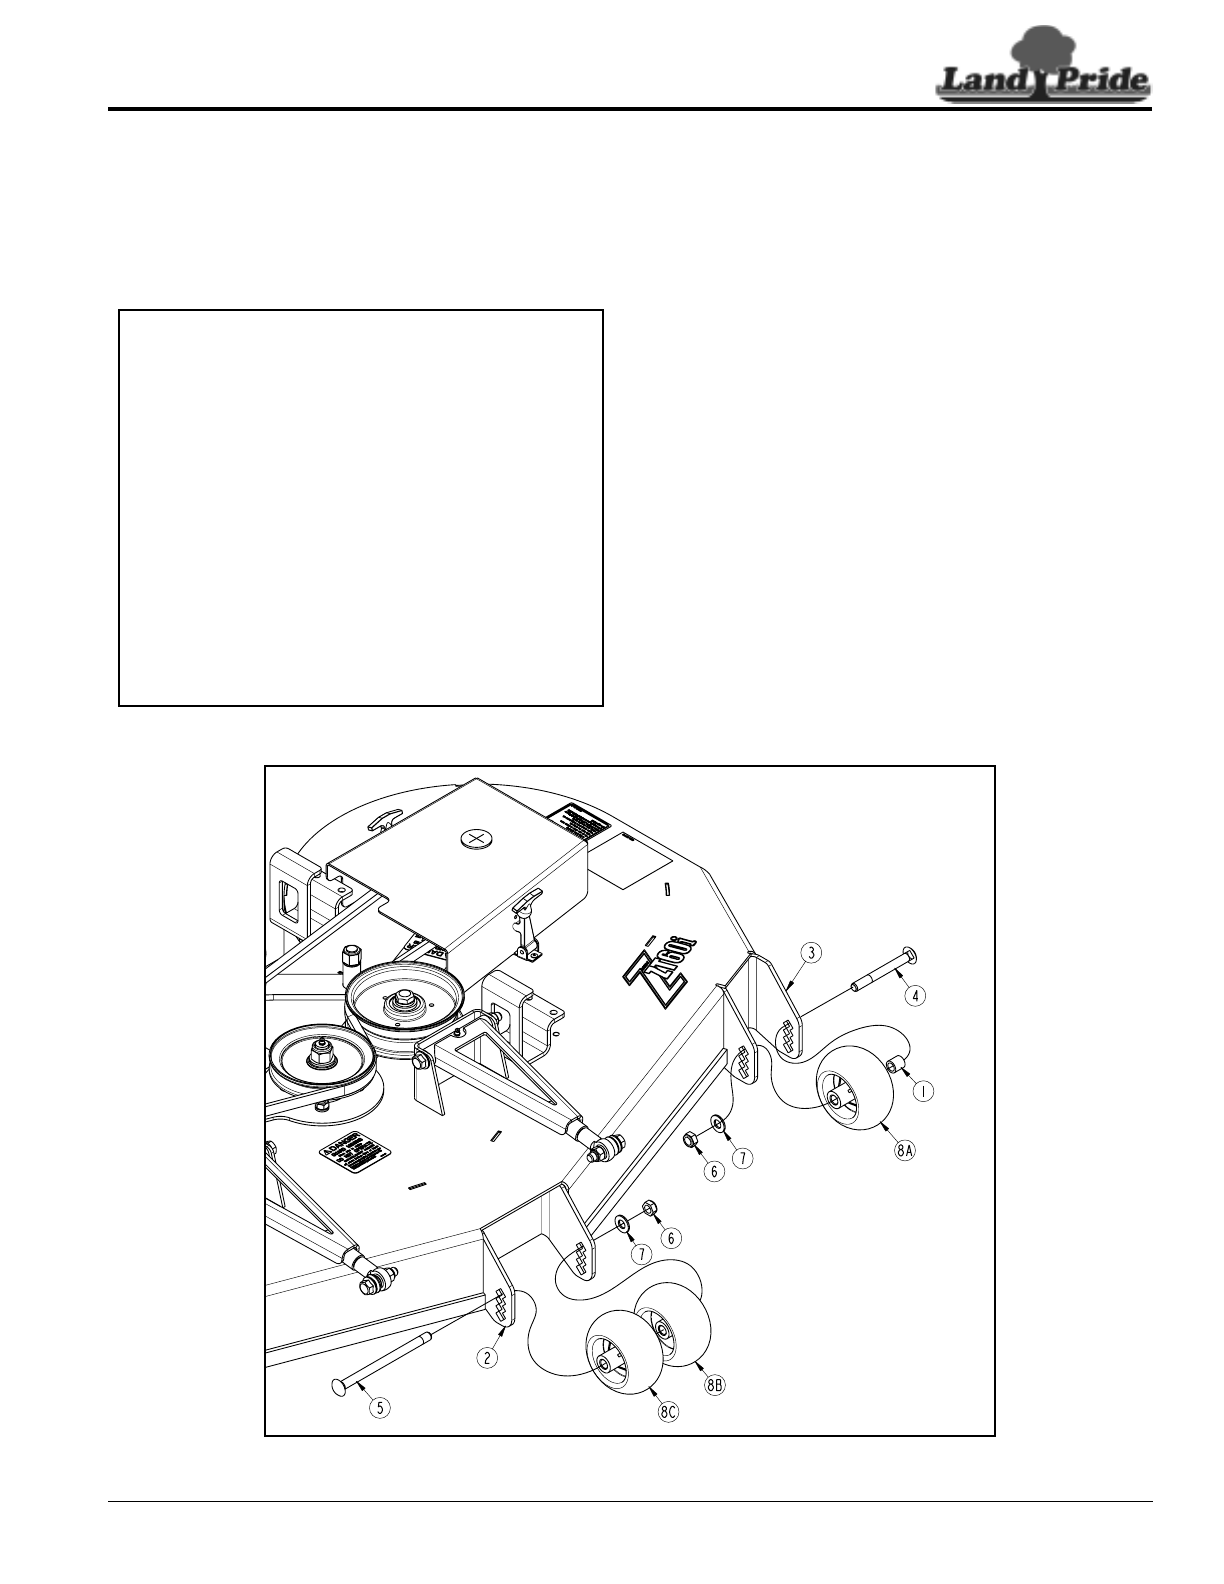
Anti-Scalp Rollers
Refer to Figure 3-12:
The mower has four anti-scalping rollers. Their purpose
is to minimize scalping of the ground when mowing on
rough uneven terrain. Their height should be adjusted
after setting stop pin to the preferred cutting height.
IMPORTANT: The anti-scalp rollers will extend
below deck bottom the distance shown below when
mounted in the following holes:
• Top hole: rollers are even with deck bottom.
• 2nd hole: rollers are 1/2" below deck bottom.
• 3rd hole: rollers are 1" below deck bottom.
• 4th hole: rollers are 1 1/2" below deck bottom.
• Bottom hole: rollers are 2" below deck bottom.
For protection of deck and blades, it is best if the anti-
scalp rollers are mounted in the lowest holes
possible without them touching the ground.
For example:
If deck cutting height is set 1 1/2" above ground, the
rollers should be mounted in the 3rd hole down or 1"
below the deck bottom.
Anti-Scalp Roller Adjustment
Figure 3-12
33780
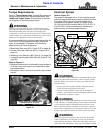
1. Position mower and deck on a flat level surface.
2. Set deck to the preferred mowing height. (Refer to
“Deck Cutting Height and Leveling” on page 29.)
3. At middle bracket (#2), remove 1/2" hex nylock jam
nut (#6) and remove carriage bolt (#5).
4. Reposition both anti-scalp rollers (#8B & #8C) up or
down in mounting bracket (#2) until rollers are in the
lowest hole possible without rollers touching the
ground. See important note on this page.
5. Reinstall carriage bolt (#5) through anti-scalp
rollers (#8B & #8C) and secure to mounting
bracket (#2) with flat washer (#7) and hex nylock
nut (#6). Tighten nylock nut to the correct torque.
6. At end brackets (#3), remove nylock jam nut (#6) and
remove carriage bolts (#4).
7. Reposition end anti-scalp rollers (#8A) and
spacers (#1) on end brackets (#3) up or down until
rollers are in the lowest possible mounting hole
without rollers touching the ground. See important
note on this page.
8. Reinstall carriage bolt (#4) through anti-scalp
rollers (#8A) and spacer (#1) to end mounting
brackets (#3) with flat washer (#7) and hex nylock
nuts (#6). Tighten nylock nuts to the correct torque