DISCUSSION:
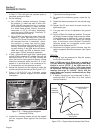
The Cylinder Leak Down Tester checks the sealing
(compression) ability of the engine by measuring air
leakage from the combustion chamber. Compression
loss can present many different symptoms. This test
is designed to detect the section of the engine where
the fault lies before disassembling the engine.
PROCEDURE:
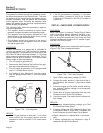
1. Remove a spark plug.
2. Gain access to the flywheel. Remove the valve
cover.
3. Rotate the engine crankshaft until the piston
reaches top dead center (TDC). Both valves
should be closed.
4. Lock the flywheel at top dead center.
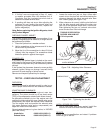
5. Attach cylinder leak down tester adapter to spark
plug hole.
6. Connect an air source of at least 90 psi to the leak
down tester.
7. Adjust the regulated pressure on the gauge to 80
psi.
8. Read the right hand gauge on the tester for cyl-
inder pressure. 20 percent leakage is normally
acceptable. Use good judgement, and listen for air
escaping at the carburetor, the exhaust, and the
crankcase breather. This will determine where the
fault lies.
9. Repeat Steps 1 through 8 on remaining cylinder.
RESULTS:
❏Air escapes at the carburetor – check intake valve.
❏Air escapes through the exhaust – check exhaust
valve.
❏Air escapes through the breather – check piston
rings.
❏Air escapes from the cylinder head – the head gas-
ket should be replaced.
CHECK COMPRESSION:
Lost or reduced engine compression can result in (a)
failure of the engine to start, or (b) rough operation.
One or more of the following will usually cause loss of
compression:
❏ Blown or leaking cylinder head gasket.
❏ Improperly seated or sticking-valves.
❏ Worn Piston rings or cylinder. (This will also result in
high oil consumption).
NOTE: It is extremely difficult to obtain an accu-
rate compression reading without special equip-
ment. For that reason, compression values are
not published for the V-Twin engine. Testing has
proven that an accurate compression indication
can be obtained using the following method.
PROCEDURE:
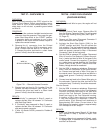
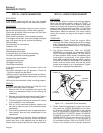
1. Remove both spark plugs.
2. Insert a compression gauge into either cylinder.
3. Crank the engine until there is no further increase
in pressure.
4. Record the highest reading obtained.
5. Repeat the procedure for the remaining cylinder
and record the highest reading.
RESULTS:
The difference in pressure between the two cylinders
should not exceed 25 percent. If the difference is
greater than 25 percent, loss of compression in the
lowest reading cylinder is indicated.
Example 1: If the pressure reading of cylinder #1 is
165 psi and of cylinder #2, 160 psi, the difference is
5 psi. Divide “5” by the highest reading (165) to obtain
the percentage of 3.0 percent.
Example 2: No. 1 cylinder reads 160 psi; No. 2 cylinder
reads 100 psi. The difference is 60 psi. Divide “60” by
“160” to obtain “37.5” percent. Loss of compression in
No. 2 cylinder is indicated.
If compression is poor, look for one or more of the fol-
lowing causes:
❏ Loose cylinder head bolts.
❏ Failed cylinder head gasket.
❏ Burned valves or valve seats.
❏ Insufficient valve clearance.
❏ Warped cylinder head.
❏ Warped valve stem.
❏ Worn or broken piston ring(s).
❏ Worn or damaged cylinder bore.
❏ Broken connecting rod.
❏ Worn valve seats or valves.
❏ Worn valve guides.
NOTE: Refer to Engine Service manual P/N xxxxxx
for further engine service information.
TEST 36 – CHECK OIL PRESSURE SWITCH
DISCUSSION:
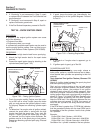
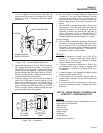
Also see “Operational Analysis” on Pages 18-23. The
Low Oil Pressure Switch is normally-closed, but is
held open by engine oil pressure during cranking and
startup. Should oil pressure drop below a safe level,
the switch contacts will close to ground the Wire 85
circuit. Printed Circuit Board action will then initiate an
automatic shutdown.
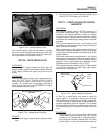
If the switch fails CLOSED, the engine will crank and
start, but will then shut down after a few seconds.
If the switch fails OPEN, low oil pressure will not result
in automatic shutdown.
Page 60
Section 7
DIAGNOSTIC TESTS


