


Maintenance
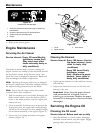
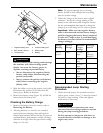
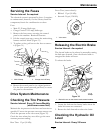
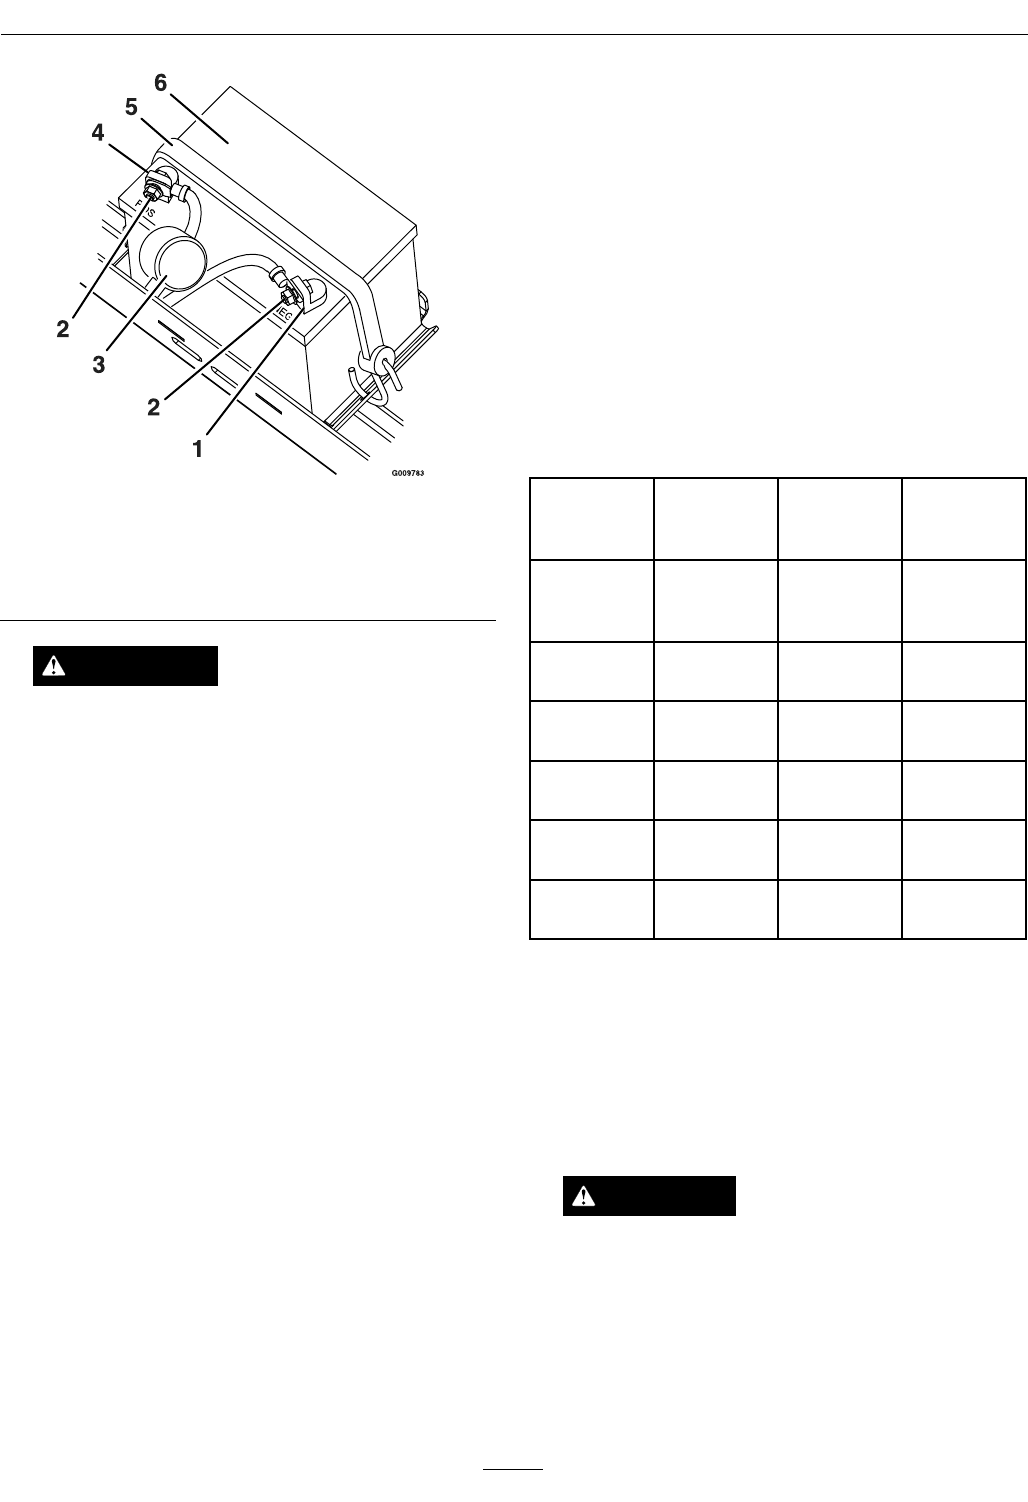
Figure 29
1. Negative battery post 4. Positive battery post
2. Bolt, washer, and nut 5. Battery strap
3. Terminal boot 6. Battery
WARNING
Incorrect battery cable routing could damage
the machine and cables causing sparks.
Sparks can cause the battery gasses to
explode, resulting in personal injury.
• Always disconnect the negative (black)
battery cable before disconnecting the
positive (red) cable.
• Always connect the positive (red) battery
cable before connecting the negative
(black) cable.
5. Slide the rubber cover up the positive (red) cable.
Disconnect the positive (red) cable from the
battery post. Retain all fasteners.
6. Remove the battery strap (Figure 29) and lift the
battery from the battery tray.
Checking the Battery Charge
1. Remove the battery from the chassis; refer to
Removing the Battery.
2. Allowing batteries to stand for an extended
period without recharging them will result in
reduced performance and service life. To preserve
optimum battery performance and life, recharge
batteries in storage when the open circuit voltage
drops to 12.4 volts.
Note: To prevent damage due to freezing,
battery should be fully charged before putting
away for winter storage.
3. Check the voltage of the battery with a digital
voltmeter. Locate the voltage reading of the
battery in the table below and charge the battery
for the recommended time interval to bring the
charge up to a full charge of 12.6 volts or greater.
Important: Make sure the negative battery
cable is disconnected and the battery charger
used for charging the battery has an output of
16 volts and 7 amps or less to avoid damaging
the battery (see chart below for recommended
charger settings).
Voltage
Reading
Percent
Charge
Maximum
Charger
Settings
Charging
Interval
12.6 or
greater
100%
16 volts/7
amps
No
Charging
Required
12.4 – 12.6 75–100%
16 volts/7
amps
30 Minutes
12.2 – 12.4 50–75%
16 volts/7
amps
1 Hour
12.0–12.2 25–50%
14.4 volts/4
amps
2 Hours
11.7–12.0 0–25%
14.4 volts/4
amps
3 Hours
11.7 or less
0%
14.4 volts/2
amps
6 Hours or
More
Recommended Jump Starting
Procedure
1. Check the weak battery for terminal corrosion
(white, green, or blue “snow”), it must be cleaned
off prior to jump starting. Clean and tighten
connections as necessary.
CAUTION
Corrosion or loose connections can cause
unwanted electrical voltage spikes at anytime
during the jump starting procedure.
Do Not attempt to jump start with loose or
corroded battery terminals or damage to the
engine may occur.
37