


3
ADDITIONAL SAFETY RULES FOR WOOD SHAPERS
1. WARNING: DO NOT OPERATE YOUR WOOD
SHAPER UNTIL IT IS COMPLETELY ASSEMBLED AND
INSTALLED ACCORDING TO THE INSTRUCTIONS.
2. IF YOU ARE NOT thoroughly familiar with the
operation of Wood Shapers, obtain advice from your
supervisor, instructor or other qualified person.
3. MAKE SURE wiring codes and recommended
electrical connections are followed and that machine is
properly grounded.
4. NEVER turn the shaper “ON” before clearing the
table of all objects (tools, scraps of wood, etc.).
5. DO NOT process materials less than 12" in length or
4 in width without special supporting fixtures. Use push
sticks, featherboards or holddowns whenever possible.
6. ALWAYS use a miter gage and clamp attachment
when edge shaping work less than 6" wide. The fence
should be removed during this operation.
7. AVOID awkward hand positions where a sudden slip
could allow your hand to contact the cutter.
8. KEEP hands away from cutting tool.
9. NEVER run the stock between the fence and the
cutter.
10. DO NOT feed material that is warped, contains
knots or is embedded with foreign objects, such as nails
or
staples.
11. NEVER start the shaper with the stock in contact
with the cutter.
12. NEVER reach under the table while the machine is
running.
13. NEVER perform layout, assembly or set-up work on
the table while the shaper is operating.
14. KEEP cutters sharp and free from rust and pitch.
15. THE FENCE halves should be adjusted so that the
cutter opening is never more than is required to clear the
cutter.
16. ALWAYS lock fence hardware after making fence
adjustments.
17. MAKE CERTAIN cutters are properly secured before
starting machine.
18. DO NOT perform any operation freehand. ALWAYS
use fence for straight shaping; miter gage for edge
shaping; and starting pin and rub collars for curve
shaping.
19. ALWAYS keep front motor access panel closed
while operating shaper.
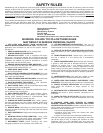
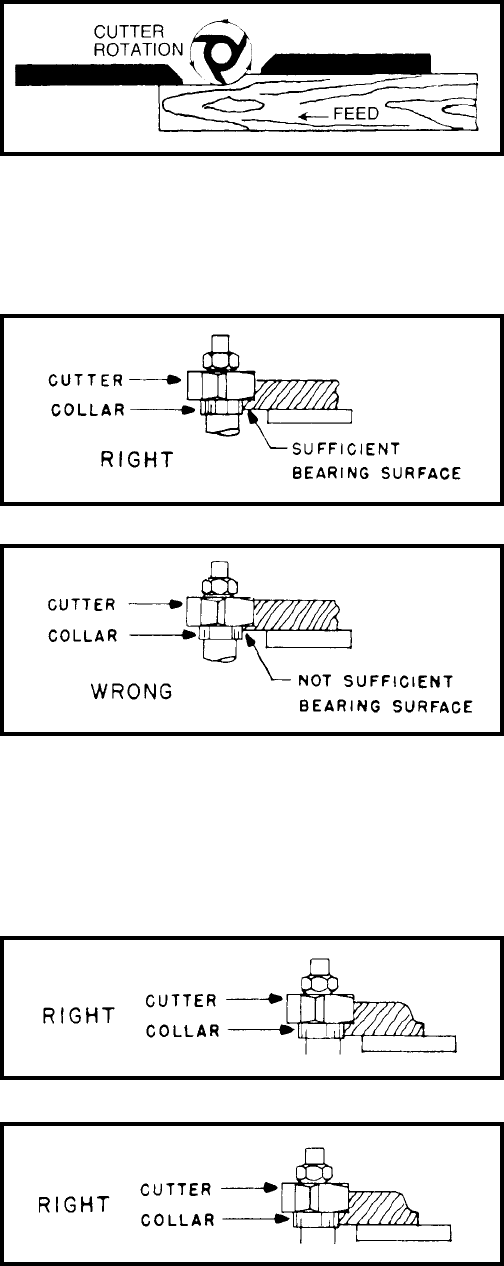
20. ALWAYS feed against the cutter rotation, as shown
in Fig. A.
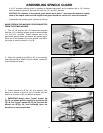
21. WHEN SHAPING with collars and starting pin, the
collar MUST have sufficient bearing surface, as shown in
Fig. B. Fig. C, illustrates the wrong way for this operation
as the collar DOES NOT have sufficient bearing surface.
Fig. A
Fig. B
Fig. C
22. WHEN SHAPING with collars and starting pin, the
work must be fairly heavy in proportion to the cut being
made as shown in Fig. D. UNDER NO CIRCUMSTANCES
should short work of light body be shaped against the
collars as shown in Fig. E.
Fig. D
Fig. E