


32 33
32 33
WARNING
!
WARNING
!
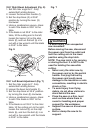
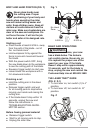
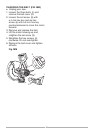
To avoid injury, after completing a
cut and releasing the trigger switch,
allow the blade brake to activate and
stop the blade before raising the
cutting head.
To avoid injury, check and tighten
the arbor bolt periodically.
Fig. AA
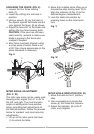
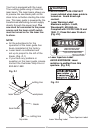
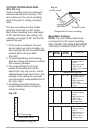
SLIDING FENCE (FIG. BB)
1.
Unlock the fence cam locking knob
(1) by pushing it toward the rear of
the machine.
2. Extend the fence (2) by sliding it out
to match the degree of the bevel cut.
Lock the fence cam locking lever
by pushing it IN toward the fence.
NOTE: When transporting the saw,
always secure the sliding fence in
the collapsed position (toward the
saw blade).
Fig. BB
●
C
AUTION-Use of controls or
performance of procedures other
than those specified herein may
result in hazardous radiation
exposure.
●
CAUTION-The use of optical
instruments with this product will
increase eye hazard.
●
Do not attempt to repair or
disassemble the laser. If
unqualified persons attempt to
repair this laser product, serious
injury may result. Any repair
required on this laser product
should be performed by a Sears
or other qualified service dealer.
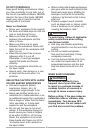
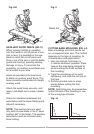
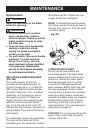
TO TURN SAW ON (FIG. AA)
To reduce the likelihood of accidental
starting, a lock-off switch (3) is located
on top of the switch handle. The lock-
off switch (3) must be pressed forward
before the trigger switch (1) can be
activated and the miter saw started.
This miter saw is equipped with an
ON/OFF trigger switch (1). The trigger
switch should be squeezed to turn the
miter saw ON.
NOTE: Make the ON/OFF switch
childproof. Insert a padlock or chain
with a padlock through the hole (2) in
the trigger switch, locking the tool’s
switch and preventing children and
other unauthorized users from turning
the machine on.
The miter saw is equipped with an
automatic blade brake. When the
trigger switch is released, the electric
blade brake will stop the blade in 10
seconds.
1
2
3
1
2