18 19
18 19
To empty the dust bag, squeeze the
metal collar and remove from exhaust
port. Open zipper on underside of bag
and empty into waste container.
NOTE: Check frequently, and empty
bag before it gets full.
NOTE: Remove bag when cutting non-
ferrous metal workpieces.
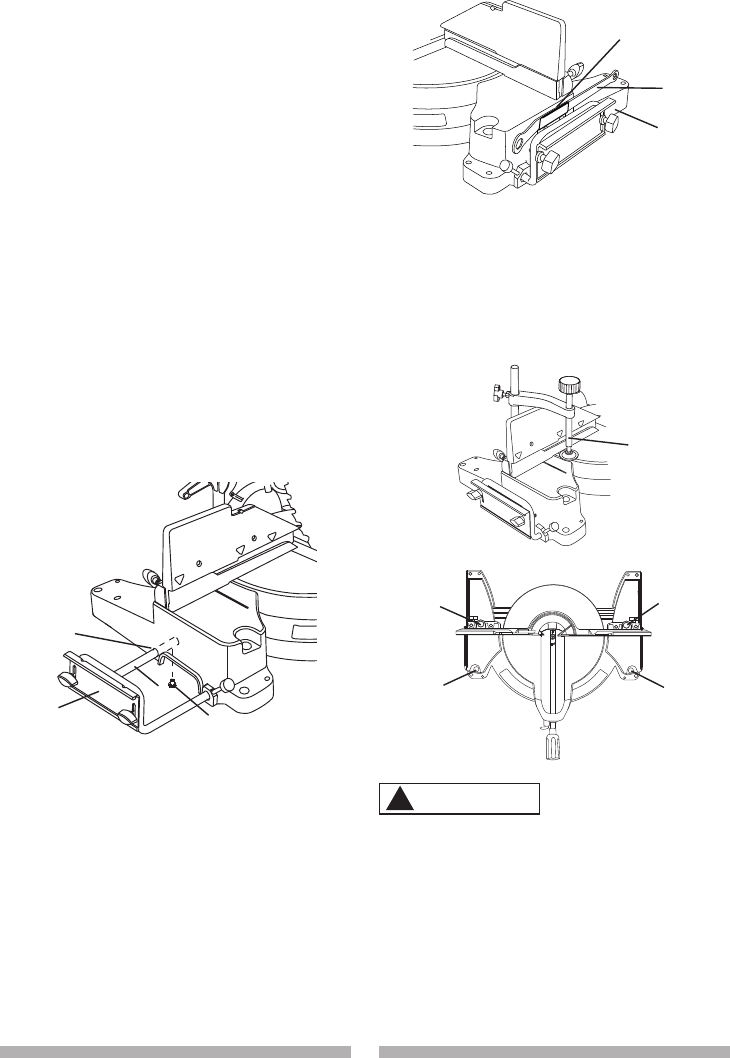
INSTALLING THE EXTENSION WING
ASSEMBLY (FIG. D)
1. Insert the extension wing bars (1)
into the holes (2) in the base.
2. Thread one extension wing stop
screw (4) into the end of the rear
extension wing bar (1). Verify that
the screw is fully threaded into the
corresponding hole in the extension
wing.
3. Repeat steps 1 through 2 for the
other side extension wing.
Fig. D
NOTE: The arm brackets (3) serve
two purposes: To act as a stop block
for repetitive cuts and to level the
workpiece when the extension wings
are fully extended for additional work
support.
SAW BLADE WRENCH (FIG. E)
1.
For convenient storage and
prevention of loss, there is a slot (1)
in the right side of saw base (2) for
storing the blade wrench (3) when
not in use.
Fig. E
INSTALLING THE SAFETY HOLD-
DOWN CLAMP (FIG. F)
1. Place the hold-down clamp assembly
(1) in one of the mounting holes (2)
as shown.
Fig. F
● Only use a 12 in. diameter
blade.
● To avoid injury from an
accidental start, make sure the
switch is in the OFF position
and plug is not connected to the
power source.
WARNING
!
1
3
2
1
2
3
4
1
2
2
2
2


