T190 Compact Track Loader
Operation & Maintenance Manual 100
DRIVE BELT
Belt Adjustment
Stop the engine.
Open the rear door and disconnect the negative (-) cable
from the battery.
Remove three belt shield fasteners and remove the belt
shield.
Figure 181
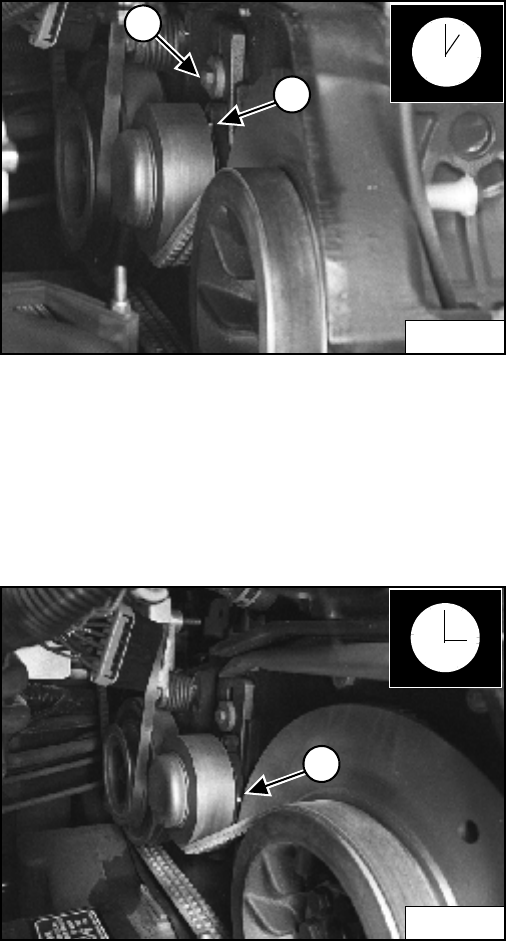
Loosen the bolt (1) [Figure 181] on the spring loaded
drive idler.
NOTE: The pointer will be at the 1 o'clock position (2)
[Figure 181] when the belt tensioner is not
under spring tension.
Figure 182
Push the idler pulley against the belt, using a pry bar
[Figure 182]. The pointer will be at the 3 o'clock
position (1) [Figure 182] when the idler pulley is against
the stop (maximum movement).
Raise the idler assembly slightly so that the pulley is
operating on spring tension and not against the stop.
NOTE: Do not set the idler against the travel stop in
the 3 o'clock position.
Tighten the mounting bolt (1) [Figure 182] to 34-38 Nm
torque.
Run the engine for a few minutes. Stop the engine and
recheck the pointer position.
Readjust if necessary.
After the idler has been in service, readjust when the
pointer reaches the 1 o'clock position.
Install the belt shield and fasteners.
Connect the negative (-) battery cable.
Close the rear door.
Belt Replacement
Follow the steps above to loosen the drive belt tensioner.
Remove the bolt (1) [Figure 182] from the tensioner and
remove the tensioner assembly.
Remove the fan drive belt.
Remove the drive belt from the pump pulley and flywheel
and remove the belt from the loader.
Install the new drive belt. Install the belt tensioner
assembly.
Install the fan drive belt.
Adjust the drive belt, reinstall previously removed
components and continue procedure from Adjusting The
Drive Belt above.
Run the machine for 5 hours and then check belt
adjustment again.
Readjust as necessary.
N-18436
2
1
N-18454
1


