Page 30
11 .2 Draining and Refilling
About every 3 to 6 months, you will want to replace the hot tub’s water.
The frequency depends on a number of variables including the frequency of
use, number of users, attention paid to water quality maintenance, etc. You
will know it is time for a change when you cannot control sudsing and/or
you can no longer get the normal feel or sparkle to the water even though
the key water balance measurements are all within the proper parameters.
CAUTION! READ THIS BEFORE DRAINING: To prevent damage to the
hot tub’s components, turn off power to the hot tub at the circuit
breaker before draining it. Do not turn the power back on until your hot
tub has been refilled. There are certain precautions to keep in mind when
draining your hot tub. If it is extremely cold, and the hot tub is outdoors,
freezing could occur in the lines or the equipment (see “WINTERIZING”,
page 32). On the other hand, if it is hot outdoors, do not leave the hot tub’s
surface exposed to direct sunlight for long periods.
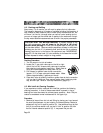
Draining Procedure:
1. Turn off power to hot tub at breaker.
2. Locate the 3” gray drain valve cap on the left or right
side of the hot tub. Unscrew drain valve cap to expose
the underlying male garden hose fitting. Attach hose to
fitting and route opposite end away from hot tub.
3. Pull outward on garden hose at drain connection
(approx. 3/8”) to open valve and release water. Water
drains at approximately 3 gallons per minute.
4. Close drain valve by pushing inward on garden hose at drain connection
until you feel it bottom out, then remove garden hose, install gray drain
cap, and refill spa. Refer to “Start-Up Instructions” (page 13).
11 .3 Mini Intelli-Jet Cleaning Procedure
If you experience a sticky rotational Mini Intelli-Jet, perform the following
cleaning procedure. In most of these cases debris is present in the jet
bearings and must be cleared to achieve proper operation. Note: This pro-
cedure is considered normal maintenance for this type of jet.
Procedure
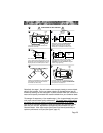
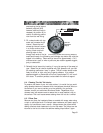
1. Remove jet internal from hot tub wall fitting by placing your hand around
the outer jet adjustment ring and rotating it counterclockwise. Rotate jet
adjustment ring until it stops at position (A). Use additional force at posi-
tion (A) to continue rotation until you feel a “click” at position (B); then
feel the internal release at position (C). It may seem like your are


