


14
engine while in storage.To avoid engine problems,
the fuel system should be emptied before storage for
30 days or longer. Drain the gas tank, start the engine
and let it run until the fuel lines and carburetor are
empty. Use fresh fuel next season. See storage
Instructions for additional information. Never use
engine or carburetor cleaner products in the fuel
tank or permanent damage may occur.
Fill Oil
The engine was shipped with oil in the engine. Check
the levell of oil before each operation and make sure
there is adequate oil in the engine. Refer to instructions
on page 18 for correct procedure.
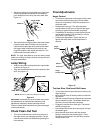
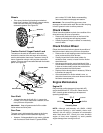
To Start Engine
Electric Starter
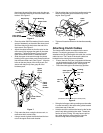
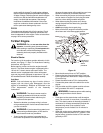
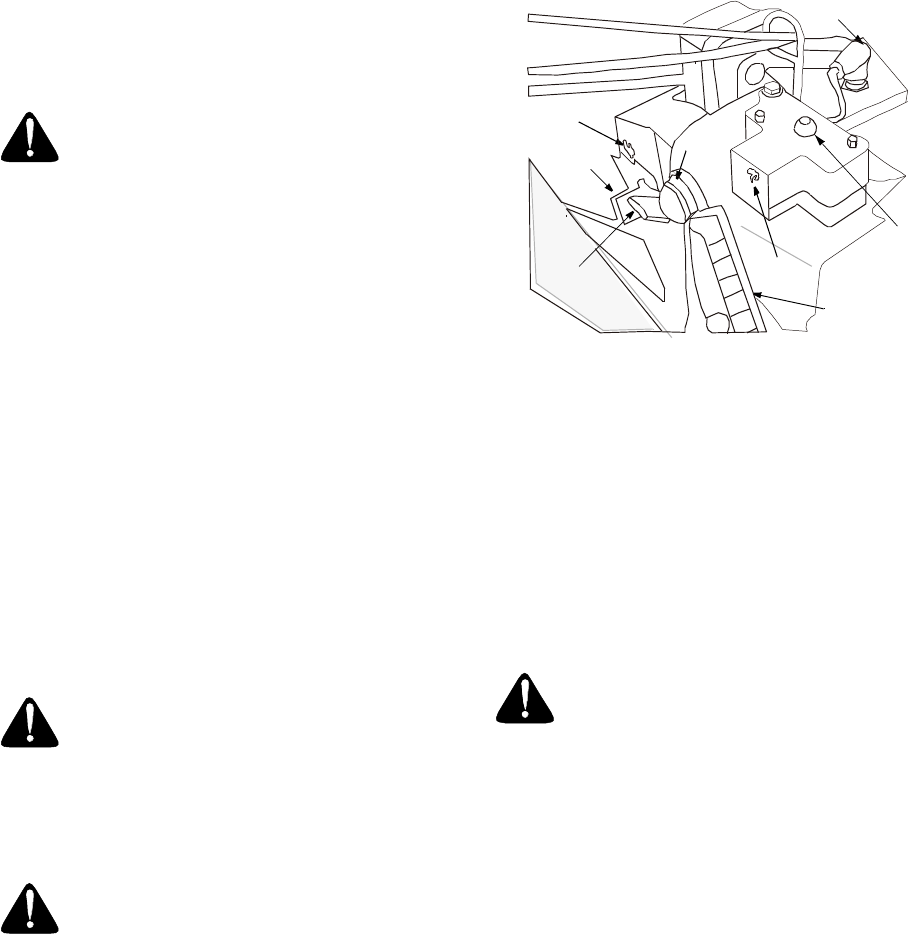
For location of all the engine controls referred to in this
section, see Figure 17 inset. For illustration of starting
instructions, see Figure 18 .
Before starting, make sure that the engine has suffi-
cient oil. The snow thrower engine is equipped with a
120 volt A.C. electric starter and recoil starter. The
electric starter is equipped with a three-wire power
cord and plug and is designed to operate on 120 volt
AC household current. Follow all instructions carefully.
Cold Start
NOTE: If the unit shows any sign of motion (drive or
augers) with the clutch grips disengaged, shut the
engine off immediately. Readjust as instructed in the
“Final Adjustments” section of the Assembly
Instructions.
• Determine whether your house wiring is a three-
wire grounded system. Ask a licensed electrician if
you are not certain.
• If your house wiring system is grounded and a
three-hole receptacle is not available at the point
the snow thrower starter will normally be used, one
should be installed by a licensed electrician.
• When connecting the power cord, always connect
cord to starter on engine first, then plug the other
end into a three-hole grounded receptacle.
• When disconnecting the power cord, always
unplug the end from the three-hole, grounded
receptacle first.
• Attach spark plug wire to spark plug.
• Make sure that the auger drive and the traction
drive levers are in the disengaged position.
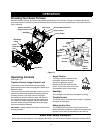
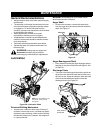
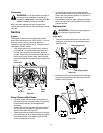
Figure 18
• Move throttle control lever to FAST position.
• Remove the keys from the plastic bag. Push key
into the ignition slot. Make sure it snaps into place.
Do not turn key.
• Rotate the choke knob to FULL choke position.
• Connect the power cord to the switch box on the
engine.
• Plug the other end of the power cord into a three-
hole, grounded 120 volt A.C. receptacle.
• Push down on the starter button until the engine
starts. Do not crank for more than 10 seconds at a
time. This electric starter is thermally protected. If
overheated, it will stop automatically and can be
restarted only when it has cooled to a safe
temperature (a wait of about 5 to 10 minutes is
required).
• When the engine starts, release the starter button
and slowly rotate the choke to OFF position. If the
engine falters, rotate the choke to FULL and then
gradually to OFF.
WARNING: Be sure no one other than the
operator is standing near the snow thrower
while starting or operating. Do not operate this
snow thrower unless the discharge chute
assembly has been properly installed and is
secured.
WARNING: The electric starter must be
properly grounded at all times to avoid the
possibility of electric shock which may be
injurious to the operator.
WARNING: If your house wiring system is not
a three-wire grounded system, do not use this
electric starter under any conditions.
WARNING: Do not use primer while starting
the engine with an electric starter.
Insert key
Move
choke
Move
throttle
Prime
Connect
Connect spark
plug wire
Pull starter if
Push
button
using Recoil
Starter
procedure
cord