


10
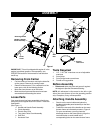
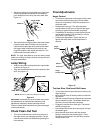
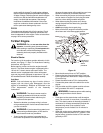
• Secure the right turn trigger cable to the right lower
handle using cable tie provided in the hardware
pack. Make sure not to wrap the drive cable. See
Figure 13 .
Figure 13
• Secure the left turn trigger cable to the lower handle
using the other cable tie. Make sure to route the
cable tie below the auger drive cable so that when
the trigger cable is secured by the cable tie, the
auger drive cable is left outside the cable tie. Trim
excess ends from each cable tie.
NOTE: The right side cable tie must be used to keep
cable from coming in contact with the moving shift arm
from the transmission.
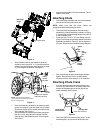
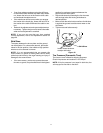
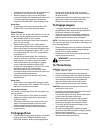
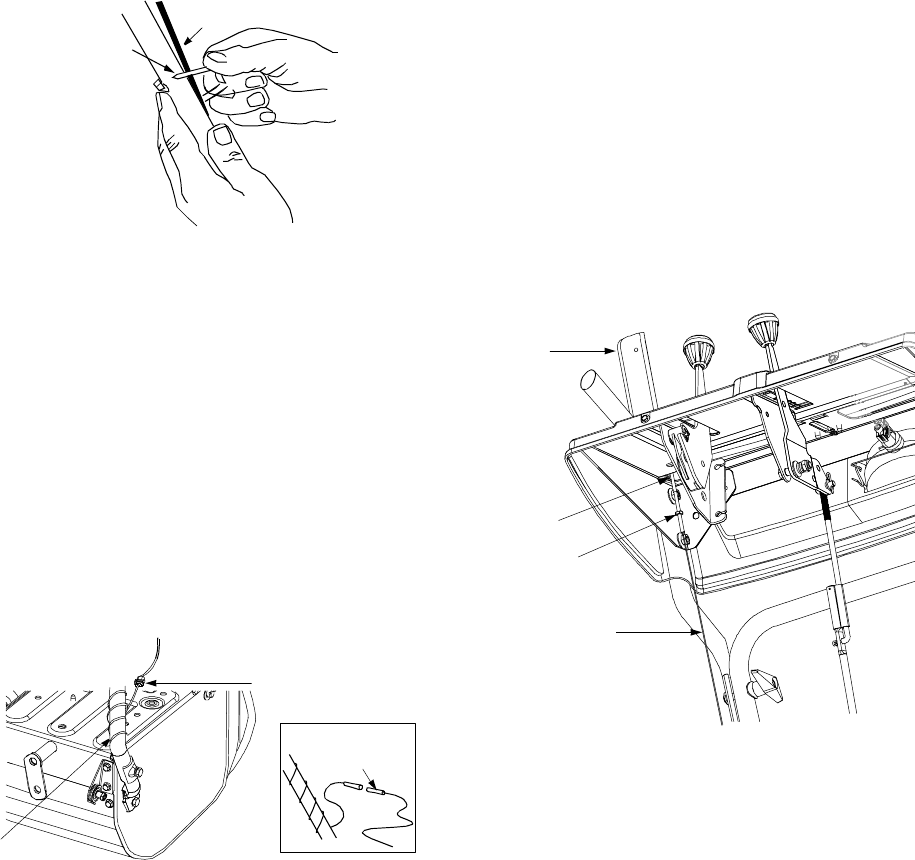
Lamp Wiring
• Wrap the wire from the lamp down the right handle
as shown in Figure 15.
• Plug wire into the alternator lead wire under the fuel
tank. See Figure 14 .
Figure 14
IMPORTANT:
Assemble your snow thrower, then check
the adjustments as instructed and make any final
adjustments necessary before operating the unit.
Failure to follow these instructions may cause damage
to the snow thrower.
Chute Clean-Out Tool
• This tool is fastened with a cable tie to the rear of
the auger housing for shipping purposes. Cut the
cable tie and remove the tool before operating the
snow thrower.
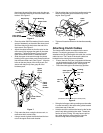
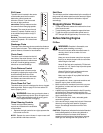
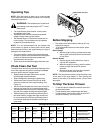
Final Adjustments
Auger Control
• To check the adjustment of the auger control, push
forward the left hand clutch grip until the rubber
bumper is compressed. There should be slack in
the clutch cable.
• Release the clutch grip. The cable should be
straight. Make certain you can depress the auger
control grip against the left handle completely.
• If adjustment is necessary, loosen the hex jam nut
and thread the cable in (for less slack) or out (for
more slack). See Figure 15.
• Recheck the adjustment. Tighten the jam nut
against the cable when correct adjustment is
reached.
Figure 15
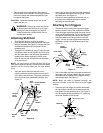
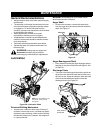
Traction Drive Clutch and Shift Lever
• Tip the snow thrower forward so that it rests on the
auger housing.
• Move the shift lever all the way forward to the sixth
(6) position.
• With the traction drive lever released, spin the snow
thrower wheels by hand. The wheels should turn;
however, you may feel some resistance.
• Engage the traction drive clutch grip. The wheels
should no longer turn.
• Now release the traction drive clutch grip, and spin
the wheels again.
• Move the shift lever back to the fast reverse
position, then all the way forward again. There
should be no resistance in the shift lever, and the
wheels should turn.
Cable Tie
Trigger Cable
Alternator Lead
Lamp Wire
Alternator
Lead
NOTE:
Wheels are omitted from illustration for clarity.
Auger
Control
Z-End
Jam Nut
Auger
Control Cable