


Powered Walk Behind Mower - CE Part No. 04016218 Rev G © Copyright 12/2006
™
4
ENGLISH
OPERATION (Continued)
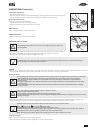
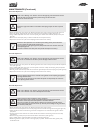
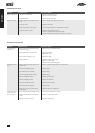
Installing the Grass catcher
• Raise the rear flap of the mower.
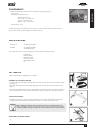
• Grasp the grass catcher by the top handle and position the grass catcher against the rear of the mower (refer figure 7).
• Lower the rear flap so that the back edge of the flap hooks over the matching lip on the grass catcher.
Removing the Grass catcher
• Grasp the grass catcher top handle and lift up.
• Raise the rear flap of the mower to release grass catcher.
• Lift the grass catcher clear of the mower and lower the rear flap.
MULCH PLUG
• Refer to the separate Mulch ‘n’ Catch Owners Manual.
GRASS DEFLECTOR
• Refer to the separate Grass Deflector Owners Manual.
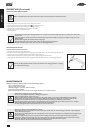
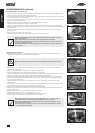
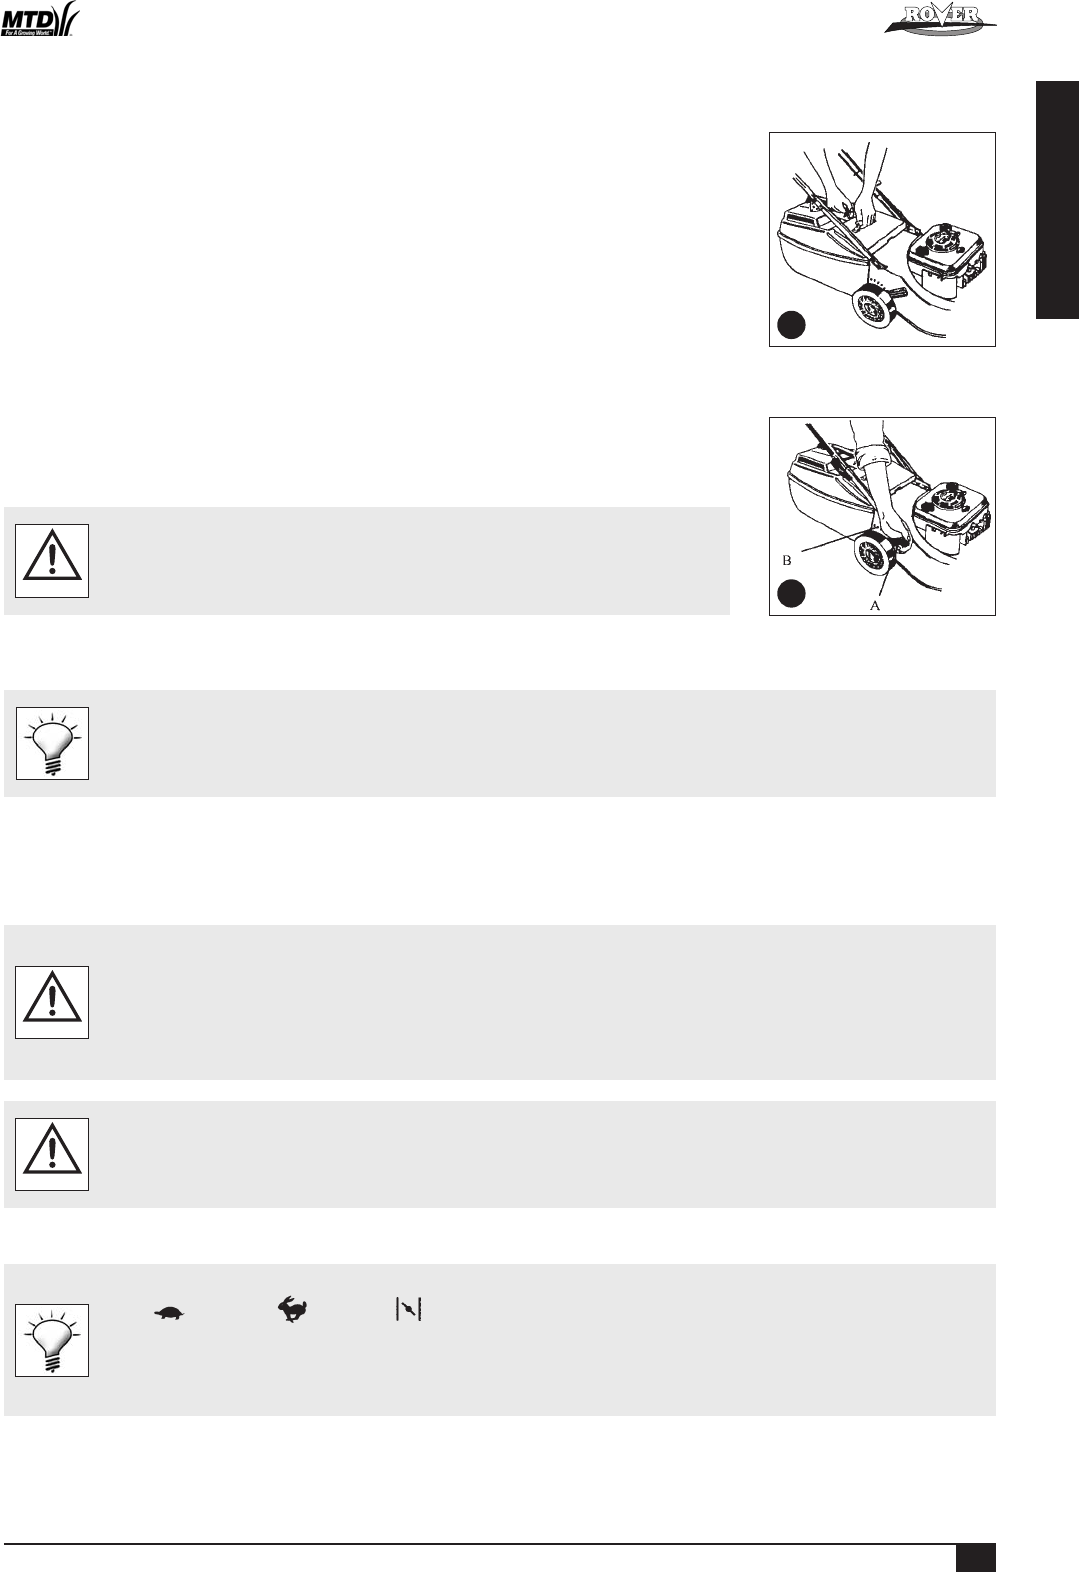
ADJUSTING THE CUT HEIGHT
• When setting the cut height stand to the rear of the machine with your feet well clear of
the cutting blades.
WARNING
• Grasp the height of cut lever (A) and apply an outward pressure to release the lever from the rack (B) (refer figure 8).
• Move the lever (while holding out) to the required height of cut position and engage the lever in the rack.
• Pushing the lever forward and down raises the cut height and vice versa.
It is advisable to start the mower in the high cut position and gradually drop the height notch by notch until the desired height is
achieved. Starting too low will leave a low spot in the lawn.
ENGINE
NOTE: The mowers covered in this manual have various engine types from various manufacturers. Included in the Mower Kit is an engine manual specific to each mower
which provides the details for the engine’s operation. Please refer to the engine manufacturer’s manual for precise instructions.
Starting the Engine
• The engine safety precautions, oil and fuel recommendations, operation instructions, adjustments and maintenance is covered in the
engine manufacturer’s manual which is included in the mower kit. Please refer to and adhere to these recommendations.
• If you do not have the engine manufacturer’s manual please refer to the nearest engine manufacturer’s representative for a
replacement copy.
• The engine is packed without oil or fuel. Please add these as per the engine manufacturer’s recommendations before attempting
to start the engine.
• If fitted with the Powerstart option activate the operator presence control lever (to release the blade brake) before attempting
to crank the engine.
CAUTION
• Refer to the “Warning” notes at the beginning of the “Operation” section.
• Start the mower on a clear level surface.
• Keep your fingers, toes and bystanders clear when starting or operating the engine.
• If fitted with the Powerstart option, always remove the key from the ignition switch and keep in a safe place to prevent unauthorised
cranking of the engine.
WARNING
• Refer to the engine manufacturer’s manual for the starting procedure, remembering to activate the operator presence control lever before cranking the engine.
• If fitted with the Powerstart option, insert the key into the ignition switch then follow the instructions in the engine manufacturer’s manual.
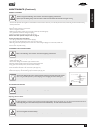
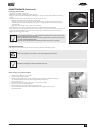
The Rover throttle control uses symbols to indicate the throttle function at various throttle positions:
O (off), (slow speed), (fast speed), (engine choke)
These positions align with settings required in the engine manufacturer’s manual.
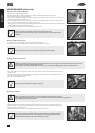
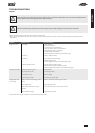
The Rover Powerstart option can be started with an ignition key which is fitted to the handle bar. The switch plate uses symbols to
indicate the key function at various positions and refers to the state of the starter motor:
O (off), I (on/start). These positions align with the settings required in the engine manufacturer’s manual.
Stopping the Engine
• Refer to the engine manufacturer’s manual for stopping procedure.
• If fitted with the Powerstart option remove the ignition key and store in a safe place after use.
7
8
Powered Walk Behind A4 CE English.indd 7