


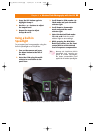

SB-600
To set up a group using the SB-600:
1. Go into the CSM by pressing the
Zoom and – buttons simultane-
ously for about two seconds.
2. Press the + or – buttons to cycle
through the CSM until you see a
squiggly arrow that says Off
above it.
3. Press the Zoom or Mode buttons
to turn the remote setting on.
4. Press the Power button. This
brings you to the wireless remote
settings menu.
5. Press the Zoom button to set
the flash zoom to match the
focal length of the lens you’re
using.
6. Press the Mode button to select
the channel. When the channel is
ready to be changed, it flashes.
7. Use the + or – buttons to
change the channel.
8. Press the Mode button again.
This sets the channel and moves
you to the Group setting. The
group letter flashes when ready
to be changed.
9. Use the + or – to change the
setting.
10. Press the Mode button again to
set the changes.
SB-800
To set up a group using the SB-800:
1. Enter the CSM on the SB-800
Speedlight. Press the Select but-
ton (SEL) for two seconds to get
there.
2. Use the + or – and the left and
right zoom buttons to choose
the wireless settings menu. The
menu has the icon of a flash with
an arrow next to it.
3. Use the + or – button to select
Remote.
4. After the setting is in the
remote mode, press SEL to high-
light the channel number.
5. Use the + or – buttons to select
the desired channel.
6. Press SEL again to set the chan-
nel and highlight the Group
settings.
7. Select the Group you want the
flash used with. Choose A, B, or C.
Setting Output Level
Compensation
You use output level compensation to fine-
tune the settings to achieve the desired look
of the overall image. The output levels can
be adjusted for each individual group.
As with the flash modes the output compen-
sation must be set in the commander unit.
The output levels apply to all remote flash
units in the group.
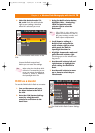
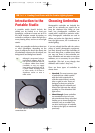
With the SB-800 set to
Master
To set output level compensation using the
SB800 set to Master:
1. Press the SEL button on the
master flash to highlight M.
2. Use the + or – buttons to adjust
the output level.
84 Part II ✦ Creating Great Photos with the Creative Lighting System
10_045275 ch04.qxp 11/28/06 8:27 PM Page 84