


27
Section 4: Maintenance & Lubrication
WC1503 Wood Chipper 328-085M
Table of Contents
12/15/15
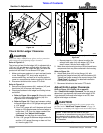
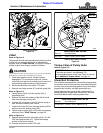
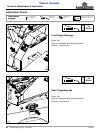
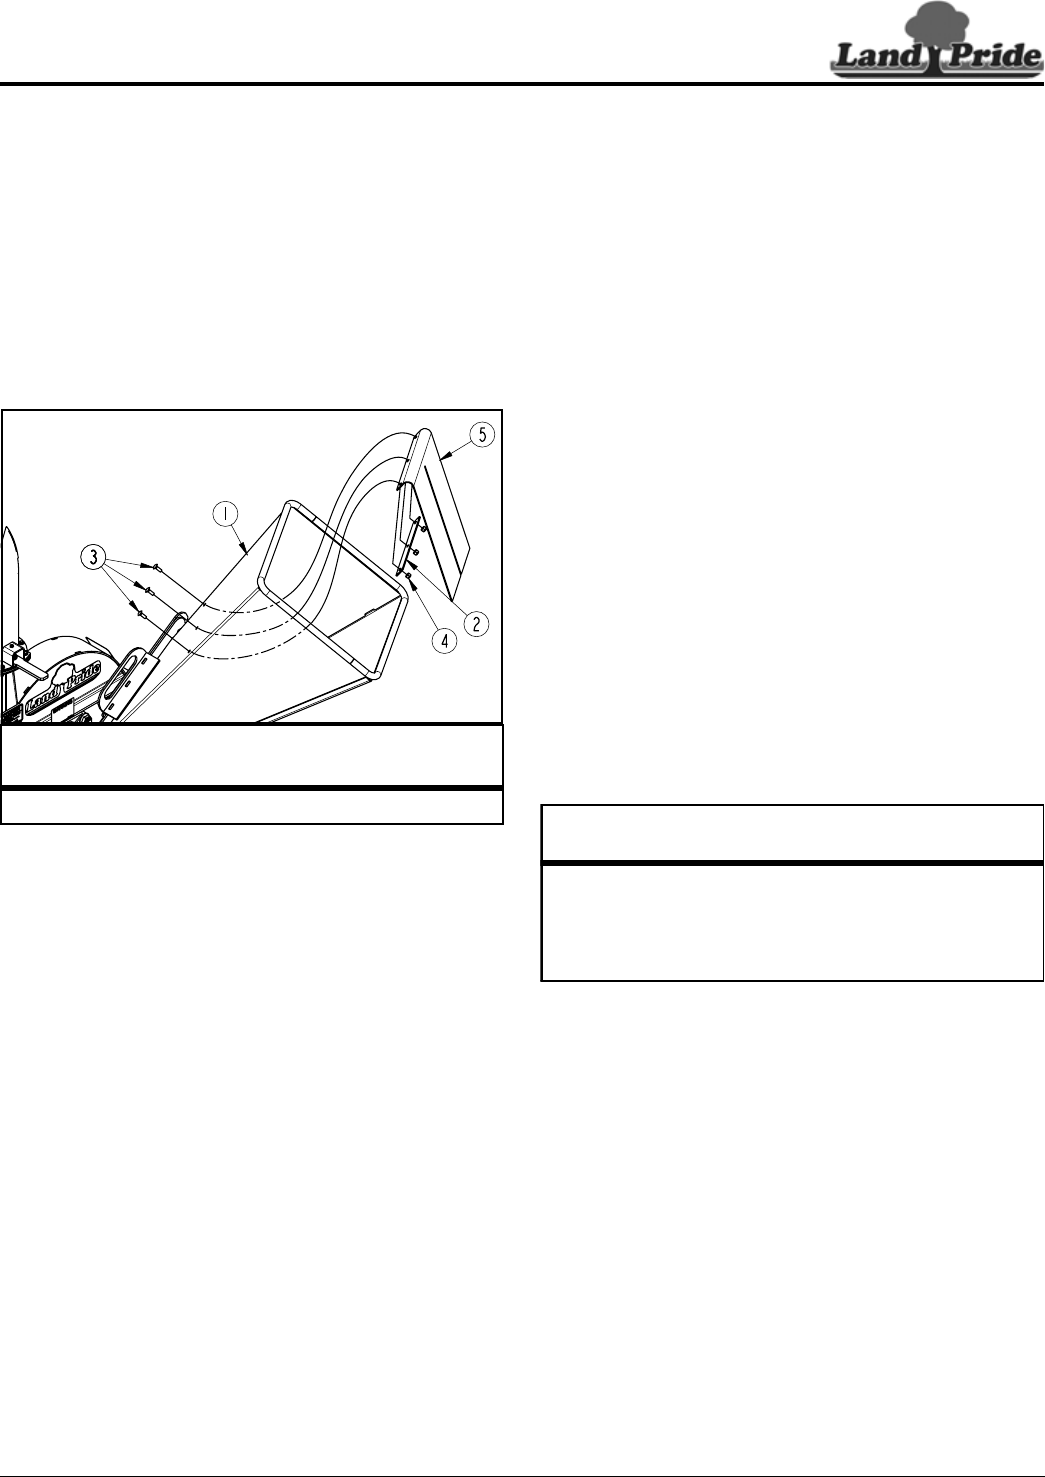
Rubber Flap
Refer to Figure 4-7:
The rubber flap (#5) should be replaced if it is torn,
damaged, or missing. It helps protect against objects
flying back out of the hopper towards the operator.
1. Unscrew hex nylock nuts (#4) and remove holddown
strap (#2), carriage bolts (#3), and rubber flap (#5).
2. Install new rubber flap with existing 1/4"-20 x 3/4"
GR5 carriage bolts (#3), holddown strap (#2), and
hex nylock nuts (#4). Tighten nylock nuts to the
correct torque.
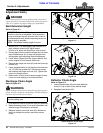
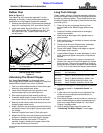
Take-up Spring Hole Location
Figure 4-7
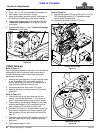
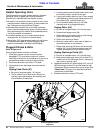
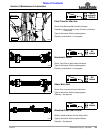
Unhooking The Wood Chipper
See “Long Term Storage” on this page before
unhooking and storing the Wood Chipper for a long time.
Unhook Wood Chipper from tractor as follows:
1. Park on a level solid hard surface. Place tractor gear
selector in park and set park brake.
2. Lower Wood Chipper onto level ground or onto
blocks supporting unit just above ground.
3. Shut tractor engine off and remove switch key.
4. If needed, adjust length of upper 3-Point center link
until center hitch pin is loose and can be removed.
5. Remove center hairpin cotter and hitch pin from the
chipper’s upper center clevis.
6. Move 3-Point link out of the way and reinstall hitch pin
and hairpin cotter in the chipper’s upper center clevis
for storage.
7. Remove linchpins from lower 3-Point hitch pins.
8. Move lower 3-Point arms out of the way and reinstall
linchpins in chipper’s lower hitch pins for storage.
9. Disconnect driveline from tractor PTO shaft. If
possible, support driveline from upper center hitch
pin to keep driveline out of the dirt.
35262
Land Pride Rubber Flap Part No.
Part No. Part Description
816-699C RUBBER FLAP
Long Term Storage
Clean, inspect, service, and make necessary repairs to
the Wood Chipper when parking it for long periods and at
the end of a working season. This will help ensure that
the Wood Chipper will be ready for field use the next time
you hook-up to it.
1. Clean off any dirt and grease that may have
accumulated on the Wood Chipper and moving
parts.
2. Inspect all rotating components for entangled
material and remove.
3. Wash surfaces thoroughly with a garden hose or
power washer.
4. After washing unit, run machine for several minutes
to dry out the inside.
5. Check knives for wear. Rotate knives, resharpen
worn knives, or replace with new knives.
6. Check knife ledger. Rotate knife ledger or replace
knife ledger when required.
7. Inspect Wood Chipper for loose, damaged, or worn
parts. Adjust and tighten loose parts or replace as
needed.
8. Repaint parts where paint is worn or scratched to
prevent rust. Ask your Land Pride dealer for aerosol
touch-up paint. They are also available in touch-up
bottles with brush, quarts, and gallon sizes by adding
TU, QT, or GL to the end of the aerosol part number.
9. Replace all damaged or missing guards and decals.
10. Lubricate as noted in “Lubrication Points” on
page 28.
11. A light coat of oil or grease may be applied to the
knives and to any exposed unpainted parts to
minimize oxidation.
12. Store Wood Chipper on a level surface in a clean, dry
place. Inside storage will reduce maintenance and
make for a longer Wood Chipper life. Tarp Wood
Chipper if stored outside.
13. Unhook Wood Chipper from the tractor. See
“Unhooking The Wood Chipper” on this page.
Land Pride Aerosol Touch-up Paint
Part No. Part Description
821-002C PAINT LP BLACK AEROSOL SPRAY CAN
821-011C PAINT LP BEIGE AEROSOL SPRAY CAN
821-058C PAINT GREEN AEROSOL SPRAY CAN
821-066C PAINT ORANGE AEROSOL SPRAY CAN