


18
Section 2: Operating Instructions
WC1503 Wood Chipper 328-085M
Table of Contents
12/15/15
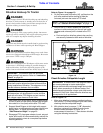
Transporting
!
WARNING
Do not transport Wood Chipper with tractor PTO engaged.
The chipper can discharge objects causing injury or death.
!
WARNING
Make sure SMV sign is visible on tractor from the rear and not
blocked by the Wood Chipper.
!
WARNING
Never allow children or others to ride on the tractor or
chipper with unit running or not running. They can be
seriously injured or killed.
!
CAUTION
When traveling on public roads whether at night or during the
day, use accessory lights and devices for adequate warning to
operators of other vehicles. Comply with all federal, state, and
local laws.
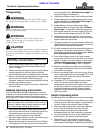
1. When raising Wood Chipper to transport, be sure
that the driveline does not contact tractor, Quick
Hitch, or chipper
2. Reduce tractor ground speed when turning and leave
enough clearance so that the chipper does not
contact obstacles such as buildings, trees, or fences.
3. Select a safe ground travel speed when transporting
from one area to another. When traveling on
roadways, transport in such a way that faster moving
vehicles may pass you safely.
4. When traveling over rough or hilly terrain, shift tractor
to a lower gear.
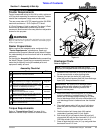
Detailed Operating Instructions
The WC1503 Wood Chipper is designed to cut wood
products 3" in size and smaller such as brush, branches,
small trees, and lumber into small chips that can be
quickly turned into mulch or just to aid in decomposition.
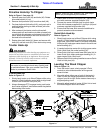
1. Park tractor with Wood Chipper outside on a level
solid surface that has room to discharge chips into a
pile directed away from the operator, people,
animals, tractor, equipment, and buildings.
2. Set tractor engine speed at an idle, place tractor gear
selector in park, and set park brakes.
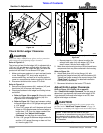
3. Adjust skid extensions to support the Wood Chipper
at a height that will allow the driveline to operate as
IMPORTANT: Always disengage PTO before raising
Wood Chipper to transport position.
IMPORTANT: Make sure operator has thoroughly
read, fully understood, and is totally familiar with this
Operator’s Manual and all safety precautions within
this manual before operating this machine.
level as possible. See “Skid Extension Height” on
page 20 for detailed instructions.
4. Lower Wood Chipper slowly onto its skid extensions.
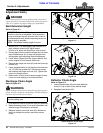
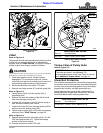
5. Rotate discharge chute to discharge product in the
direction desired. See “Discharge Chute Angle” on
page 20 for detailed instructions.
6. Rotate deflector chute to direct product being
discharged closer or farther away. See “Deflector
Chute Angle” on page 20 for detailed instructions.
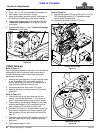
7. With engine speed at a low idle, engage PTO and
then slowly increase engine speed to 540 RPM.
8. Untangle product before inserting it into the feed
chute. Slowly slide one piece at a time into the feed
hopper toward the rotor knives.
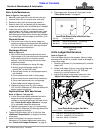
9. To protect oneself, do not reach past the rubber skirt
inside the feed chute. Instead use a stick or branch to
lightly push on the product as needed.
10. If tractor engine starts to slow, stop pushing lightly on
the product. Once engine speed returns, continue
push lightly on product but at a slower speed. Do not
force feed product into the chipper.
11. Once Wood Chipper starts to self-feed, release
product and allow knives to pull product in at its own
speed. If knives will not pull product in, then refer to
“Product self-feeds slowly or won’t self-feed at
all” in the “Troubleshooting” chart on page 32.
12. Make any necessary corrections to the discharge
chute angle and deflector chute to finalize direction
and location of chip pile.
13. Never leave Wood Chipper with unit running. Always
lower engine speed to an idle, disengage PTO, shut
tractor engine off and remove switch key before
leaving the work area.
14. Disengage PTO if foreign material such as glass,
metal, or rocks enters the chipper or if other
emergencies arise. Shut tractor engine off, remove
switch key, and wait for moving parts to come to a
complete stop before removing foreign material.
Inspect and make repairs before putting machine
back into service.
Helpful Operating Hints
The following hints will help keep the unit from plugging.
1. Be careful not to feed too much product at once, feed
oversize product, feed wet product, or feed product
too fast. Doing so can plug the Wood Chipper.
2. Alternate leafy material with a non leafy hardwood
piece. Hard wood pieces help clean out leafy
material. Keep alternating leafy material with
hardwood pieces until leafy material is processed.
3. Let leafy branches dry for a couple weeks before
chipping them. Dry leaves will process better.
4. Maintaining 1/32" gap between ledger bar and
knives will keep knives wiped off, prevent plugging,
allow product to feed better, and keep wood chipping.