


21
Section 3: Adjustments
WC1503 Wood Chipper 328-085M
Table of Contents
12/15/15
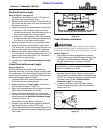
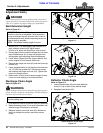
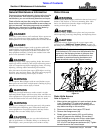
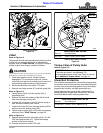
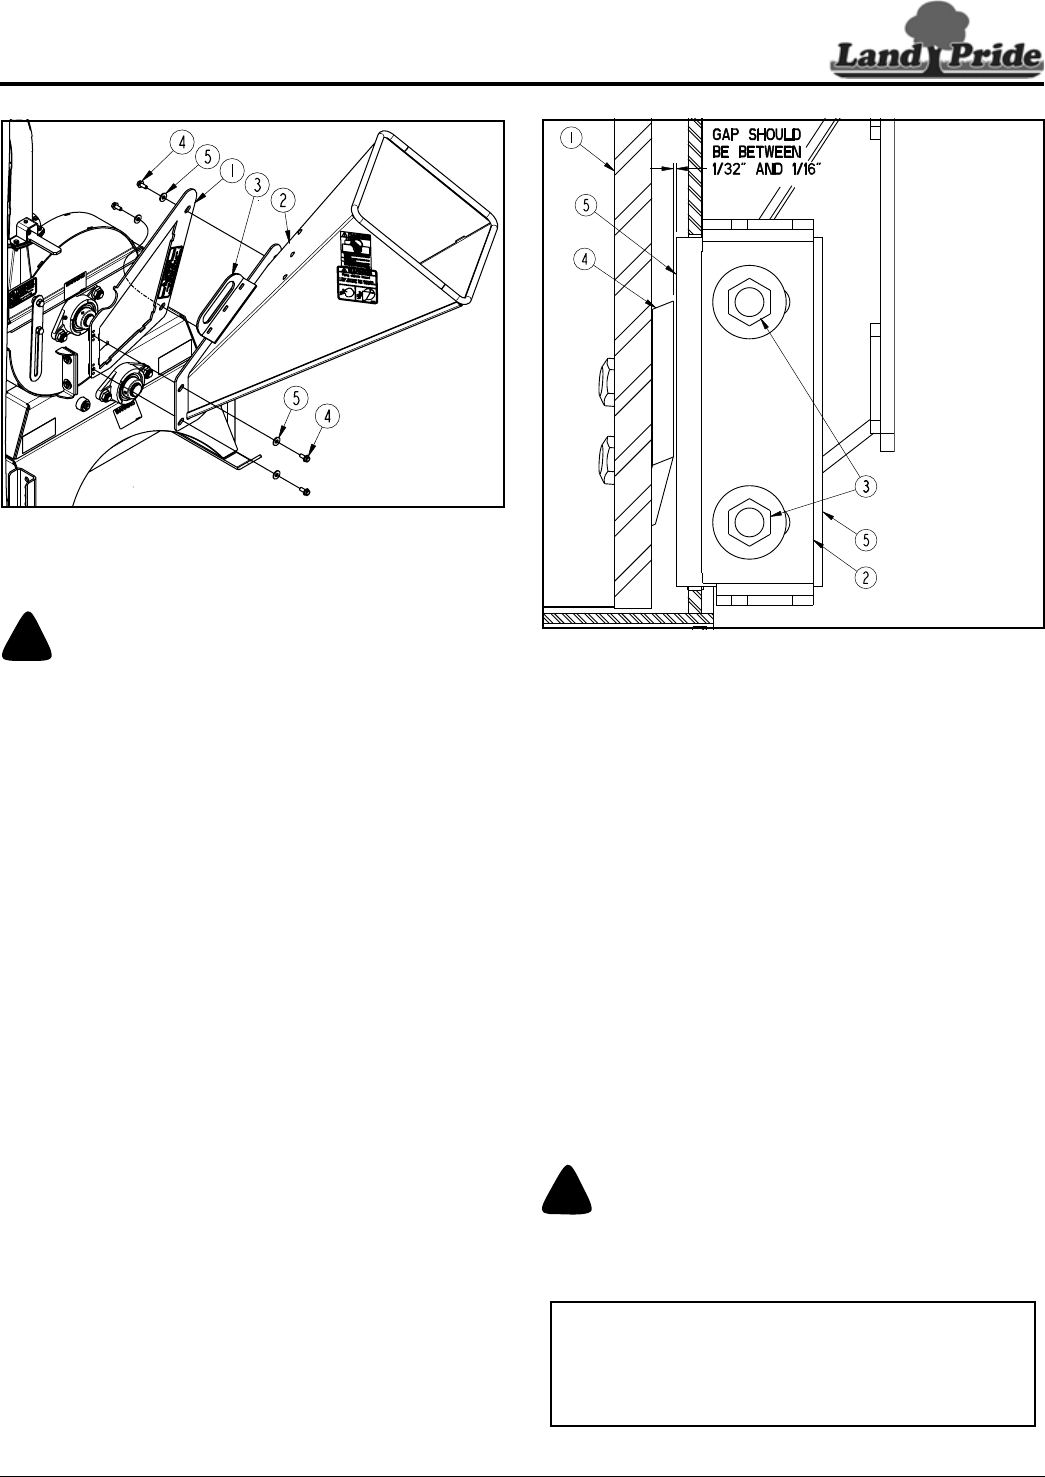
Cut Away View of Rotor (#4), Ledger (#5), and Knife (#4)
Figure 3-5
c. Repeat steps 4.a. & 4.b. above to realign the
second knife edge (#4) with ledger (#5). Go to
step 5 below if second knife edge is OK.
5. Make sure rotor housing is clear of all tools and loose
components that may have collected in the housing.
Refer to Figure 3-4:
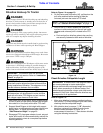
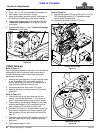
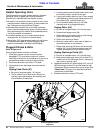
6. Attach feed chute (#2) to inlet flange (#1) with
existing hex flange screws (#4) and flat washers (#5).
Tighten hex flange screws to the correct torque. See
“Feed Chute” on page 12 for detailed installation
instructions of feed chute.
7. Reconnect driveline to the tractor PTO shaft.
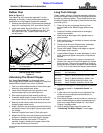
Adjust Knife Ledger Clearance
Refer to Figure 3-5 & Figure 3-6 on page 22:
See “Check Knife Ledger Clearance” on this page to
determine if gap between knife and knife ledger is OK.
If gap between knife and knife ledger is not OK, then
adjust knife ledger as follows:
!
CAUTION
Ledger bolts must be tightened to the correct torque value
provided under “Additional Torque Values” on page 34.
Not doing so can damage the chipper and cause bodily injury.
1. Loosen hex bolts (#3).
35259
NOTE: Credit card can be used to set gap.
Tolerances in manufacturing vary due to weld pull.
Set closest knife to ledger with 1/32" shim and lock
ledger in place. Rotate rotor and check other knives
for clearance.
Feed Chute Removal & Assembly
Figure 3-4
Check Knife Ledger Clearance
!
CAUTION
Knives are sharp. ALWAYS wear gloves and eye protection
while inspecting and adjusting ledger clearance.
Refer to Figure 3-5:
The knives cut best if knife ledger (#5) is adjusted with a
1/32" to 1/16" gap between cutting edge of knives (#4)
and knife ledger (#5). The larger the gap, the faster the
product will self-feed. Do not exceed 1/16" gap.
1. Make certain gear selector is in park and park brake
is set. Disengage PTO, shut tractor engine off,
remove switch key, and wait for all moving parts to
come to a complete stop before working on this unit.
2. Disconnect driveline from tractor PTO shaft.
Refer to Figure 3-4:
3. Remove hex flange screws (#4), washers (#5) and
feed chute (#2) to access inlet opening.
4. Check gap between knife ledger and cutting knives
as follows:
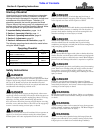
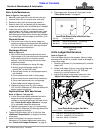
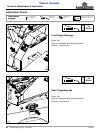
a. Refer to Figure 3-6 on page 22: Manually rotate
rotor (#1) until cutting edge of knife (#4) is in
alignment with knife ledger (#5).
b. Refer to Figure 3-5: Check gap between cutting
knife and ledger with a 1/32" gauge and again with
a 1/16" gauge.
• If the 1/32" gauge will not fit between knife and
ledger or if the gap between knife and ledger is
larger than 1/16", then the ledger needs to be
readjusted. See “Adjust Knife Ledger
Clearance” on this page for instructions.
• If the 1/32" gauge fits between ledger and knife
and the 1/16" gauge fits snug or does not fit at
all, then the gap is OK.
35252