


12
Section 1: Assembly & Set-Up
WC1503 Wood Chipper 328-085M
Table of Contents
12/15/15
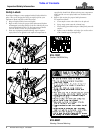
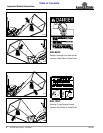
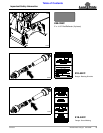
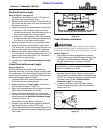
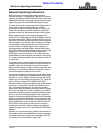
Feed Chute
Refer to Figure 1-2:
For product to feed smoothly into the Wood Chipper, feed
chute (#2) must be attached to inlet flange (#1) with left
inside surface of feed chute in line with or slightly to the
right of the left side of inlet opening and the bottom inside
surface of the feed chute must be in line with or slightly
higher than the bottom of inlet opening.
1. Straddle lift handle (#3) over the top edge of inlet
flange (#1) and above slide stop.
2. Attach feed chute (#2) to inlet flange (#1) with
5/16"-18 x 3/4" GR5 hex flange screws (#4) and flat
washers (#5). Screw hex flange screws up snug and
then back-off flange screws 1 or 2 turns.
3. Slide feed chute (#2) along top edge of inlet
flange (#1) until left inside surface of feed chute (#2)
is in line with or slightly to the right of left side of inlet
opening.
4. Check line up of bottom inside surface of feed
chute (#2) with bottom of inlet opening. If inside
surface of feed chute is lower than the inlet opening,
then continue to slide feed chute (#2) along the top
edge of inlet flange (#1) until bottom inside surface of
feed chute (#2) is in line with or slightly higher than
bottom of inlet opening.
5. Hold feed chute (#2) in this position and tighten
hex flange screws (#4) to the correct torque.
6. Recheck alignment of feed chute (#2) with inlet
opening (#1). If necessary, make any adjustments
needed and retighten hex flange screws (#4) to the
correct torque.
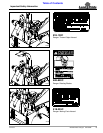
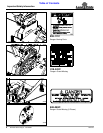
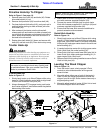
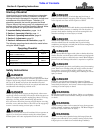
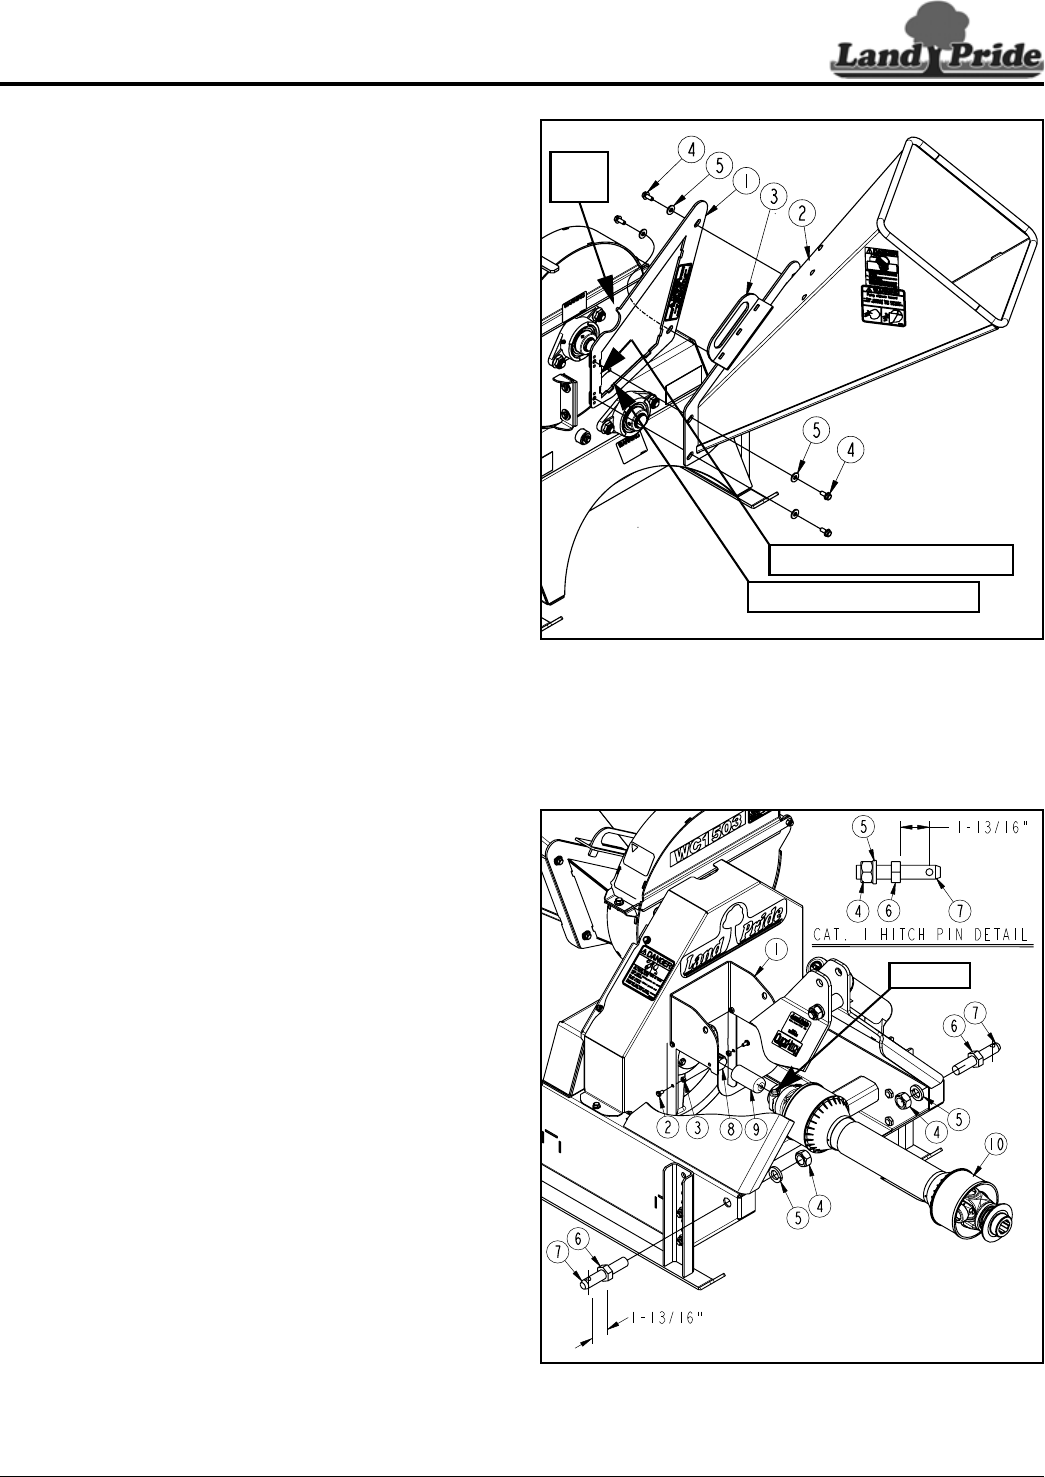
Hitch Pin Set-Up
Refer to Figure 1-3:
The Wood Chipper is shipped from the factory with hitch
pins mounted on the inside. They will need to be turned
around to fit the tractor’s 3-Point hitch.
1. On the right-hand side, remove hex nut (#4) from
hitch pin (#7).
2. Remove lock washer (#5) and hitch pin (#7) from
inside the Wood Chipper housing.
3. Adjust nut (#6) on hitch pin (#7) to be 1 13/16" from
face of nut to center of hitch pin hole.
4. Reinsert hitch pin (#7) on the outside of the Wood
Chipper housing as shown.
5. Install lock washer (#5) and hex nut (#4). Draw hex
nut (#4) up snug.
6. Insert a drive punch in hitch pin hole and rotate hitch
pin with the drive punch until the hole is vertical.
7. Verify 1 13/16" is maintained from face of nut (#6) to
center of hitch pin hole and then tighten hex nut (#4)
to the correct torque.
8. Repeat steps 1 thru 7 for the left-hand hitch pin.
3" Feed Chute Assembly
Figure 1-2
Driveline Assembly
Figure 1-3
35252
Bottom of Inlet Opening
Left Side of Inlet Opening
Slide
Stop
Push Pin
35253