


24
Section 4: Maintenance & Lubrication
WC1503 Wood Chipper 328-085M
Table of Contents
12/15/15
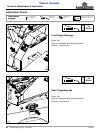
Rotor Knife Maintenance
Refer to Figure 4-1 on page 23:
1. Manually rotate one of the rotor knives to the top.
2. Unscrew bolts (#5) and remove rotor knife (#6).
3. Rotate the other knife to the top and remove it.
4. Examine bolts (#5) and blades (#6) for damaged
threads and replace with Land Pride parts if needed.
5. Inspect knives for edge wear. Reverse knives if
unused edge is still sharp, resharpen knives if both
edges are worn, and replace knives if both edges
have been ground back so far that the gap between
the cutting edge and knife ledger is more than 1/16".
Reverse Knives
a. Flip knives over so that the sharp edges are
leading in rotation and reattach them with existing
3/8"-24 x 5/8" GR8 bolts (#5). See step 6 below
for special torque instructions.
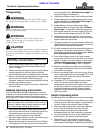
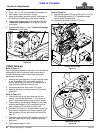
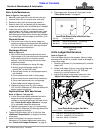
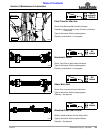
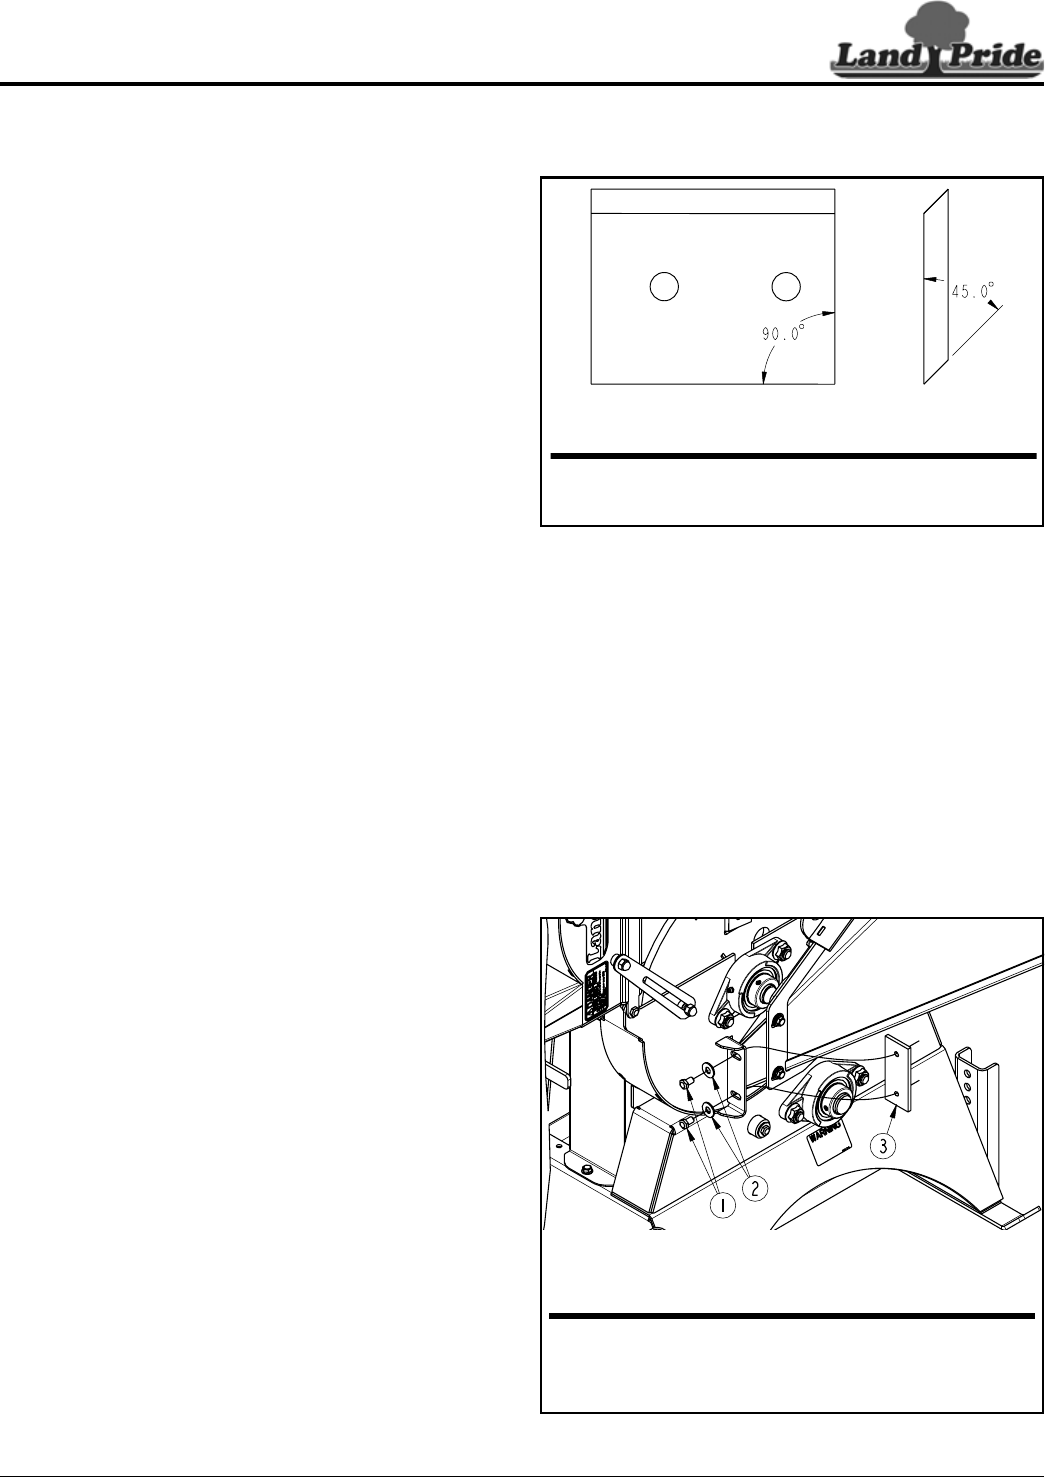
Resharpen Knives
Refer to Figure 4-2:
a. Both knives should be sharpened at the same
original angle of 45
o
and must both be sharpened
at the same service time to maintain proper
balance. Take the following precautions when
sharpening knives.
• Always grind blades to a sharp 45
o
edge.
• Always grind cutting edge straight and
square (90
o
) to the knife’s side.
• Always keep corners of cutting edges square,
not rounded.
• Do not sharpen back side of cutting edge.
• Do not remove more material than necessary.
• Do not heat and pound out a cutting edge.
• Both blades should weigh the same.
b. Reattach knives to rotor (#1) with existing
3/8"-24 x 5/8" GR8 bolts (#5). See step 6 below for
special torque instructions.
Replace Knives With New Knives
Refer to Figure 4-1 on page 23:
a. If rotor knives have been reinstalled and knife
ledger cannot be adjusted to the proper
clearance, then replaced knives with new knives.
See “Check Knife Ledger Clearance” on page
21 for allowable clearance dimensions.
b. Reattach new knives to rotor (#1) with existing
3/8"-24 x 5/8" GR8 bolts (#5). See step 6 below for
special torque instructions.
6. Tighten GR8 knife bolts (#5) to 35-40 ft-lbs. See
“Additional Torque Values” on page 34 for more
information.
7. Adjust knife ledger to the proper clearance
dimensions. For detailed adjustment instructions,
see “Check Knife Ledger Clearance” on page 21.
8. Close upper rotor housing (#2). See step 5 under
“Rotor Knife Access” on page 23.
Sharpening Rotor Knives
Figure 4-2
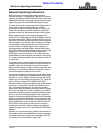
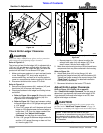
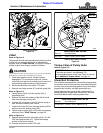
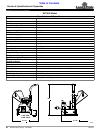
Knife Ledger Maintenance
Refer to Figure 4-3:
The knife ledger has four sharp edges. When an edge
becomes worn and dull or rounded, rotate knife ledger to
a new sharp edge.
1. Remove cap screws (#1), flat washers (#2), and knife
ledger (#3).
2. Rotate knife ledger (#3) to a new cutting edge and
reinstall with existing 3/8"-24 x 5/8" GR8 cap
screws (#1) and flat washers (#2).
3. Adjust knife ledger to the correct clearance. See
“Adjust Knife Ledger Clearance” on page 21.
Accessing Knife Ledger
Figure 4-3
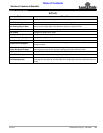
Land Pride Rotor Knife & Bolt Part Nos.
Part No. Part Description
820-472C KNIFE REVERSIBLE - 17.5 ROTOR
802-961C HHCS 3/8-24X5/8 GR8 PLT
35258
Land Pride Knife Ledger Part No’s.
Item Part No. Part Description
1 802-961C HHCS 3/8-24X5/8 GR8 PLT
2 804-011C WASHER FLAT 3/8 USS PLT
3 820-476C KNIFE, LEDGER 3"
35302