


26
Section 4: Maintenance & Lubrication
WC1503 Wood Chipper 328-085M
Table of Contents
12/15/15
Helpful Operating Hints
The following hints will help protect against a plugged
discharge chute, plugged rotor housing, sheared
driveline bolt, and help keep the chipper running.
• Be careful not to feed too much product at once, feed
oversize product, feed wet product, or feed product too
fast. Doing so can plug the Wood Chipper.
• Alternate leafy material with a non leafy hardwood
piece. Hard wood pieces help clean out leafy material.
Keep alternating leafy material with hardwood pieces
until leafy material is processed.
• Let leafy branches dry for a couple weeks before
chipping them. Dry leaves will process better.
• Maintaining 1/32" gap between ledger bar and knives
will keep knives wiped off, prevent plugging, allow
product to feed better, and keep wood chipping.
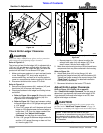
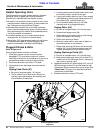
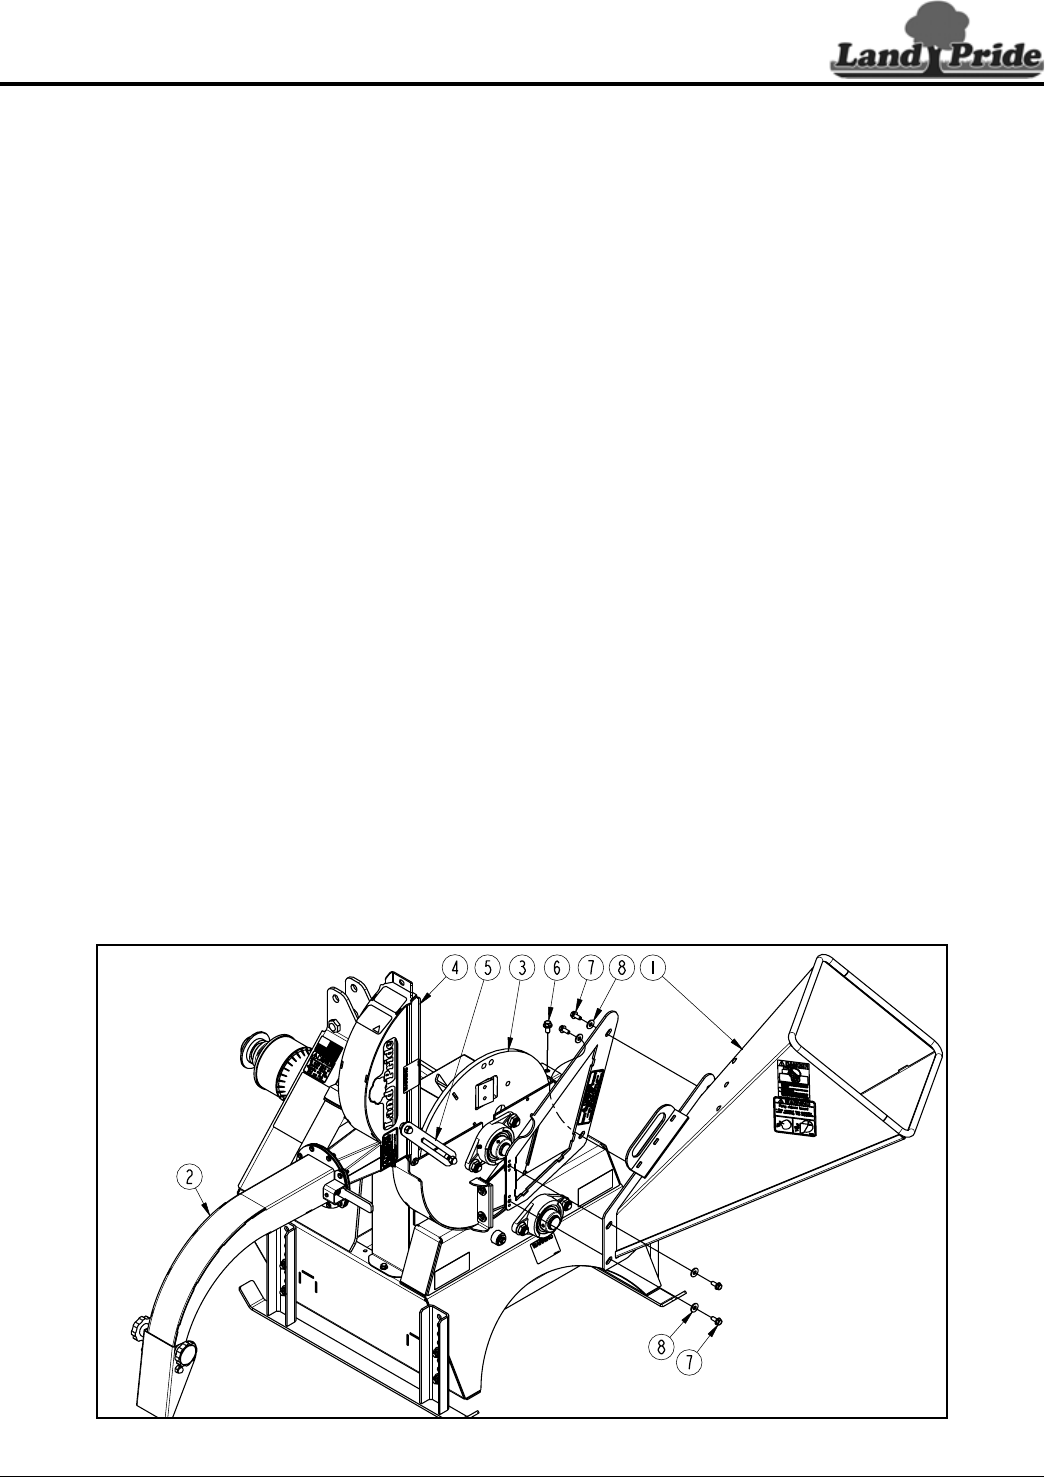
Plugged Chutes & Rotor
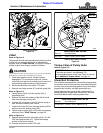
Refer to Figure 4-6:
Clear plugged chutes and rotor as follows:
1. Place gear selector in park, set park brakes,
disengage PTO, shut tractor engine off, remove
switch key, and wait for all moving parts to come to a
complete stop before working on this machine.
2. Disconnect driveline from tractor PTO shaft.
3. Unplug feed chute, discharge chute and rotor as
follows:
Unplug Feed Chute (#1)
a. Be sure to complete steps 1 & 2 above.
b. Pull all material out of feed chute. Make sure
nothing is jammed between inlet opening and
rotor at bottom of feed chute.
c. Loosen product jammed at the bottom with a stick
or board by prying it up and to the right.
d. If prying on product does not free it, then access
inlet opening by removing hex flange screws (#7),
flat washers (#8), and feed chute (#1).
e. Do not reattach feed chute (#1) until after
checking rotor for a plugged situation.
Unplug Rotor (#3)
a. Be sure to complete steps 1 & 2 on this page.
b. Remove hex flange screw (#6).
c. Rotate upper rotor housing (#4) up until locking
strap (#5) supports the housing.
d. Clean rotor housing of debris.
e. Manually rotate rotor to make sure all debris is
removed and rotor is not jammed.
f. Rotate rotor housing (#4) down and secure with
existing 3/8"-16 hex flange serrated screw (#6).
Tighten serrated screw to the correct torque.
Unplug Discharge Chute (#2)
a. Be sure to complete steps 1 & 2 on this page.
b. Make certain discharge chute (#2) is clean. Pull
material out of the discharge chute. If necessary,
use a stick to unplug a jam.
4. Reattach feed chute (#1) with existing 5/16"-18 x 3/4"
GR5 hex flange screws (#7) and flat washers (#8).
Tighten hex flange screws to the correct torque. See
“Feed Chute” on page 12 for detailed installation
instructions of feed chute.
5. Reattach driveline to tractor PTO shaft.
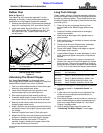
Accessing Rotor Knives
Figure 4-6
35263