


18
Section 3: Operating Instructions
RCR2684 Rotary Cutter 312-785M
9/24/08
Land Pride
Table of Contents
Operating Check List
Hazard control and accident prevention are dependent
upon the awareness, concern, prudence and proper
training involved in the operation, transport,
maintenance and storage of the Rotary Cutter.
Therefore, it is absolutely essential that no one operates
the Rotary Cutter without first having read, fully
understood and become totally familiar with the
Operator’s Manual. Make sure the operator has paid
particular attention to:
• Important Safety Information, pages 1 to 6
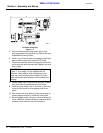
• Section 1: Assembly and Set-up, page 8
• Section 2: Adjustments, page 15
• Section 3: Operating Instructions, page 18
• Section 5: Maintenance & Lubrication, page 24
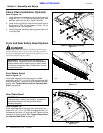
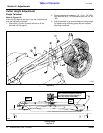
With cutter attached to a tractor and PTO disengaged
and completely stopped, make the following inspections:
1. Inspect tractor safety equipment to make sure it is in
good working condition.
2. Carefully raise and lower implement to ensure that
the drawbar, tires, and otherequipment on the tractor
do not contact the cutter frame or PTO driveline.
3. Check PTO guards to make certain they are in good
working condition and in place.
4. With the PTO disengaged and completely stopped,
check cutting blades for sharpness.
5. Adjust tractor lower 3-point arms such that the deck
is set to nominal cutting height.
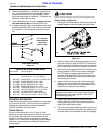
Operating Checklist
Check Reference
Read “Important Safety Information”
Page 1
Read “Assembly & Set-up” Instructions.
page 8
Read “Operating Instructions”
page 18
Check cutter initially and periodically for
loose bolts & pins, See Torque Values
Chart.
Page 27
Check the cutter initially and periodically for
loose bolts & pins, Torque Values Chart.
Section 1
Make sure all guards and shields are in
place.
Page 1
Lubricate cutter as needed. Refer to
“Maintenance and Lubrication”.
Page 27
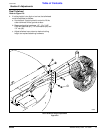
IMPORTANT: Stop PTO immediately if vibration
continues after a few revolutions during start-up and
anytime it occurs thereafter. Wait for PTO to come to
a complete stop before dismounting from tractor to
check for probable causes. Make necessary repairs
and adjustments before continuing on.
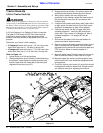
6. Start tractor, set throttle to idle or slightly above idle
and slowly engage the PTO. Initial start-up vibration
is normal and should stop after a few revolutions.
Stop PTO rotation immediately if vibration continues.
7. Once the cutter is running smoothly, increase tractor
PTO speed to 540 RPM. Stop PTO rotation
immediately if vibration occurs.
Transporting
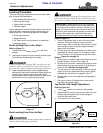
!
CAUTION
When traveling on public roads at night or during the day, use
accessory lights and devices for adequate warning to
operators of other vehicles. Comply with all federal, state and
local laws.
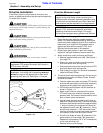
1. Make sure driveline does not contact tractor or cutter
when raising cutter to the transport position.
2. Reduce tractor ground speed when turning and
leave enough clearance so cutter does not contact
obstacles such as buildings, trees or fences.
3. Limit transport speed to 20 mph. Transport only with
a farm tractor of sufficient size and horse power.
4. When traveling on roadways, transport in such a way
that faster moving vehicles may pass you safely.
5. Shift tractor to a lower gear when traveling over
rough or hilly terrain.
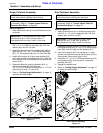
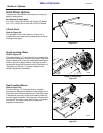
Un-hooking the Rotary Cutter
Un-hook Rotary Cutter from the tractor as follows:
1. Park on a level solid surface.
2. Lower deck to level ground or onto blocks supporting
the deck just above ground level.
3. Engage tractor park brake, shut tractor engine off
and remove key before dismounting from tractor.
4. Disconnect driveline from tractor PTO shaft.
5. Un-hook 3-point hitch from tractor. Reinstall hitch
pins, linchpins and hair pin cotters in cutter hitch for
storage.
6. Rotate driveline storage hook down and place
driveline in storage hook.
7. See “Storage Instructions” on page 26 if cutter is to
be stored for a long time.
IMPORTANT: Do not exceed rated PTO speed of
the cutter. Excessive engine speed will cause
damage to the power train components.
IMPORTANT: Always disengage the tractor’s PTO
before raising the cutter to transport position.
Section 3: Operating Instructions