


22
Section 3: Adjustments
ZSR54, & ZSR60 Accu-Z Razor
®
Zero Turn Mowers 357-344M
Table of Contents
12/15/15
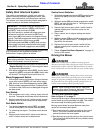
!
WARNING
Unless specifically required, Do Not have engine running
when servicing or making adjustments to the mower. Place
both control levers in the park position and remove ignition
switch key. Read and observe all “Safety Warnings” and
“Important Notes” in this manual.
Repairs or maintenance requiring engine power should be
performed by trained personnel only. To prevent carbon
monoxide poisoning, be sure proper ventilation is available
when engine must be operated in an enclosed area.
Your Zero Turn Riding Mower was checked for proper
operation and adjusted before it left the factory. However,
break-in wear and continued use can cause some
adjustments to change.
• Be alert for unusual noises while operating the mower.
They could be signaling a problem.
• Visually inspect for abnormal wear or damage while
servicing and making adjustments to the mower.
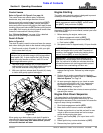
Proper servicing and adjustments are key to the long life
of any implement. With careful inspection and routine
maintenance, you can avoid costly downtime and repair.
!
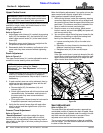
WARNING
Keep your mower clean. Remove heavy trash and clippings
from mower. Keep all moving parts, hydraulic system, engine
cooling system, and exhaust system clean of trash and
clippings. Accumulation of trash and/or clippings can cause
fires, hydraulic overheating and excessive belt wear.
Clear away heavy build-up of grease, oil, and dirt.
Especially clean in the areas around oil openings, fuel
openings, and air inlets. Minute dust particles are
abrasive to close-tolerance engine and hydraulic
components.
Some repairs require the assistance of a trained service
mechanic and should not be attempted by unskilled
personnel. Consult your Land Pride service center when
assistance is needed.
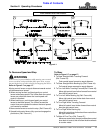
Torque Requirements
Refer to “Torque Values Chart” on page 57 to determine
correct torque values when tightening hardware. See
“Additional Torque Values” at bottom of chart for
exceptions to standard torque values.
Tire Pressure
Before considering any adjustment, check tire air
pressure. Unequal tire pressure will cause mower to drift
to one side. Refer to “Tire Inflation Chart” on page 57.
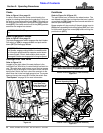
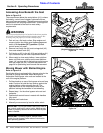
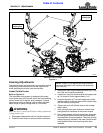
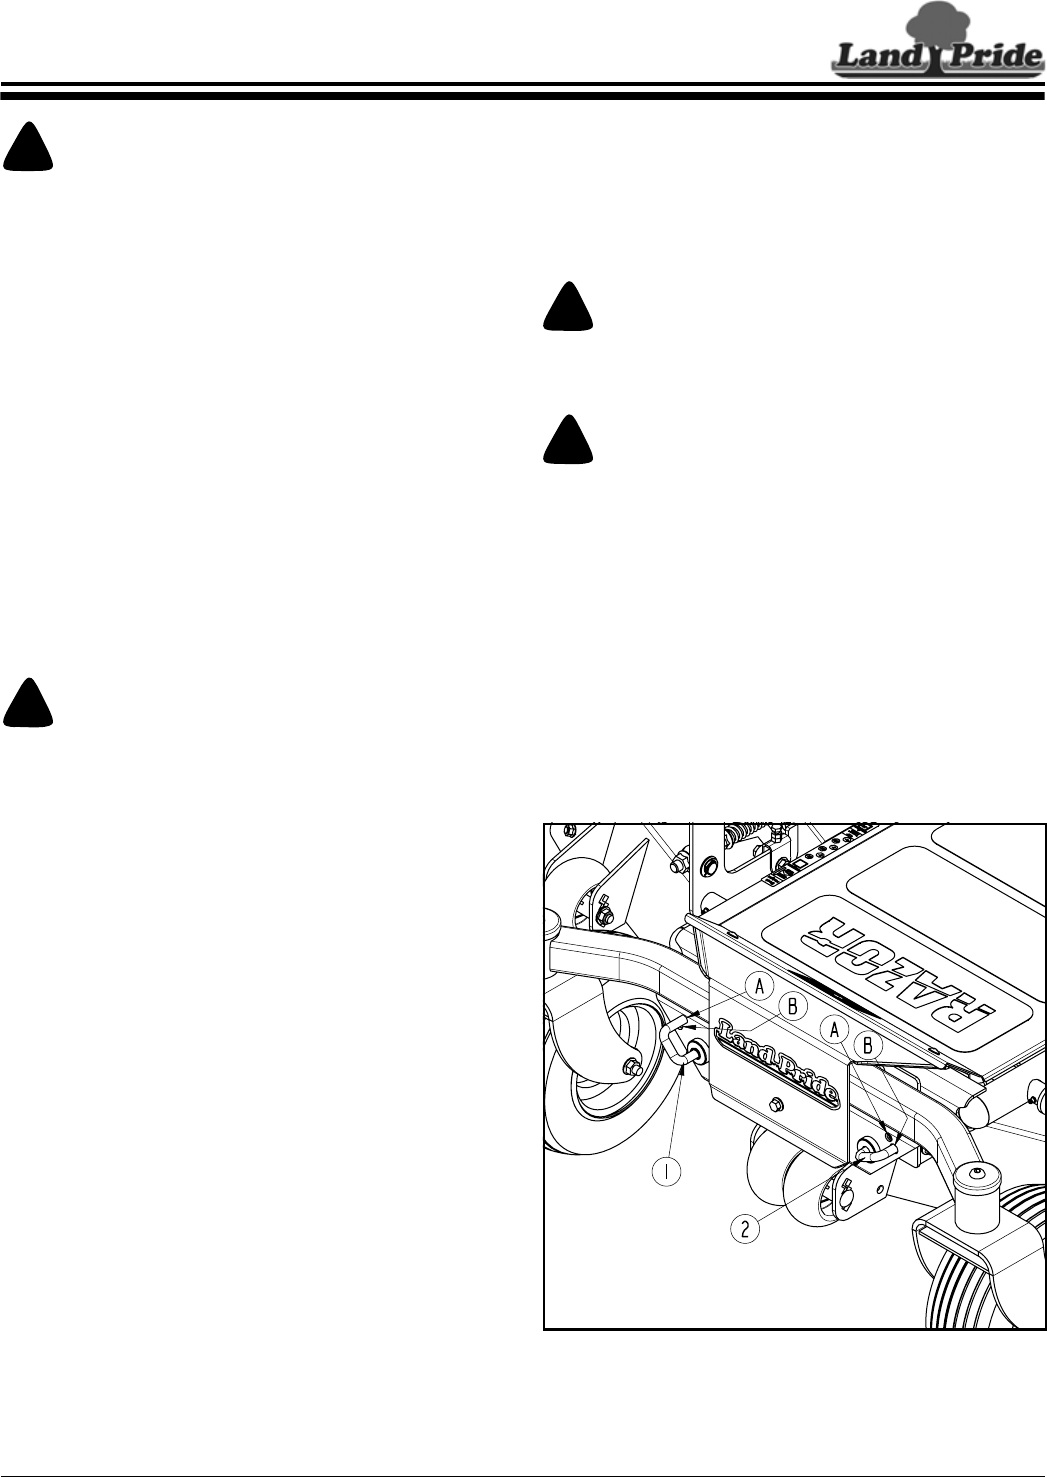
Front Floating Axle
Refer to Figure 3-1:
The front axle will pivot. Simply lock the axle in place with
locking pins (#1 & #2) to keep the axle from pivoting or
unlock the axle to allow the axle and front wheels to float
with the contour of the ground.
!
WARNING
Make sure blade engagement switch is (OFF), switch key is
(OFF) and removed from ignition switch, control levers are
(OUT), and park brake is (ON) before making adjustments.
!
WARNING
Lock front axle before lifting mower front. Body extremities
can easily become pinched while lifting mower front if axle is
not locked.
Lock Front Axle
1. Pull locking pins (#1 & #2) out of holes (A) and rotate
pins down to holes (B).
2. If spring loaded pins do not fully engage, they will
automatically engage when front end pivots into
proper alignment. This will happen during operation.
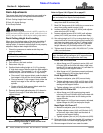
Unlock Front Axle Pivot
1. Park all four wheels on a flat level surface.
2. Pull locking pins (#1 & #2) out of holes (B) and rotate
pins to locate in holes (A).
Pivot Locking Device
Figure 3-1
27769
Section 3: Adjustments