13
Section 2: Operating Procedures
ZSR54, & ZSR60 Accu-Z Razor
®
Zero Turn Mowers 357-344M
Table of Contents
12/15/15
Operating Checklist
Hazard control and accident prevention are dependent
upon awareness, concern, prudence, and proper training
involved in operation, transport, maintenance, and
storage of the riding mower. Therefore, it is absolutely
essential that no one operates the mower without first
having read, fully understood, and become totally familiar
with the Operator’s Manual. Make sure the operator has
paid particular attention to:
• Important Safety Information, page 1
• Section 1: Assembly & Set-up, page 10
• Section 2: Operating Procedures, page 12
• Section 3: Adjustments, page 22
• Section 5: Maintenance & Lubrication, page 30
The following Operating Checklist should be performed
before operating your mower:
Instrumentation
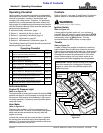
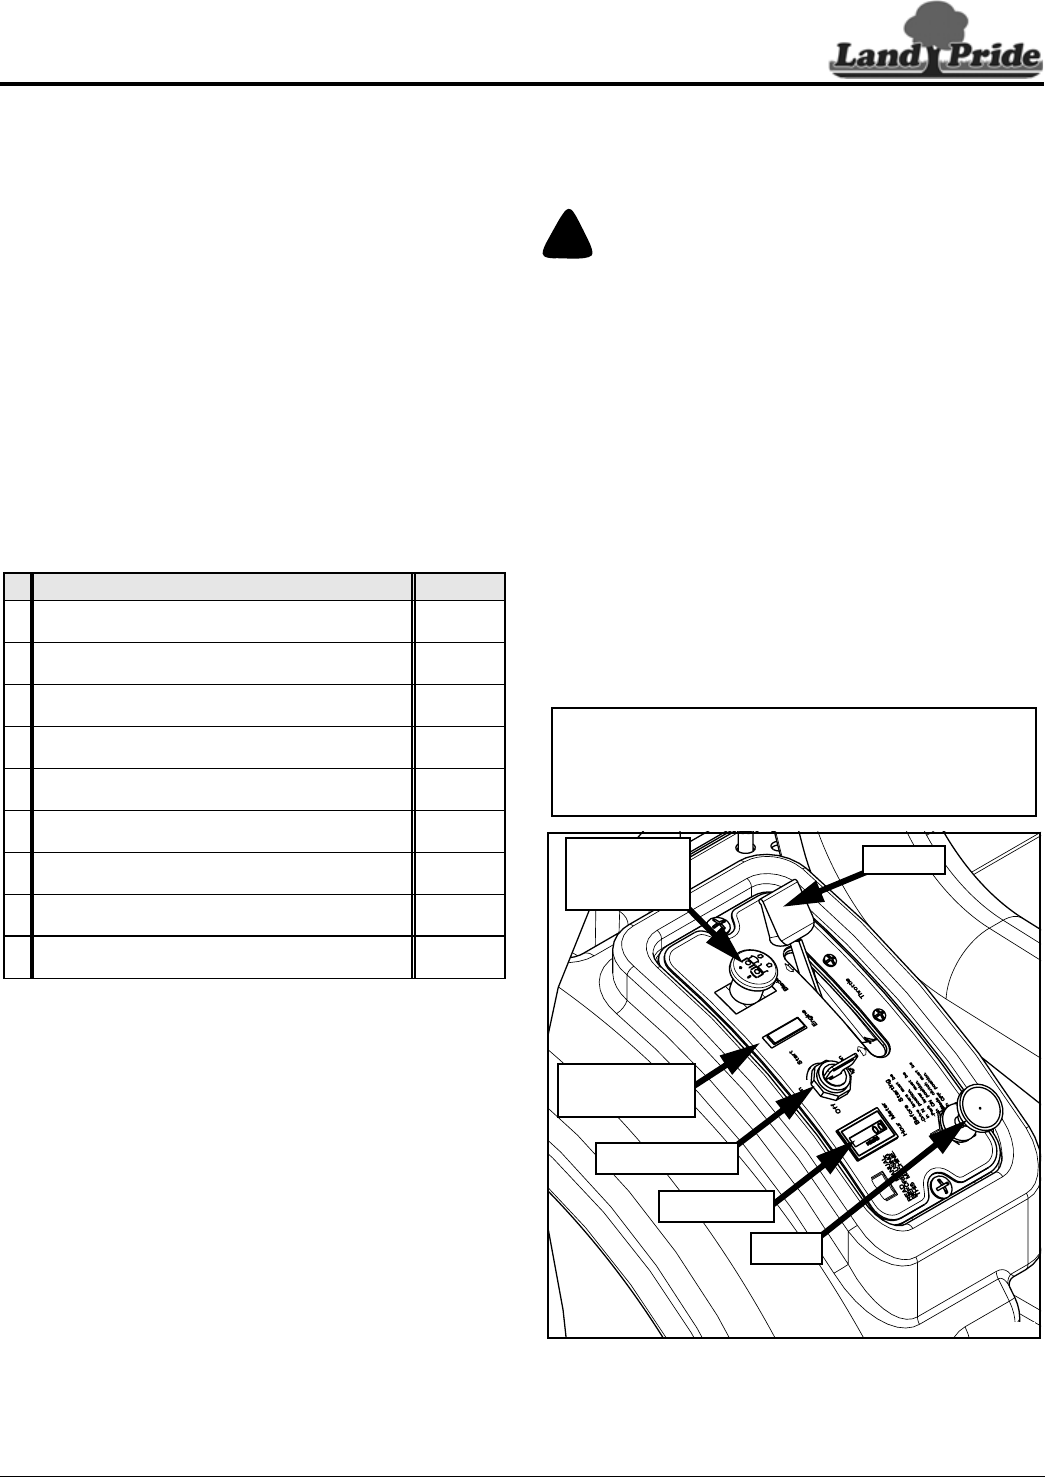
Engine Oil Pressure Light
Refer to to Figure 2-2:
This light comes on when ignition switch is placed in RUN
position and stays lit until the engine is running with safe
oil pressure. Shut engine off immediately if light comes
on during operation. Locate and correct problem before
using the mower.
Hour Meter
Refer to Figure 2-2:
The hour meter registers 1/10 hour increments up to
9,999.9 total hours. The meter is connected to the ignition
switch and records accumulative time only while the
engine is running.
A plastic film covers the hour meter window. It protects
the window from scratches during shop assembly and
shipping. This covering should be removed by the owner
before placing mower into service.
Operating Checklist
✔
Check Ref.
Carefully read and follow all safety rules.
Refer to "Important Safety Information".
Page 1
Make sure all guards and shields are in place.
Refer to "Mower Features".
Page 12
Make all required adjustments.
Refer to "Section 3: Adjustments".
Page 22
Read and follow all operating procedures.
Refer to "Section 2: Operating Procedures".
Page 12
Check mower safety start interlock system daily
prior to operation.
Page 16
Perform all maintenance and lubrications.
Refer to "Section 5: Maintenance & Lubrication".
Page 30
Make sure their are no hydraulic leaks on the unit.
Refer to "Avoid High Pressure Fluids Hazard".
Page 2
Check blade for nicks and sharpness.
Refer to "Mower Blade Maintenance".
Page 42
Check mower initially and periodically for loose
bolts and pins. Refer to "Torque Values Chart".
Page 57
Controls
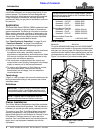
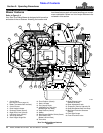
Refer to Figure 2-1 on page 12 and Figure 2-2 below for
general location of controls described in this section.
!
WARNING
Do not operate mower while smoking.
Ignition Switch
Refer to Figure 2-2:
A three position ignition switch: off, run, and start is
provided. With key inserted, rotate it clockwise to START
position; release key when engine starts and switch will
automatically return to RUN position. Turn key
counterclockwise to OFF position to stop engine.
Throttle
Refer to Figure 2-2:
A cable is linked from engine to throttle for controlling
engine speed. Move throttle lever forward to increase
engine rpm and rearward to decrease rpm. Always travel
and cut grass with throttle set at full engine rpm speed.
Decrease travel speed by pulling back on the control
levers. Reduce engine rpm only when mower is not
traveling and just before engaging the cutting blades.
Control Panel
Figure 2-2
IMPORTANT: Always operate throttle at full engine
rpm while traveling or cutting grass. Operating
engine at a slow rpm may overheat engine and
hydraulic pumps.
23686
Engine Oil
Pressure Light
Ignition Switch
Hour Meter
Throttle
Blade
Engagement
Switch
Choke


