


10
Section 1: Assembly & Set-up
ZSR54, & ZSR60 Accu-Z Razor
®
Zero Turn Mowers 357-344M
Table of Contents
12/15/15
Section 1: Assembly & Set-up
Uncrating Instructions
The shipping crate is assembled together with nails. It
can be disassembled by prying or cutting the lumber
apart. Be careful not to scratch, dent, or cut mower
and/or seat during disassembly. It is best if two people
are present while disassembling the crate.
1. Remove end and side panels from the crate.
2. Cut metal bands securing the front and rear wheels
to the crate floor. Discard bands.
3. Lift mower from crate floor with a hoist or other
suitable lifting device.
Torque Requirements
Refer to “Torque Values Chart” on page 57 to
determine correct torque values for common bolts. See
“Additional Torque Values” at bottom of chart for
exceptions to standard torque values.
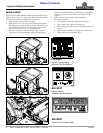
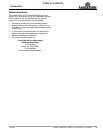
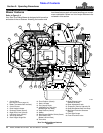
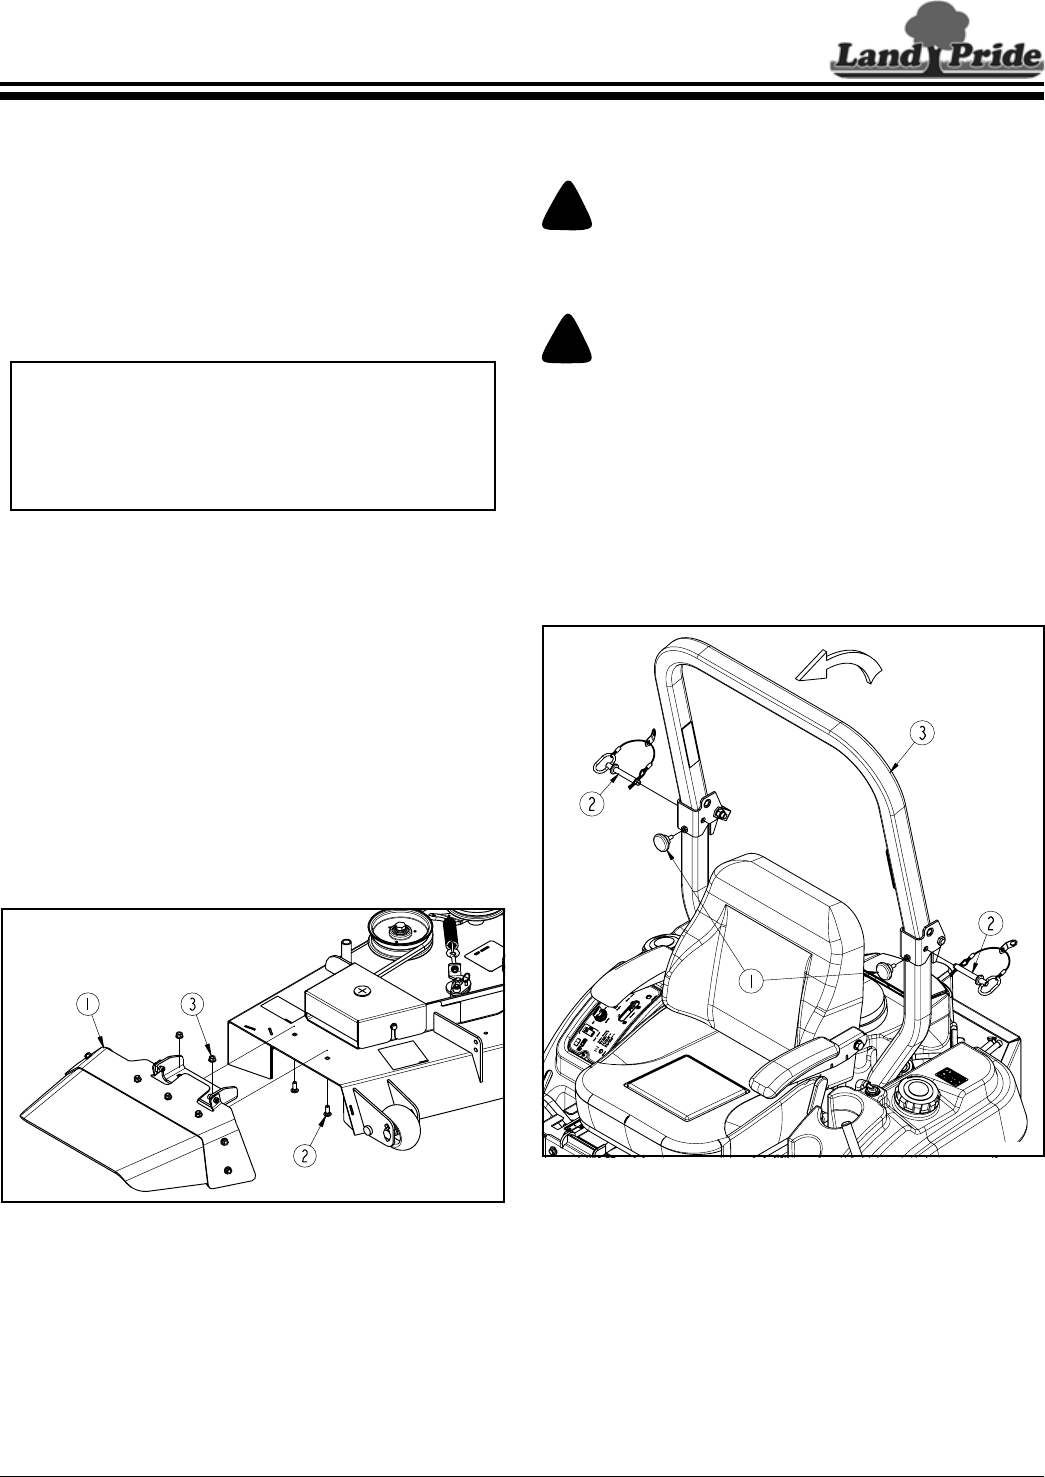
Discharge Chute Assembly
Refer to Figure 1-1:
1. Attach discharge chute (#1) to the deck by inserting
3/8"-16 x 1" GR5 round head square neck bolts (#2)
up through the deck bottom as shown.
2. Secure with 3/8" flanged locknuts (#3). Tighten nuts
to correct torque. See Torque Chart on page 57.
Discharge Chute Assembly
Figure 1-1
IMPORTANT: Do not drive mower off the crate floor,
as this can bend or break components underneath
the mower, especially the transaxles. Lift mower off
the crate floor with a hoist or other suitable lifting
device. Be careful not to damage the paint and seat
while lifting the unit off the crate floor.
30337
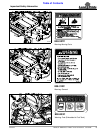
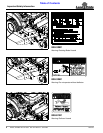
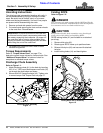
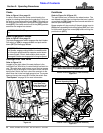
Folding ROPS
Refer to Figure 1-2:
!
DANGER
Low structures can make contact with the ROPS and flip the
mower over backwards. Fold ROPS down when driving under
low structures such as tree limbs and doorways.
!
CAUTION
Keep hands and other body extremities away from hinged
pinch points while folding and unfolding ROPS.
ROPS locking knobs (#1) are included in an attached
parts bag.
1. Remove hitch pins (#2).
2. Rotate upper ROPS frame up to position shown.
3. Reinsert hitch pins (#2) and secure with attached
hairpins.
4. Install locking knobs (#1) and hand tighten.
Folding ROPS Set-up Assembly
Figure 1-2
33201