


www.flexible-flyer.com 33-Rev. A 1-888-350-3015
Pictures / Fotografías /
Photo:
H
ar
d
ware
(
ac
t
ua
l
s
i
ze
b
u
t
f
or re
f
erence on
ly)
/
Herra
j
es (Tamaño real pero sólo para referencia) /
Illustrations de quincaillerie à l'échelle 1
seulement pour référence. :
Instructions / Instrucciones / Instructions:
E
n
g
lish:
Sp
anish:
F
rench:
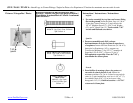
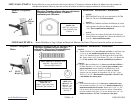
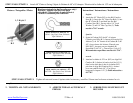
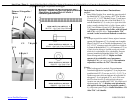
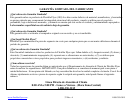
Step / Paso / Étape 4: Attach Slide Chin Bar to Hand Rail. / Sujete la Barra de Mentón de la Resbaladilla al Pasamanos. / Fixation de la barre de
renfort du toboggan à la poignée
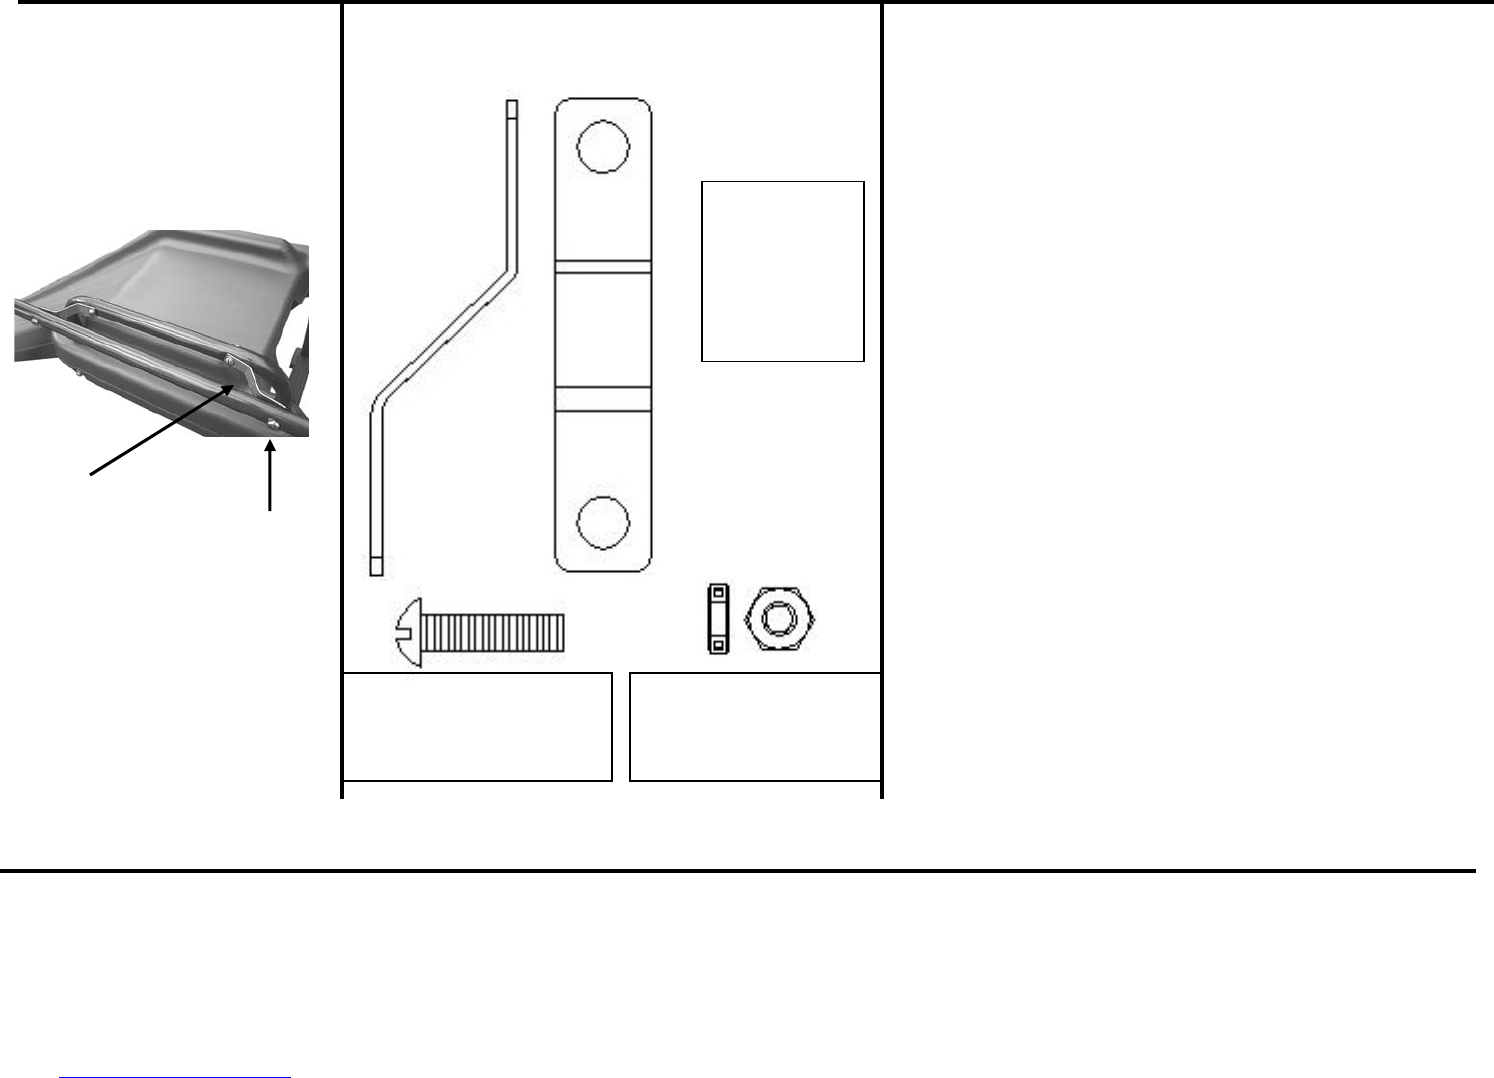
4. Attach one end of each Slide Bracket (5) to the Slide chin Bar
(A-6), bar with the four holes, with a 1/4” x 1” Machine
Screw (9). Secure with a 1/4” Lock Nut (4). Now, attach the
other end of each Slide Bracket (5) to the left hand rail (B-4)
with a 1/4” x 1” Machine Screw (9) and secure with a 1/4”
Lock Nut (4). Tools needed a 7/16” Wrench and Flathead
Screwdriver. Repeat steps for other Slide Bracket.
4. Sujete un extremo de cada Soporte de Resbaladilla (5) a la
Barra de Mentón de Resbaladilla (A-6), barra con cuatro
orificios, con un Tornillo de Máquina (9) de 1/4” x 1”.
Asegure con una Tuerca de Seguridad (4) de 1/4”. Ahora ,
sujete el otro extremo de cada Soporte de Resbaladilla (5) al
pasamanos izquierdo (B-4) con un Tornillo de Máquina (9)
de 1/4” x 1” y asegure con una Tuerca de Seguridad (4) de
1/4”. Herramientas requeridas: una Llave de 7/16” y
Atornillador de Cabeza Plana. Repita los pasos para el
otro Soporte de Resbaladilla.
4. Fixez une extrémité des supports du toboggan (5) à la barre
de renfort (A-6), barre comportant 4 trous, à l'aide d'une vis
1/4” x 1” (9). Assurez avec un écrou-frein 1/4" (4). Fixez
maintenant l'extrémité opposée des supports du toboggan (5)
à la poignée gauche (B-4) avec une vis 1/4” x 1” (9) et
assurez avec un écrou-frein 1/4” (4). Outils nécessaires : Clé
Allen 7/16" et tournevis à lame plate. Répétez ces étapes
pour l'autre support de toboggan.
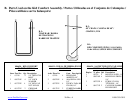
ITEM/
ARTÍCULO/
ARTICLE #5
04199 – Qty
Used / Cant.
Utilizada / Qté
Utilisée: 2
ITEM/ ARTÍCULO/
ARTICLE #9
000858P – Qty Used / Cant.
Utilizada / Qté ilisée: 4
ITEM/ ARTÍCULO/
ARTICLE #4
04230 – Qty Used / Cant.
Utilizada / Qté Utilisée: 4
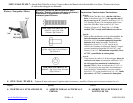
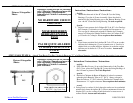
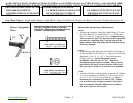
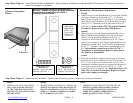
Step / Paso / Étape 5: Tighten all nuts and bolts. / Apriete todas las tuerca y pernos / Serrer tous les écrous et boulons.
E
n
g
lish:
5. TIGHTEN ALL NUTS AND SCREWS.
SEAT LEGS TO MAKE THE FOOT
OF THE SLIDE BED TOUCH THE
GROUND AND TOP BAR AND CHIN
BAR ARE LEVEL.
Sp
anish:
5. APRIETE TODAS LAS TUERCAS Y TORNILLOS.
ASIENTE LAS PIERNAS PARA HACER QUE EL
PIE DE LA DIAPOSITIVA ACUESTA TACTO LA
TIERRA Y LA BARRA SUPERIOR Y LA BARRA
DE LA BARBILLA SON NIVEL.
F
rench:
5. SERRER TOUS LES ÉCROUS ET TOUTES LES VIS.
POSEZ LES JAMBES POUR FAIRE LE PIED DE
LA GLISSIÈRE ENFONCER LE CONTACT LA
TERRE ET LA BARRE SUPÉRIEURE ET LA
BARRE DE MENTON SONT NIVEAU.
4 &/y/et 9
9